
Overview
You will learn
- How to create and run an ABAP application


Prerequisites
- You have a valid instance of an on-premise AS ABAP server, version 7.51 or higher (some ABAP Development Tools may not be available in earlier versions)
- Tutorial: Create an ABAP Project in ABAP Development Tools (ADT)
Steps
Intro
This mission is based on tables of the SAP NetWeaver Demo sample EPM Model, so that you can complete the tutorial on any SAP NetWeaver 7.5x system.
For more information, see The SAP NetWeaver Enterprise Procurement Model – An Introduction
In the toolbar, choose New > ABAP Program…:

A wizard appears to create a new ABAP Program. Enter z_invoice_items_euro in the name field. Enter a meaningful text in the description field. Choose Finish to create the report.
Afterwards an editor will be opened which shows the empty report.

Type
lcland chooseCtrl+Spaceto get code completion proposals. Select the code template for the insertion of a local class by choosinglcl - Local classor chooseEnterif the right entry is already selected.
Image depicting step2-local-class-quick-fix Adjust the name of the local class to
lcl_mainusing inline editing.
Image depicting step2-local-class
Position the cursor in the class definition statement and choose Ctrl+1 to open the Quick Fix menu. Choose Generate factory method create to create a static factory method.

Add the definition of an additional instance method run by entering
methods run.in the public section.Then position the cursor on the method name and choose Ctrl+1 to open the Quick-Fix menu. Choose Add implementation for run.

Image depicting step4-run-method Implement a simple WRITE statement in the method run.

Image depicting step4b-write-statement
Add a START-OF-SELECTION event to your report
Create an instance of the local class
lcl_main.Call the run method. That is, enter the following code:
ABAPSTART-OF-SELECTION. lcl_main=>create( )->run( ).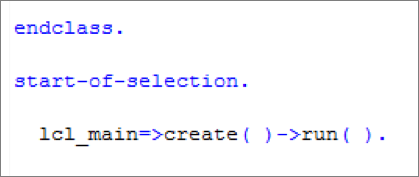Class methods are called using
=>; instance methods are called using->.Save and activate ABAP program
Save and activate your program by choosing Save and Activate in the toolbar.

Image depicting step6-save-and-activate-program Run the ABAP program
Choose F8 to run your program. An embedded SAP GUI will open inside an Eclipse editor. After checking the output of the report choose Close.

Image depicting step7-run-program Output system variables
You will now enhance the program to output your user name and today’s date. Change the
WRITEstatement to:`WRITE: 'Welcome, ', sy-uname, / 'Today is the', sy-datum.`
Image depicting step8-enhance-write sy-is the table containing all the system fields. For the complete list, see the ABAP keyword documentation: ABAP System Fields./is simply the new line character. (See also ABAP keyword documentation: WRITE.)Run the ABAP program
Again, choose F8 to run your program. Your output should now look something like this:

Image depicting step9-run-program-2 Check your code
Your code should look like this:
ABAP*&---------------------------------------------------------------------* *& Report zjp_basic_app *&---------------------------------------------------------------------* *& *&---------------------------------------------------------------------* REPORT z_invoice_items_euro. class lcl_main definition create private. public section. methods run. CLASS-METHODS create RETURNING value(r_result) TYPE REF TO lcl_main. protected section. private section. endclass. class lcl_main implementation. method create. create object r_result. endmethod. method run. WRITE: 'Welcome, ', sy-uname, / 'Today is the', sy-datum. endmethod. endclass. START-OF-SELECTION. lcl_main=>create( )->run( ).
</div><div class="step-validation-mount"
        data-step="5"></div>
   <div class="step-actions">
     <button class="fd-button fd-button--emphasized" data-action="mark-done" data-step="5">Done</button>
   </div>
 </div>
</div>


<div id="step-6" class="tutorial-step" data-step="6">
 <div class="step-header" data-action="toggle-step">
   <span class="step-check-circle"></span>
   <div class="step-header-text">
     <span class="step-label">Step 6</span>
     <span class="step-title-text">Test yourself</span>
   </div>
   <span class="step-toggle-icon">+</span>
 </div>
 <div class="step-body" hidden>
   <hr class="step-divider" />
   <div class="step-content">


</div><div class="step-validation-mount"
        data-step="6"></div>
   <div class="step-actions">
     <button class="fd-button fd-button--emphasized" data-action="mark-done" data-step="6">Done</button>
   </div>
 </div>
</div>Resources
Discussion
Share feedback on this tutorial or join the conversation in SAP Community.
Joule
AI Notice
Joule is an AI assistant. Generative AI may produce inaccurate, incomplete, or biased information. Always verify important details before acting on them.
Conversations are sent to SAP-hosted large language models for processing. Do not include personal data, credentials, or confidential information in your messages.
Joule's responses are based on the SAP tutorial catalog and may not reflect the latest product changes. For authoritative guidance, consult the linked tutorials and official SAP documentation.