Creating a Servlet in MyEclipse IDE allows developers to build and deploy Java-based web applications efficiently. With built-in support for servers like Apache Tomcat, MyEclipse simplifies the process of developing, configuring, and running Servlets.
- Provides an integrated environment for creating and managing Servlets
- Supports easy deployment on Apache Tomcat server
- Simplifies configuration of web.xml and project structure
Prerequisites:
- Install MyEclipse IDE
- Install a Java-enabled Web Server (e.g., Apache Tomcat, GlassFish)
- Configure Eclipse with Apache Tomcat server
Steps to Creating Servlet Program in MyEclipse
Follow the below steps to create and deploy a basic Servlet application in MyEclipse
Step 1: Create a Dynamic Web Project
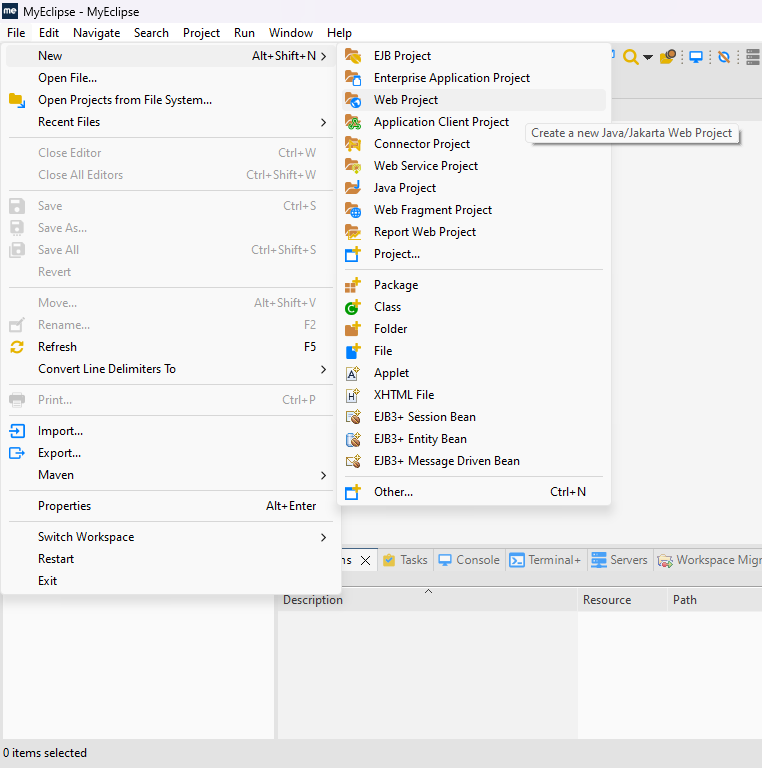
- Open MyEclipse, in the top menu, go to File -> New -> Web Project and click it to create a Web Project..
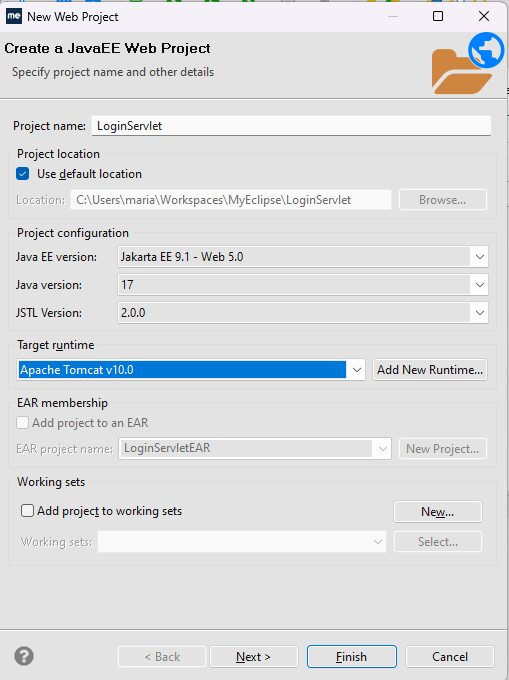
- Click Web Project, enter the project name, and select Java EE version, Java version, and JSTL.
- Choose or add the target runtime (Apache Tomcat), then click Next to proceed.
- After that a new screen will show source and classes folders.
- keep the default settings and click Next.

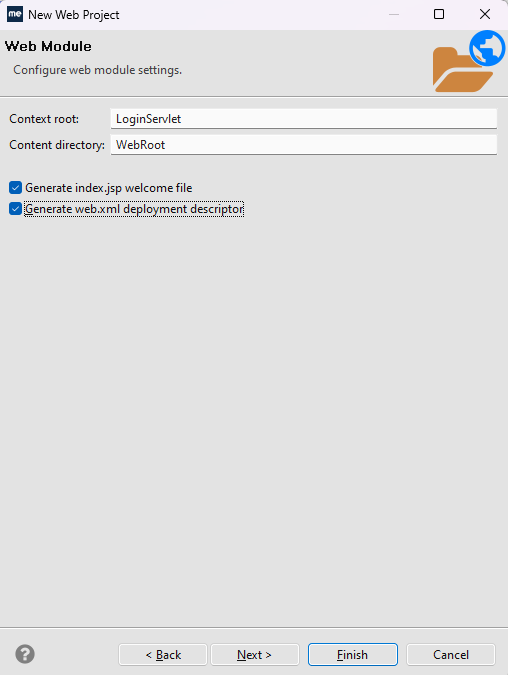
- Enter the context root and keep default settings; optionally select Generate web.xml or use @WebServlet.
- Then click Next to continue with Maven configuration.
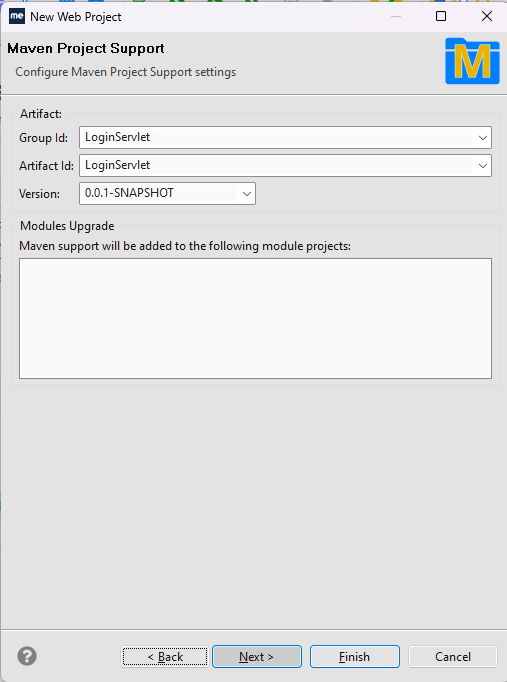
- Configure Maven (enabled by default), enter Group ID and Artifact ID or keep defaults.
- Then click Next to proceed.
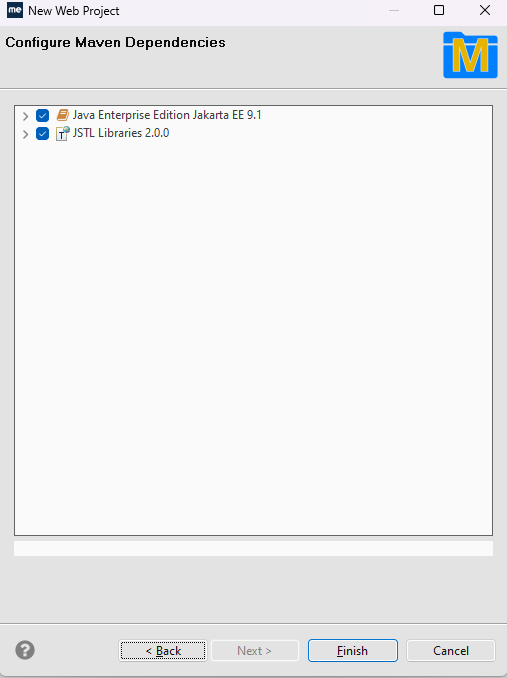
- Keep default dependencies selected and click Finish to create the project.
- Ensure internet connection so Maven can download required dependencies.
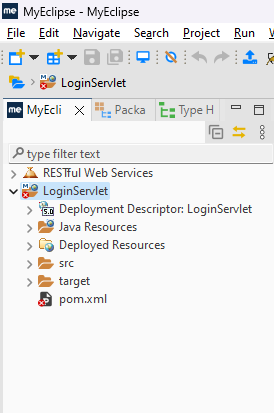
- After project creation, verify the project structure matches the expected setup.
- You have successfully created the web project in MyEclipse.
Step 2: Create Servlet Class
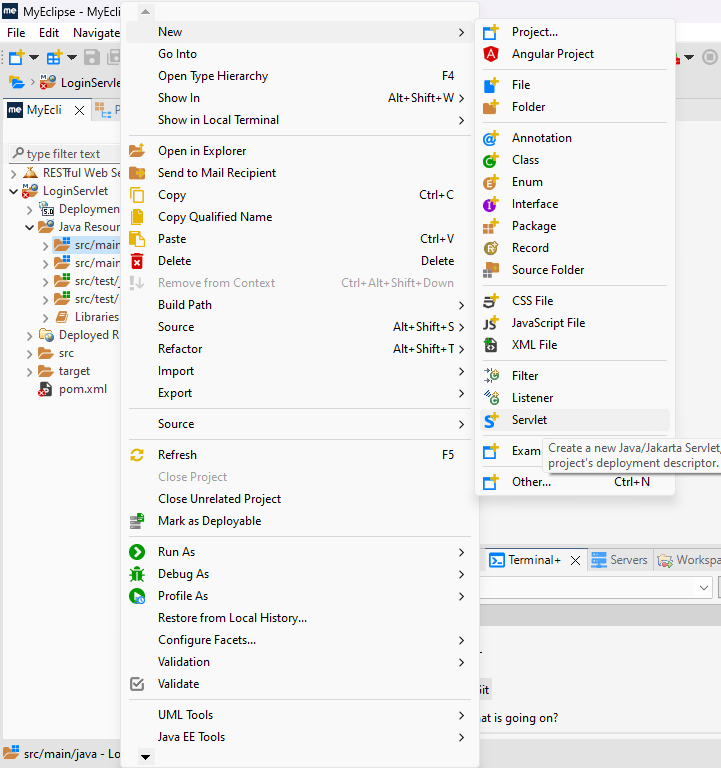
- Now, click on the Java Resources in the project tree of your project.
- Right Click on the src/main/java folder and go to New -> Servlet.
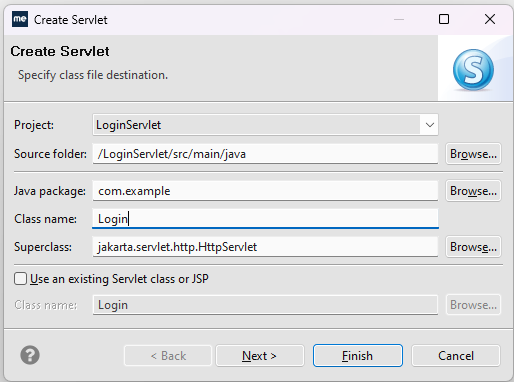
- A dialog will open -> enter the package name (proper naming) and servlet name.
- Ensure it extends HttpServlet, then click Next to continue.
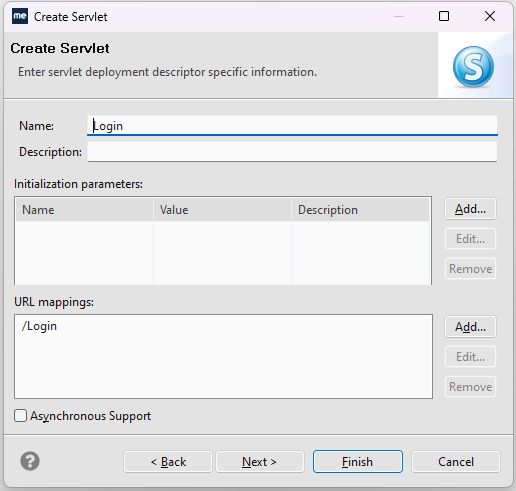
- Enter servlet description and URL pattern (or keep default).
- Click Next to continue.
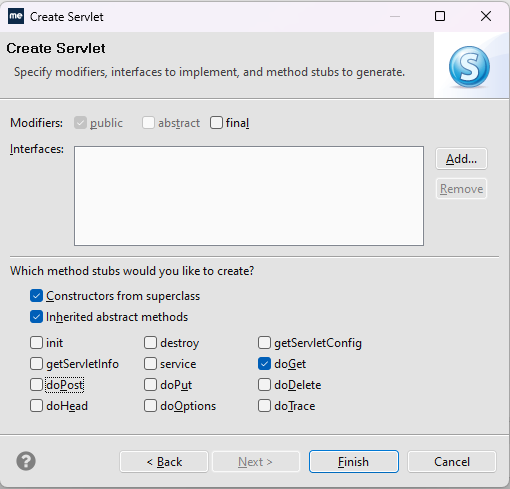
- Select required HTTP methods (GET, POST, etc.), and MyEclipse will generate doGet() and doPost().
- You can also use init() and destroy(), then click Finish to create the servlet.
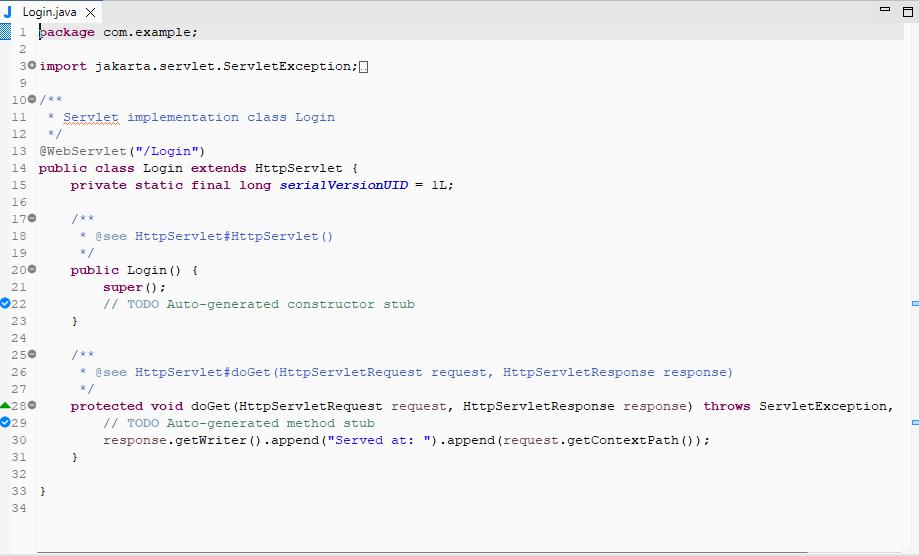
- The servlet is created with boilerplate code, including a constructor and methods like doGet().
- It uses @WebServlet annotation for URL mapping.
Step 3: Defining the servlet logic.
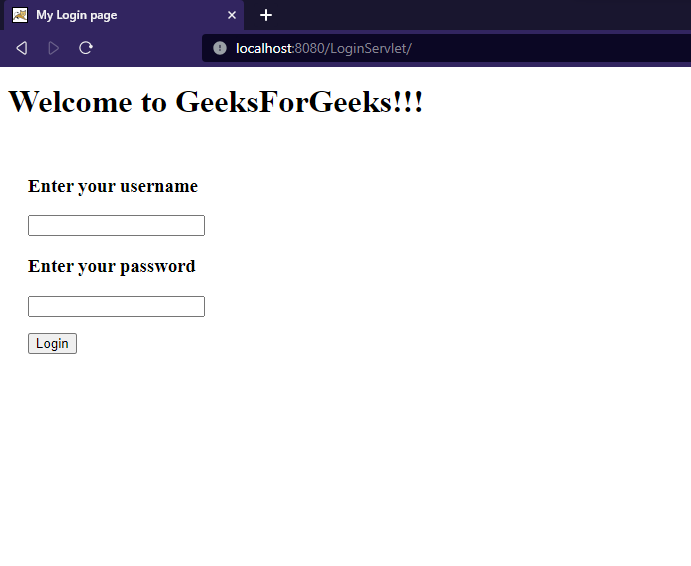
- Configure the welcome page to collect username and password (using GET for demo).
- Open index.jsp (src -> main -> webapp) and add the login form code.
<%@ page language="java" import="java.util.*" pageEncoding="ISO-8859-1"%>
<%
String path = request.getContextPath();
String basePath = request.getScheme() + "://" + request.getServerName() + ":" + request.getServerPort() + path + "/";
%>

<!DOCTYPE HTML PUBLIC "-//W3C//DTD HTML 4.01 Transitional//EN">
<html>
<head>
<base href="<%=basePath%>">
<title>My Login page</title>
<style>
.row {
    margin: 1rem 0;
}
</style>
</head>

<body>
    <h1 class="row">Welcome to GeeksForGeeks!!!</h1>
    <div style="padding:20px">
        <form action="Login">
            <div class="row">
                <h3>Enter your username</h3>
                <input name="userName" type="text">
            </div>
            <div class="row">
                <h3>Enter your password</h3>
                <input name="password" type="password">
            </div>
            <div class="row">
                <button type="submit">Login</button>
            </div>
        </form>
    </div>
</body>
</html>

<!-- This code is contributed by ragul21 -->
- Open the servlet file and add code to read username and password from URL parameters and display them.
- This is for demo only—avoid using URL parameters for sensitive data in real applications.
package com.example;

import jakarta.servlet.ServletException;
import jakarta.servlet.annotation.WebServlet;
import jakarta.servlet.http.HttpServlet;
import jakarta.servlet.http.HttpServletRequest;
import jakarta.servlet.http.HttpServletResponse;
import java.io.IOException;
import java.io.PrintWriter;

@WebServlet("/Login")
public class Login extends HttpServlet {
    private static final long serialVersionUID = 1L;

    public Login() {
        super();
    }
    protected void doGet(HttpServletRequest request, HttpServletResponse response) throws ServletException, IOException {
        response.setContentType("text/html");
        PrintWriter out=response.getWriter();
        String userName=request.getParameter("userName");
        String password=request.getParameter("password");
        out.print("<html><body>");
        out.print("<h1>Hello!!!</h1>");
        out.printf("<h3>User Name with : %s </h3><h3>Your password is : %s</h3>",userName,password);
        out.print("</body></html>");
    }
}
Step 4: Running our project.
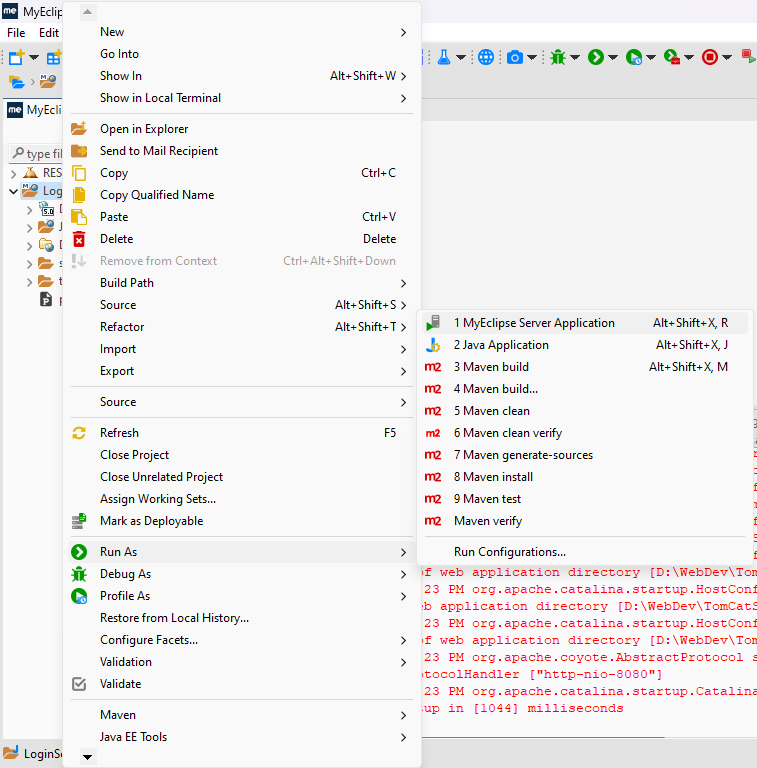
- Right-click the project -> Run As -> MyEclipse Server Application and check console logs.
- If configured properly, it will run on Tomcat without errors.
Output
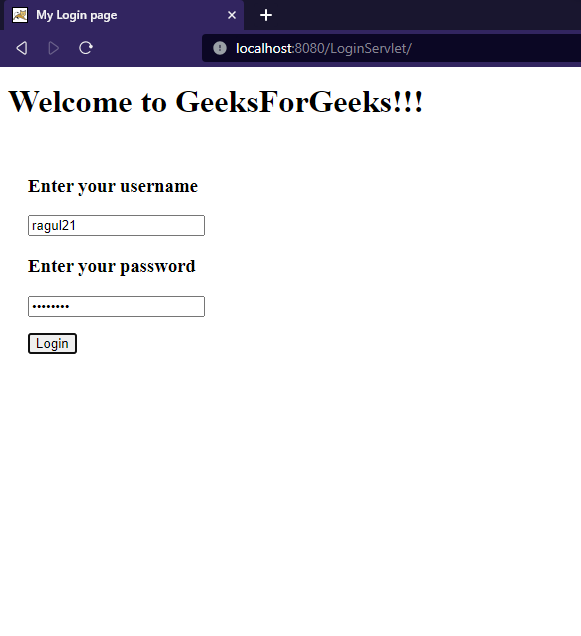
- After running, the project starts on Tomcat and may open in the browser.
- If not, use http://localhost:8080/project_name then index.jsp loads by default.
- After submitting the form, the mapped servlet is invoked.
- It processes the request and displays the entered username and password.
- After submitting the form, the request is sent to the mapped servlet.
- The output of form filled by the user visible to us.
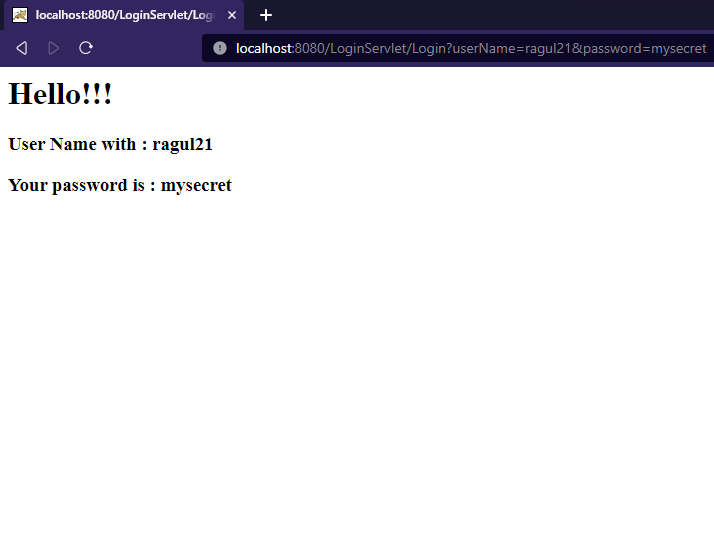
Explanation: After submitting the login form, the servlet processes the request and displays the entered username and password on the browser.