Spring Cloud enables distributed tracing in Spring Boot applications by integrating with Zipkin, an open-source tool for tracking requests across microservices. It helps developers monitor the flow of requests, detect latency issues, and debug performance bottlenecks efficiently.
- Tracks end-to-end request flow across multiple microservices using trace and span concepts.
- Helps identify performance bottlenecks and latency issues in distributed systems.
- Provides a visual dashboard (Zipkin UI) for analyzing and debugging request execution.
Core Concepts in Distributed Tracing
These concepts help understand how requests are tracked and monitored across multiple microservices using Zipkin:
- Trace: Represents the complete journey of a request as it travels through multiple services. It consists of multiple spans.
- Trace ID: A unique identifier assigned to each trace, shared by all spans within that trace.
- Span ID: A unique identifier for each span within a trace.
- Parent Span ID: Identifies the parent span, helping establish a hierarchical relationship between spans.
- Trace Context: Propagates tracing information (such as Trace ID and Span IDs) across different services.
- Sampler: Controls which requests are traced, helping manage tracing overhead and performance.
- Reporter: Sends collected span data to Zipkin for storage and analysis.
- Span: Represents a single unit of work within a trace. It contains details such as operation name, start and end time, metadata, and downstream calls.
- Zipkin UI Dashboard: A web-based interface used to visualize traces, analyze performance, and debug distributed systems.
Steps To Implement Distributed Tracing with Zipkin
Follow these steps to implement a simple Employee Data Service integrated with Zipkin for distributed tracing.
Step 1: Create the Spring Boot Project
Use IntelliJ IDEA or Spring Initializr to create a new Spring Boot project with the following dependencies:
- Spring Web
- Spring Data MongoDB
- Spring Boot DevTools
- Spring Boot Actuator
- Zipkin
Step 2: Add Zipkin Dependencies
Add required dependencies to enable distributed tracing with Zipkin.
<dependency>
<groupId>io.micrometer</groupId>
<artifactId>micrometer-tracing-bridge-brave</artifactId>
</dependency>
<dependency>
<groupId>io.zipkin.reporter2</groupId>
<artifactId>zipkin-reporter-brave</artifactId>
</dependency>
Step 3: Configure MongoDB and Zipkin
Open src/main/resources/application.properties and add the following configurations:
- spring.zipkin.base-url: Points to the Zipkin server.
- spring.sleuth.sampler.probability: Defines the percentage of requests to be traced (1.0 = 100%).
spring.data.mongodb.uri=mongodb://localhost:27017/Registration
# Zipkin Configuration
spring.zipkin.base-url=http://localhost:9411
spring.sleuth.sampler.probability=1.0
Step 4: Run the Zipkin Server
Download the Zipkin JAR from the official Zipkin GitHub releases.
- Run the following command in your terminal.
- The Zipkin server runs by default on port 9411.
java -jar zipkin-server-3.0.6-exec.jar
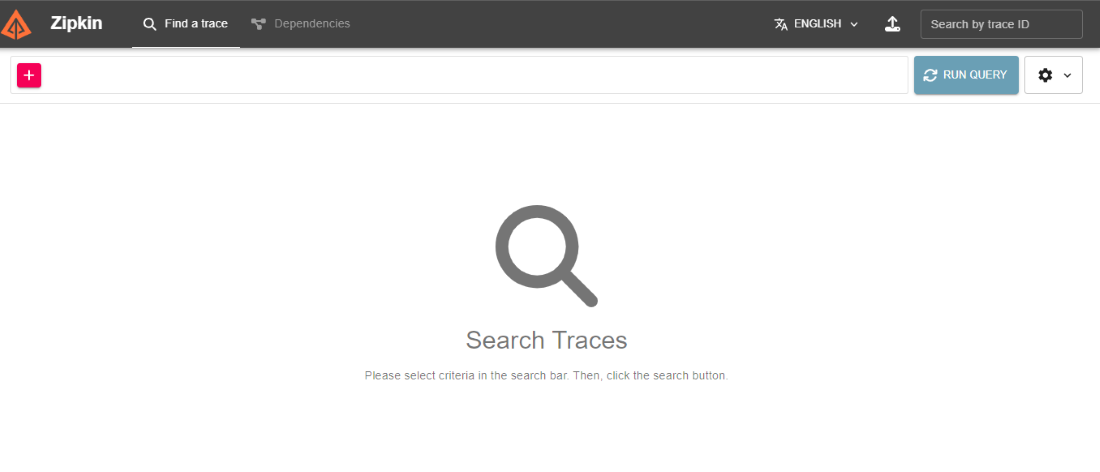
Verify by visiting http://localhost:9411, this opens the Zipkin Dashboard.
Step 5: Create the Employee Entity
Define the MongoDB document structure for storing employee data.
package com.example.zipkindemoproject;

import org.springframework.data.annotation.Id;
import org.springframework.data.mongodb.core.mapping.Document;

@Document
public class Employee {

    @Id
    private String id;
    private String fullName;
    private String department;
    private String role;
    private String experience;

    // Getters and Setters
    public String getId() { return id; }
    public void setId(String id) { this.id = id; }

    public String getFullName() { return fullName; }
    public void setFullName(String fullName) { this.fullName = fullName; }

    public String getDepartment() { return department; }
    public void setDepartment(String department) { this.department = department; }

    public String getRole() { return role; }
    public void setRole(String role) { this.role = role; }

    public String getExperience() { return experience; }
    public void setExperience(String experience) { this.experience = experience; }
}
Step 6: Create the Repository
Create a repository interface to perform database operations using MongoDB.
package com.example.zipkindemoproject;

import org.springframework.data.mongodb.repository.MongoRepository;
import org.springframework.stereotype.Repository;

@Repository
public interface EmployeeRepo extends MongoRepository<Employee, String> {
}
Step 7: Create the Service Layer
Implement business logic to handle employee data operations.
package com.example.zipkindemoproject;

import org.springframework.beans.factory.annotation.Autowired;
import org.springframework.stereotype.Service;
import java.util.List;

@Service
public class EmployeeService {

    @Autowired
    private EmployeeRepo repository;

    public List<Employee> getAllEmployees() {
        return repository.findAll();
    }

    public Employee saveEmployee(Employee employee) {
        return repository.save(employee);
    }
}
Step 8: Create the Controller
Expose REST APIs to interact with employee data.
package com.example.zipkindemoproject;

import org.springframework.beans.factory.annotation.Autowired;
import org.springframework.web.bind.annotation.*;
import java.util.List;

@RestController
@RequestMapping("/employees")
public class EmployeeController {

    @Autowired
    private EmployeeService service;

    @GetMapping
    public List<Employee> getAllEmployees() {
        return service.getAllEmployees();
    }

    @PostMapping("/create")
    public Employee createEmployee(@RequestBody Employee employee) {
        return service.saveEmployee(employee);
    }
}
Step 9: Create the Main Class
Define the main class to bootstrap the Spring Boot application.
package com.example.zipkindemoproject;

import org.springframework.boot.SpringApplication;
import org.springframework.boot.autoconfigure.SpringBootApplication;
import zipkin2.server.internal.EnableZipkinServer;

@SpringBootApplication
public class ZipkinDemoProjectApplication {

    public static void main(String[] args) {
        SpringApplication.run(ZipkinDemoProjectApplication.class, args);
    }
}
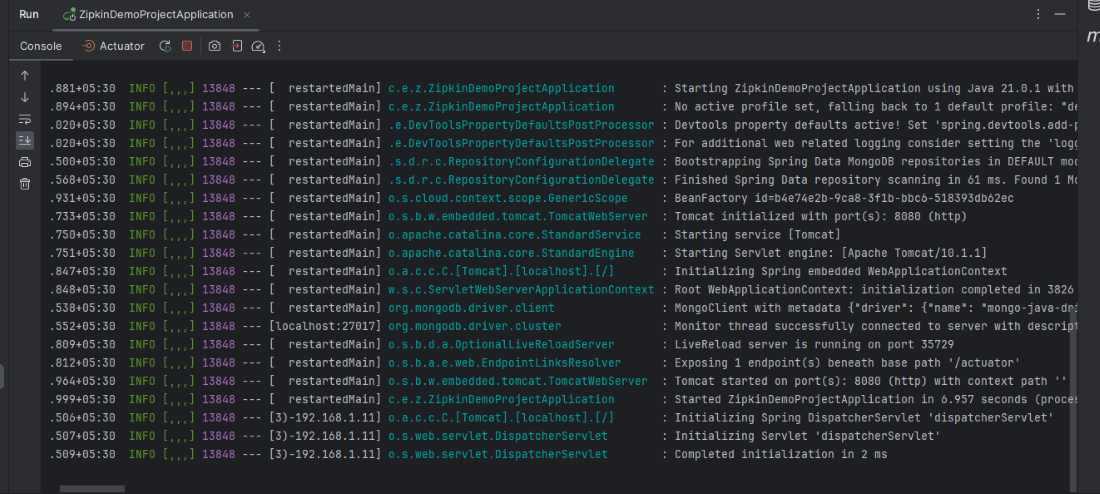
Step 10: Run the Application
Run the application as a Spring Boot App. The application starts on port 8080 and the Zipkin server runs on port 9411.
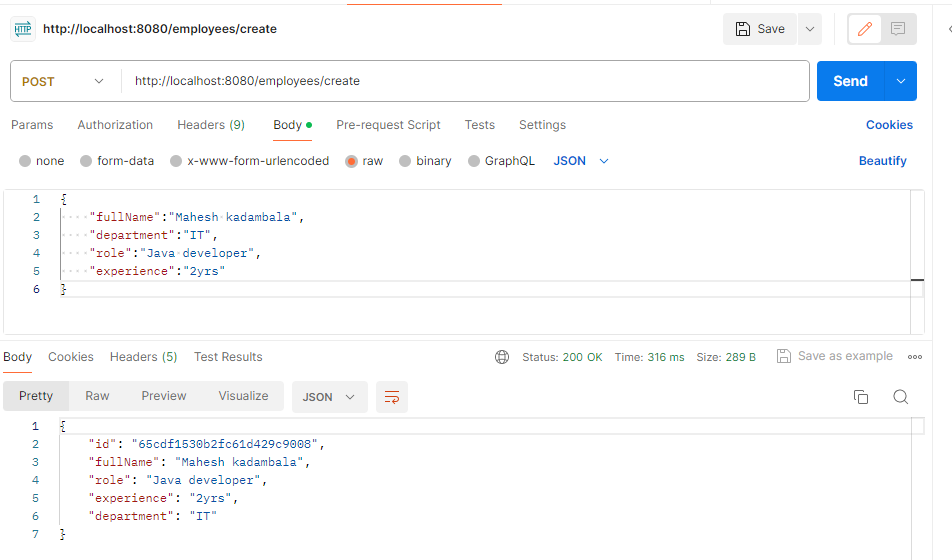
Step 11: Test the APIs
Use tools like Postman to send requests and verify API functionality.
POST Request:
http://localhost:8080/employees/create
GET Request:
http://localhost:8080/employees
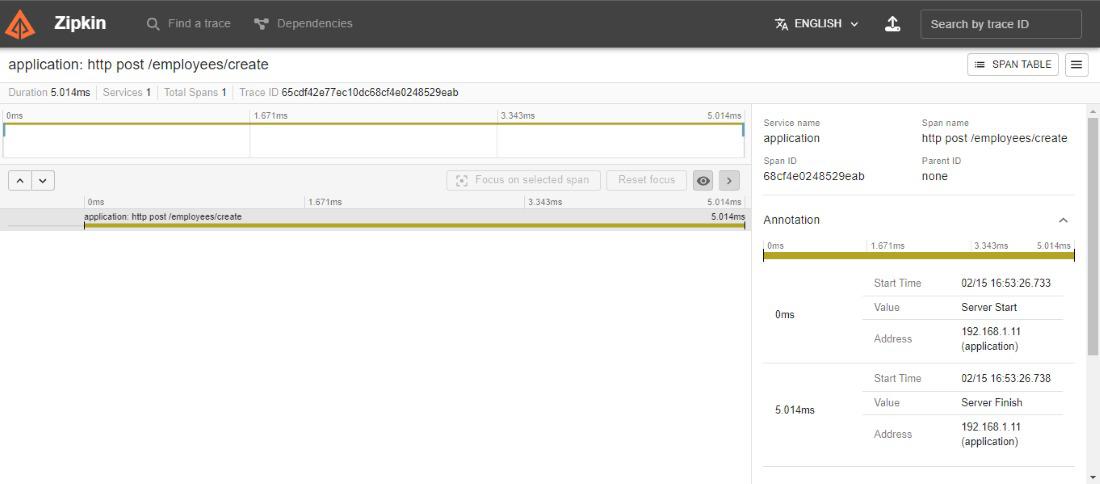
Step 12: Check Zipkin Dashboard
After executing the requests, open http://localhost:9411 to view the traces in the Zipkin Dashboard. You’ll see details such as:
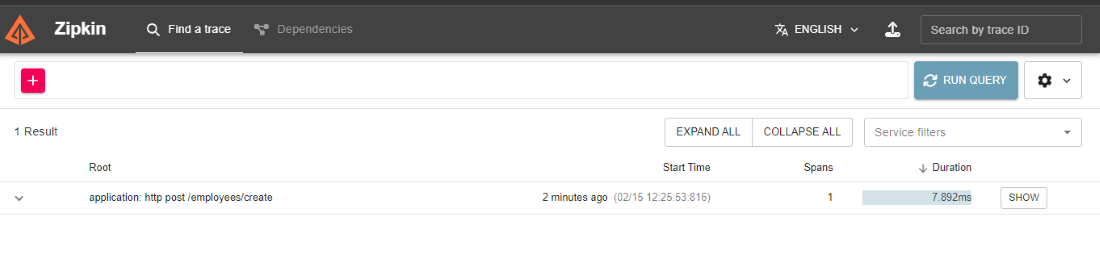
Zipkin can trace all the information of the requests and generates the service name, span name and span ID and parent ID and all the details of the request.