Animation is the process of adding a motion effect to any view, image, or text. With the help of an animation, you can add motion or can change the shape of a specific view. Animation in Android is generally used to give your UI a rich look and feel. The animations are basically of three types as follows:
- Property Animation
- View Animation
- Drawable Animation
1. Property Animation
Property Animation is one of the robust frameworks which allows animation almost everything. This is one of the powerful and flexible animations which was introduced in Android 3.0. Property animation can be used to add any animation in the CheckBox, RadioButtons, and widgets other than any view.
2. View Animation
View Animation can be used to add animation to a specific view to perform tweened animation on views. Tweened animation calculates animation information such as size, rotation, start point, and endpoint. These animations are slower and less flexible. An example of View animation can be used if we want to expand a specific layout in that place we can use View Animation. The example of View Animation can be seen in Expandable RecyclerView.

3. Drawable Animation
Drawable Animation is used if you want to animate one image over another. The simple way to understand is to animate drawable is to load the series of drawable one after another to create an animation. A simple example of drawable animation can be seen in many apps Splash screen on apps logo animation.

Important functions for working with Animation
Methods | Description |
|---|---|
| startAnimation() | This method will start the animation. |
| clearAnimation() | This method will clear the animation running on a specific view. |
Steps of Implementing Android Animation
Now we will see the Simple Example to add animations to ImageView. Note that we are going to implement this project using both Java and Kotlin language.
Step 1: Create a New Project
To create a new project in Android Studio please refer to How to Create/Start a New Project in Android Studio.
Select Java/Kotlin as the programming language.
Step 2: Working with the strings.xml file
Navigate to app > res > values > strings.xml and the below code into the file. Follow the gate to the file.

strings.xml:
<resources>
    <string name="app_name">GFG App</string>
    <string name="blink">BLINK</string>
    <string name="clockwise">ROTATE</string>
    <string name="fade">FADE</string>
    <string name="move">MOVE</string>
    <string name="slide">SLIDE</string>
    <string name="zoom">ZOOM</string>
    <string name="stop_animation">STOP ANIMATION</string>
    <string name="course_rating">Course Rating</string>
    <string name="course_name">Course Name</string>
</resources>
Step 3: Working with the activity_main.xml file
Navigate to the app > res > layout > activity_main.xml. Create ImageView in the activity_main.xml along with buttons that will add animation to the view.

activity_main.xml:
<LinearLayout
    xmlns:android="http://schemas.android.com/apk/res/android"
    xmlns:tools="http://schemas.android.com/tools"
    android:layout_width="match_parent"
    android:layout_height="match_parent"
    android:orientation="vertical"
    android:gravity="center_horizontal"
    tools:context=".MainActivity">

    <ImageView
        android:id="@+id/imageview"
        android:layout_width="200dp"
        android:layout_height="200dp"
        android:layout_marginTop="40dp"
        android:contentDescription="@string/app_name"
        android:src="@drawable/gfg_logo" />

    <LinearLayout
        android:id="@+id/linear1"
        android:layout_width="match_parent"
        android:layout_height="wrap_content"
        android:layout_marginTop="30dp"
        android:orientation="horizontal"
        android:weightSum="3">

        <!--To start the blink animation of the image-->
        <Button
            android:id="@+id/blink"
            style="@style/TextAppearance.MaterialComponents.Button"
            android:layout_width="0dp"
            android:layout_height="wrap_content"
            android:layout_margin="10dp"
            android:layout_weight="1"
            android:padding="3dp"
            android:text="@string/blink"
            android:textColor="@color/white" />

        <!--To start the rotate animation of the image-->
        <Button
            android:id="@+id/rotate"
            style="@style/TextAppearance.MaterialComponents.Button"
            android:layout_width="0dp"
            android:layout_height="wrap_content"
            android:layout_margin="10dp"
            android:layout_weight="1"
            android:padding="3dp"
            android:text="@string/clockwise"
            android:textColor="@color/white" />

        <!--To start the fading animation of the image-->
        <Button
            android:id="@+id/fade"
            style="@style/TextAppearance.MaterialComponents.Button"
            android:layout_width="0dp"
            android:layout_height="wrap_content"
            android:layout_margin="10dp"
            android:layout_weight="1"
            android:padding="3dp"
            android:text="@string/fade"
            android:textColor="@color/white" />

    </LinearLayout>

    <LinearLayout
        android:id="@+id/linear2"
        android:layout_width="match_parent"
        android:layout_height="wrap_content"
        android:layout_marginTop="30dp"
        android:orientation="horizontal"
        android:weightSum="3">

        <!--To start the move animation of the image-->
        <Button
            android:id="@+id/move"
            style="@style/TextAppearance.MaterialComponents.Button"
            android:layout_width="0dp"
            android:layout_height="wrap_content"
            android:layout_margin="10dp"
            android:layout_weight="1"
            android:padding="3dp"
            android:text="@string/move"
            android:textColor="@color/white" />

        <!--To start the slide animation of the image-->
        <Button
            android:id="@+id/slide"
            style="@style/TextAppearance.MaterialComponents.Button"
            android:layout_width="0dp"
            android:layout_height="wrap_content"
            android:layout_margin="10dp"
            android:layout_weight="1"
            android:padding="3dp"
            android:text="@string/slide"
            android:textColor="@color/white" />

        <!--To start the zoom animation of the image-->
        <Button
            android:id="@+id/zoom"
            style="@style/TextAppearance.MaterialComponents.Button"
            android:layout_width="0dp"
            android:layout_height="wrap_content"
            android:layout_margin="10dp"
            android:layout_weight="1"
            android:padding="3dp"
            android:text="@string/zoom"
            android:textColor="@color/white" />

    </LinearLayout>

    <!--To stop the animation of the image-->
    <Button
        android:id="@+id/stop"
        android:layout_width="match_parent"
        android:layout_height="wrap_content"
        android:layout_marginLeft="30dp"
        android:layout_marginTop="30dp"
        android:layout_marginRight="30dp"
        android:text="@string/stop_animation" />

</LinearLayout>
Step 4: Create 6 different types of animation for ImageView
To create new animations we have to create a new directory for storing all our animations. Navigate to the app > res > Right-Click on res > New > Directory > Name your directory and type as "anim". Inside this directory, we will create our animations. For creating a new anim right click on the anim directory> Animation Resource file and give the name to your file as below. Below is the code snippet for 6 different animations.
<?xml version="1.0" encoding="utf-8"?>
<set xmlns:android="http://schemas.android.com/apk/res/android">
    <alpha android:fromAlpha="0.0"
        android:toAlpha="1.0"
        android:interpolator="@android:anim/accelerate_interpolator"
        android:duration="500"
        android:repeatMode="reverse"
        android:repeatCount="infinite"/>
</set>
<?xml version="1.0" encoding="utf-8"?>
<set xmlns:android="http://schemas.android.com/apk/res/android"
    android:interpolator="@android:anim/accelerate_interpolator">

    <!-- duration is the time for which animation will work-->
    <alpha
        android:duration="1000"
        android:fromAlpha="0"
        android:toAlpha="1" />

    <alpha
        android:duration="1000"
        android:fromAlpha="1"
        android:startOffset="2000"
        android:toAlpha="0" />

</set>
<?xml version="1.0" encoding="utf-8"?>
<set
    xmlns:android="http://schemas.android.com/apk/res/android"
    android:interpolator="@android:anim/linear_interpolator"
    android:fillAfter="true">

    <translate
        android:fromXDelta="0%p"
        android:toXDelta="75%p"
        android:duration="700" />
</set>
<?xml version="1.0" encoding="utf-8"?>
<set
     xmlns:android="http://schemas.android.com/apk/res/android">
    <rotate
        android:duration="6000"
        android:fromDegrees="0"
        android:pivotX="50%"
        android:pivotY="50%"
        android:toDegrees="360" />

    <rotate
        android:duration="6000"
        android:fromDegrees="360"
        android:pivotX="50%"
        android:pivotY="50%"
        android:startOffset="5000"
        android:toDegrees="0" />

</set>
<?xml version="1.0" encoding="utf-8"?>
<set xmlns:android="http://schemas.android.com/apk/res/android"
     android:fillAfter="true" >
    <scale
        android:duration="500"
        android:fromXScale="1.0"
        android:fromYScale="1.0"
        android:interpolator="@android:anim/linear_interpolator"
        android:toXScale="1.0"
        android:toYScale="0.0" />
</set>
<?xml version="1.0" encoding="utf-8"?>
<set xmlns:android="http://schemas.android.com/apk/res/android"
    android:fillAfter="true" >

    <scale
        android:interpolator="@android:anim/linear_interpolator"
        android:duration = "1000"
        android:fromXScale = "1"
        android:fromYScale = "1"
        android:pivotX = "50%"
        android:pivotY = "50%"
        android:toXScale = "2"
        android:toYScale = "2"/>
</set>
Below is how the file structure should look like:

Step 5: Working with the MainActivity file
Add animation to the ImageView by clicking a specific Button. Navigate to the app > java > your apps package name >> MainActivity. Code is provided in both Java and Kotlin.

MainActivity file:
package org.geeksforgeeks.demo;

import android.os.Bundle;
import android.view.View;
import android.view.animation.Animation;
import android.view.animation.AnimationUtils;
import android.widget.Button;
import android.widget.ImageView;
import androidx.appcompat.app.AppCompatActivity;

public class MainActivity extends AppCompatActivity {

    // Declare variables for ImageView and Buttons
    private ImageView imageView;
    private Button blink, rotate, fade, move, slide, zoom, stop;

    @Override
    protected void onCreate(Bundle savedInstanceState) {
        super.onCreate(savedInstanceState);
        setContentView(R.layout.activity_main);

        // Initialize ImageView and Buttons using their IDs
        imageView = findViewById(R.id.imageview);
        blink = findViewById(R.id.blink);
        rotate = findViewById(R.id.rotate);
        fade = findViewById(R.id.fade);
        move = findViewById(R.id.move);
        slide = findViewById(R.id.slide);
        zoom = findViewById(R.id.zoom);
        stop = findViewById(R.id.stop);

        // Set up click listeners for each button to start corresponding animations
        createAnimation(blink, R.anim.blink);
        createAnimation(rotate, R.anim.rotate);
        createAnimation(fade, R.anim.fade);
        createAnimation(move, R.anim.move);
        createAnimation(slide, R.anim.slide);
        createAnimation(zoom, R.anim.zoom);

        // Set up click listener for stop button to clear any ongoing animation
        stop.setOnClickListener(v -> imageView.clearAnimation());
    }

    // Function to set up an animation for a given view and animation resource ID
    private void createAnimation(View view, int animResId) {
        view.setOnClickListener(v -> {
            // Load the animation from the specified resource ID
            Animation animation = AnimationUtils.loadAnimation(MainActivity.this, animResId);
            // Start the animation on the ImageView
            imageView.startAnimation(animation);
        });
    }
}
package org.geeksforgeeks.demo

import android.os.Bundle
import android.view.View
import android.widget.Button
import android.widget.ImageView
import android.view.animation.AnimationUtils
import androidx.appcompat.app.AppCompatActivity

class MainActivity : AppCompatActivity() {

    // Declare variables for ImageView and Buttons
    private lateinit var imageView: ImageView
    private lateinit var blink: Button
    private lateinit var rotate: Button
    private lateinit var fade: Button
    private lateinit var move: Button
    private lateinit var slide: Button
    private lateinit var zoom: Button
    private lateinit var stop: Button

    override fun onCreate(savedInstanceState: Bundle?) {
        super.onCreate(savedInstanceState)
        setContentView(R.layout.activity_main)

        // Initialize the ImageView and Buttons using their IDs
        imageView = findViewById(R.id.imageview)
        blink = findViewById(R.id.blink)
        rotate = findViewById(R.id.rotate)
        fade = findViewById(R.id.fade)
        move = findViewById(R.id.move)
        slide = findViewById(R.id.slide)
        zoom = findViewById(R.id.zoom)
        stop = findViewById(R.id.stop)

        // Set up click listeners for each button to start corresponding animations
        createAnimation(blink, R.anim.blink)
        createAnimation(rotate, R.anim.rotate)
        createAnimation(fade, R.anim.fade)
        createAnimation(move, R.anim.move)
        createAnimation(slide, R.anim.slide)
        createAnimation(zoom, R.anim.zoom)

        // Set up click listener for stop button to clear any ongoing animation
        stop.setOnClickListener {
            imageView.clearAnimation()
        }
    }

    // Function to set up an animation for a given view and animation resource ID
    private fun createAnimation(view: View, animResId: Int) {
        view.setOnClickListener {
            // Load the animation from the specified resource ID
            val animation = AnimationUtils.loadAnimation(this, animResId)
            // Start the animation on the ImageView
            imageView.startAnimation(animation)
        }
    }
}
Note: Drawables and strings can be found in the drawable folder and strings.xml file. Drawables can be found from the app > res > drawable.
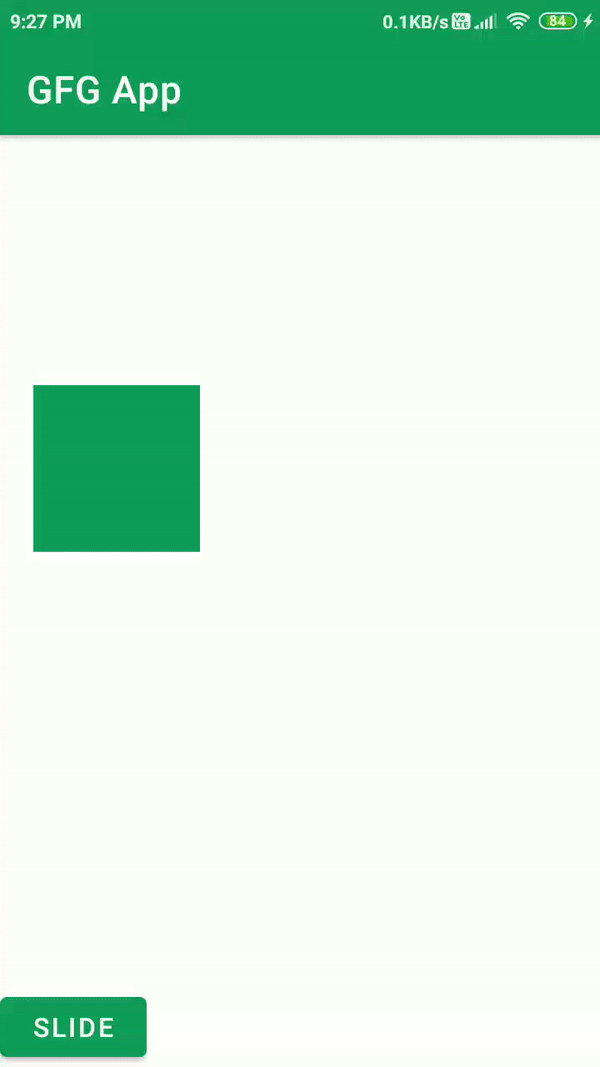
Output:
Note : To access the full android application code check this github repository: Animation in Android Application