This article explains how to install CUDA Toolkit and configure it with VS Code on Windows for compiling and running CUDA (.cu) programs.
Prerequisites
Before proceeding, ensure:
- A system with an NVIDIA GPU
- Windows 10/11 (64-bit)
To check whether your system has an Nvidia GPU or not, you can run the following command on your Windows PowerShell or command prompt or linux terminal.
nvidia-smi
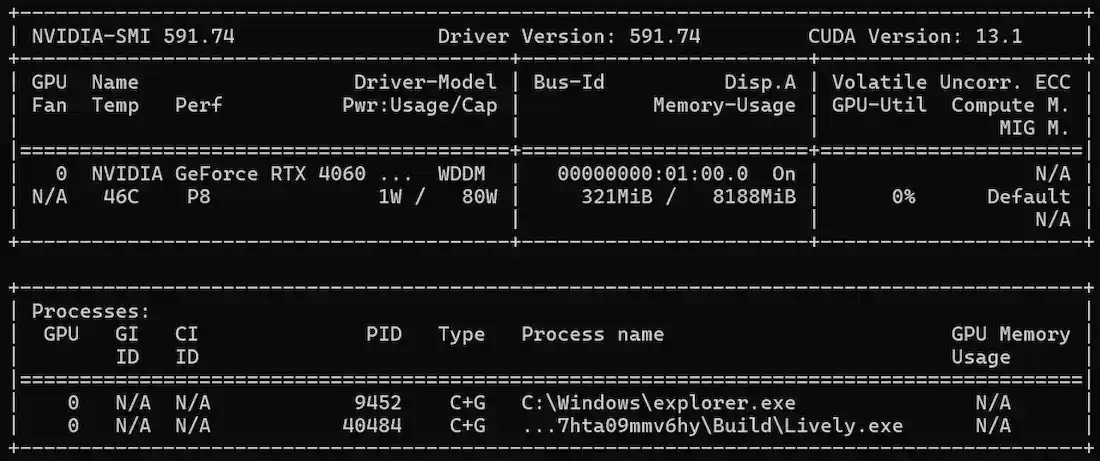
If your system has Nvidia GPU, you will see output similar to the above image. Above image informs us that the system has an NVIDIA GeForce RTX 4060 installed, running Driver Version 591.74 and CUDA Version 13.1. It also provides real-time data on the GPU's temperature (46°C), power usage (1W), and memory consumption (321MiB used out of 8188MiB).
Step 1: Install Latest NVIDIA Graphics Drivers
We can install the latest drivers from the NVIDIA official Website : https://www.nvidia.com/en-us/drivers/

After clicking on find, we can download required driver from here.

Clicking on either game driver or studio driver is fine.
Step 2: Install NVIDIA-toolkit
We can download nvidia-toolkit from here https://developer.nvidia.com/cuda-downloads

Step 3: Download Visual Studio
Download Visual Studio community version from this link: https://visualstudio.microsoft.com/downloads/

Step 4: Download C++ extensions in Visual Studio
We will download desktop development with C++ extensions , and download MSVC compiler required for C++ compilation.

After clicking on install while downloading , our installation would start

Step 5: Install Nvidia toolkit from setup
Now install the nvidia toolkit from the setup installed by running the .exe present in the downloads folder

After running the installer, accept all the agreements, and click on Express installation.

After installation is complete, restart your system.
Step 6: Open Visual Studio Command line
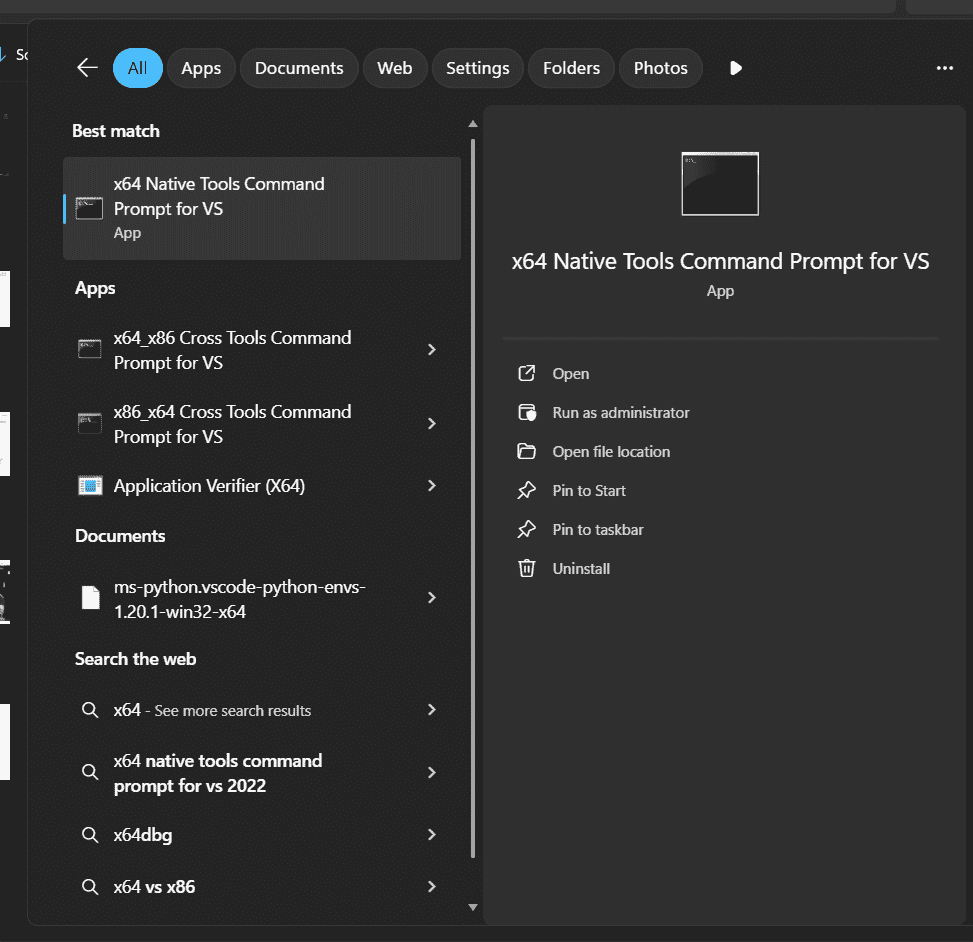
Search x64 Native tools on your windows search and click on the CLI
Step 7: Verify Installation of nvcc and cl
Run the following commands in the terminal:
nvcc --version
cl

This verifies that the Nvidia compiler has been installed successfully.
Running a Simple Program
Click on create new file and make a new file by the name of my_cuda.cu and paste the below code in it.
#include <stdio.h>
#include <cuda_runtime.h>

__global__ void hello() {
    printf("Hello from GPU\n");
}

int main() {
    int count = 0;
    cudaError_t err;

    err = cudaGetDeviceCount(&count);
    printf("Device Count: %d\n", count);

    if (count == 0) return 0;

    hello<<<1,1>>>();

    err = cudaGetLastError();
    if (err != cudaSuccess) {
        printf("Kernel launch error: %s\n", cudaGetErrorString(err));
    }

    err = cudaDeviceSynchronize();
    if (err != cudaSuccess) {
        printf("Sync error: %s\n", cudaGetErrorString(err));
    }

    return 0;
}
Go to x64_native CLI discussed earlier and set the working directory path to the directory in which you created the CUDA file such as
cd path\to\folder
Then run the following command
nvcc my_cuda.cu -o hello.exe

This compiles the my_cuda.cu file and creates an executable by name hello.exe.
Execute the executable: Now we will execute our executable file by simply typing the name of executable
hello.exe
Output:
