

IntelliJ IDEA is one of the most popular Integrated Development Environments (IDE) used for Java development. It provides features like code completion, debugging, refactoring, and project management that make Java programming easier and faster. IntelliJ IDEA supports programming languages such as Java, Kotlin, Scala, and Groovy.
- Provides smart code completion and debugging tools.
- Helps in project management and JAR file creation.
- Available for Windows, Linux, and macOS platforms.
Procedure
- Start a project
- Create a package and Java class
- Write and run the Java program
- Package the project into a JAR file
- Configure the JAR application
- Execute the JAR file
Step-by-Step Implementation of First Java Application
Step 1: Start a New Project
- Open IntelliJ IDEA.
- Click on New Project from the welcome screen.
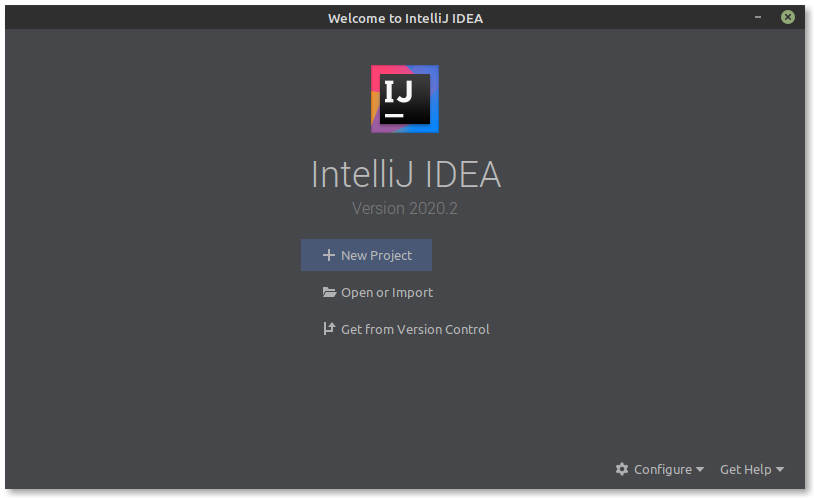
Name the project as 'GeeksForGeeks' (you can choose any name), and then click finish.

Step 2: Create a Package and Java Class
- In the Project window, right-click the src folder and select New -> Package.
- Enter the package name, for example, gfg.
- Right-click the gfg package and select New -> Java Class.
- Enter the class name, for example, GeeksForGeeks.
The GeeksForGeeks.java class will now be created inside the gfg package.
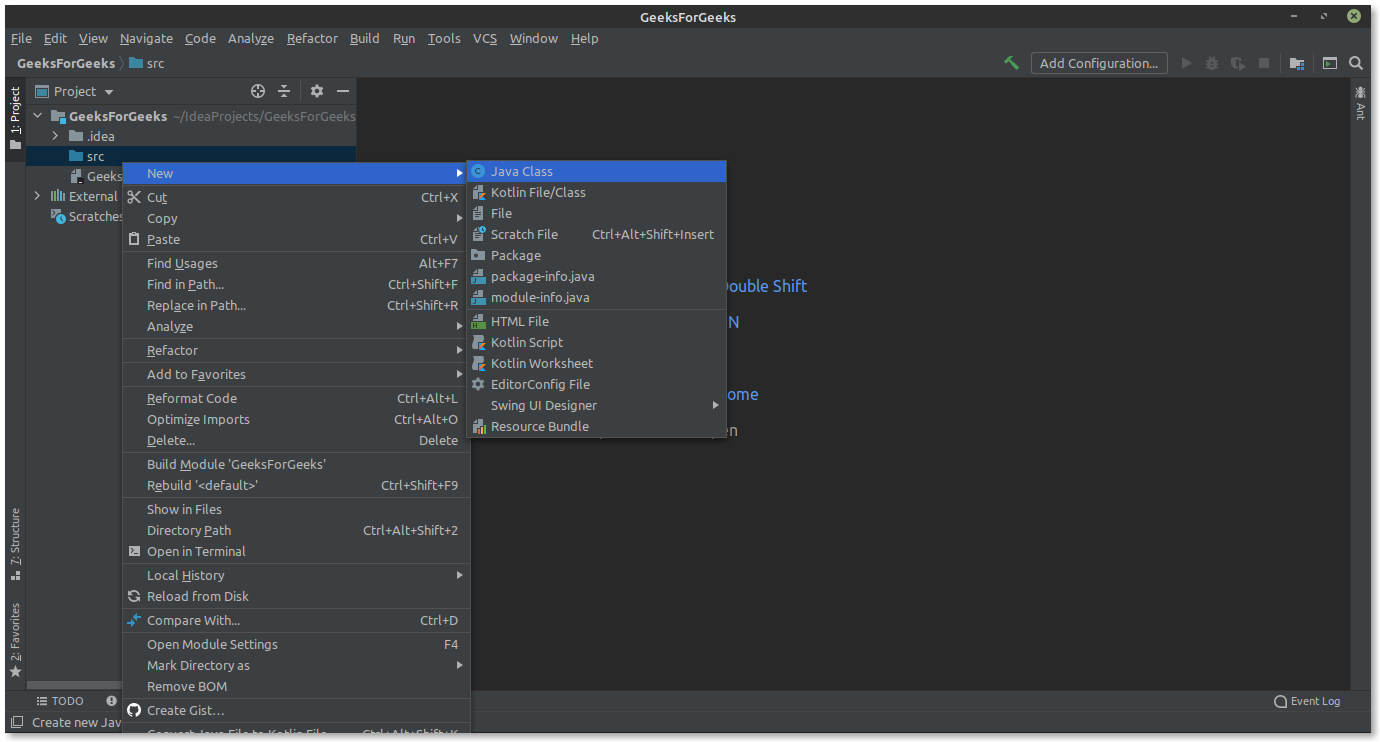
Step 3: Write the Java Program
Write the following Java program inside the class file:
Example: Java demo program to print message on the console
import java.io.*;

// Class
public class Geeksforgeeks {

    // Main driver method
    public static void main(String[] args)
    {
        // Print and display on the console after
        // successful compilation and execution
        System.out.println(
            "This is my first project in java");
    }
}
Step 4: Run the Java Program
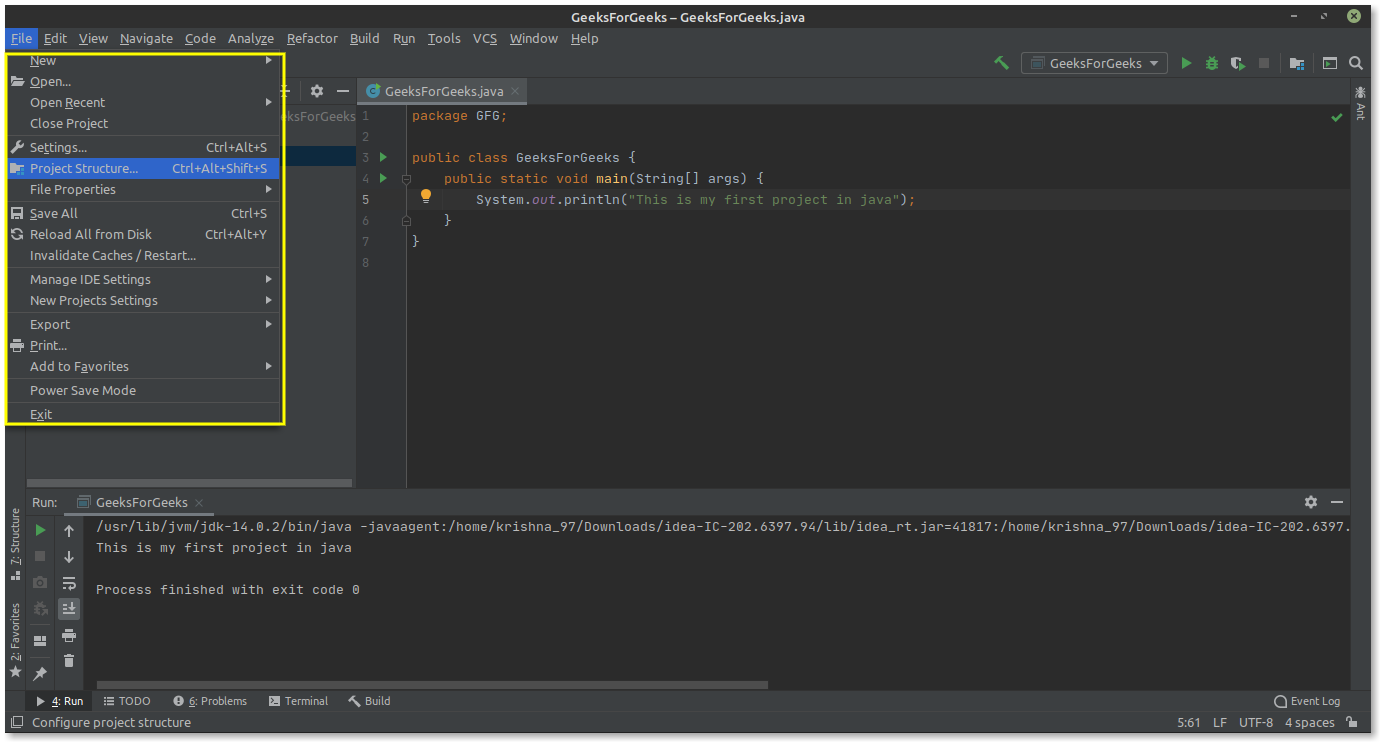
- Click the Run button present at the top-right corner of IntelliJ IDEA.
- The output will appear in the console window.

After writing the above code you may check if it is finishing with exit code '0' or not.
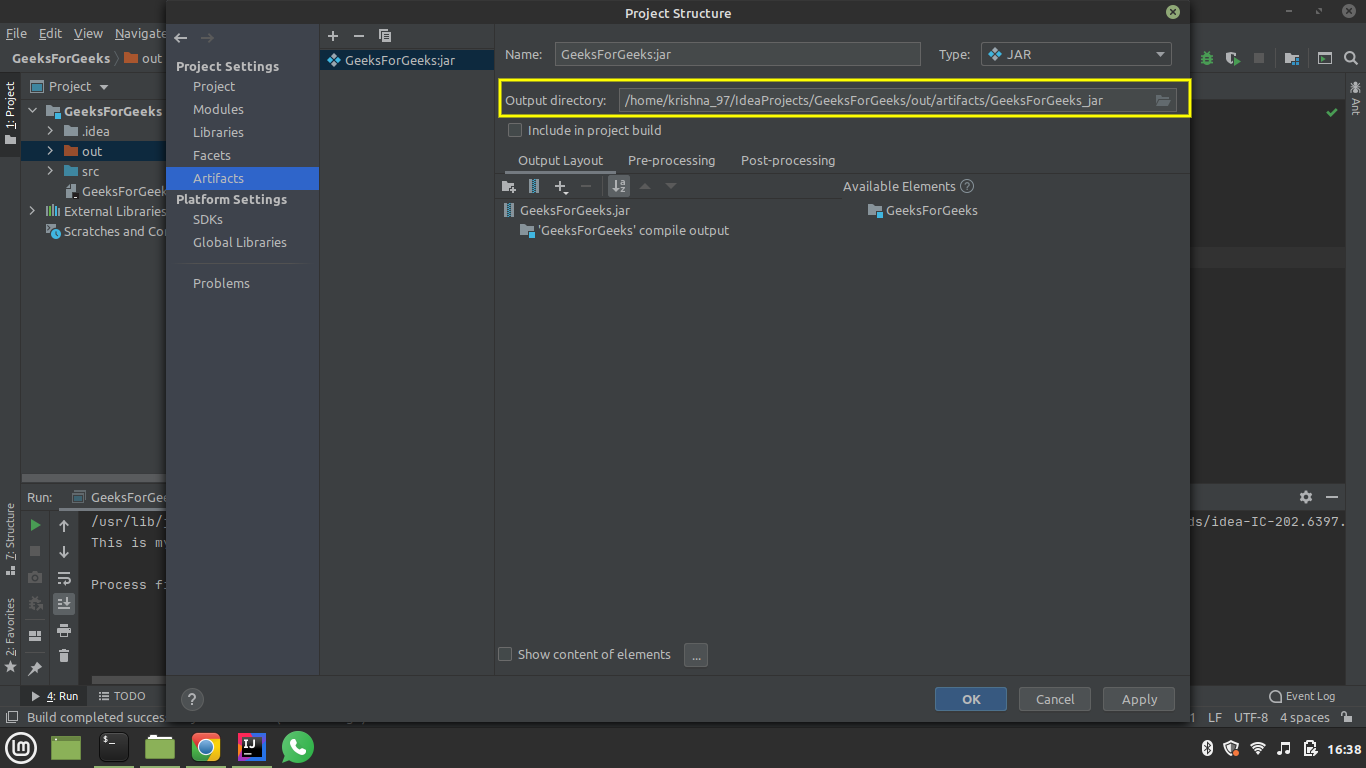
Step 5: Configure the JAR Artifact
- Go to:
File -> Project Structure -> Artifacts
Click the + icon and select the appropriate JAR option to create an artifact configuration.
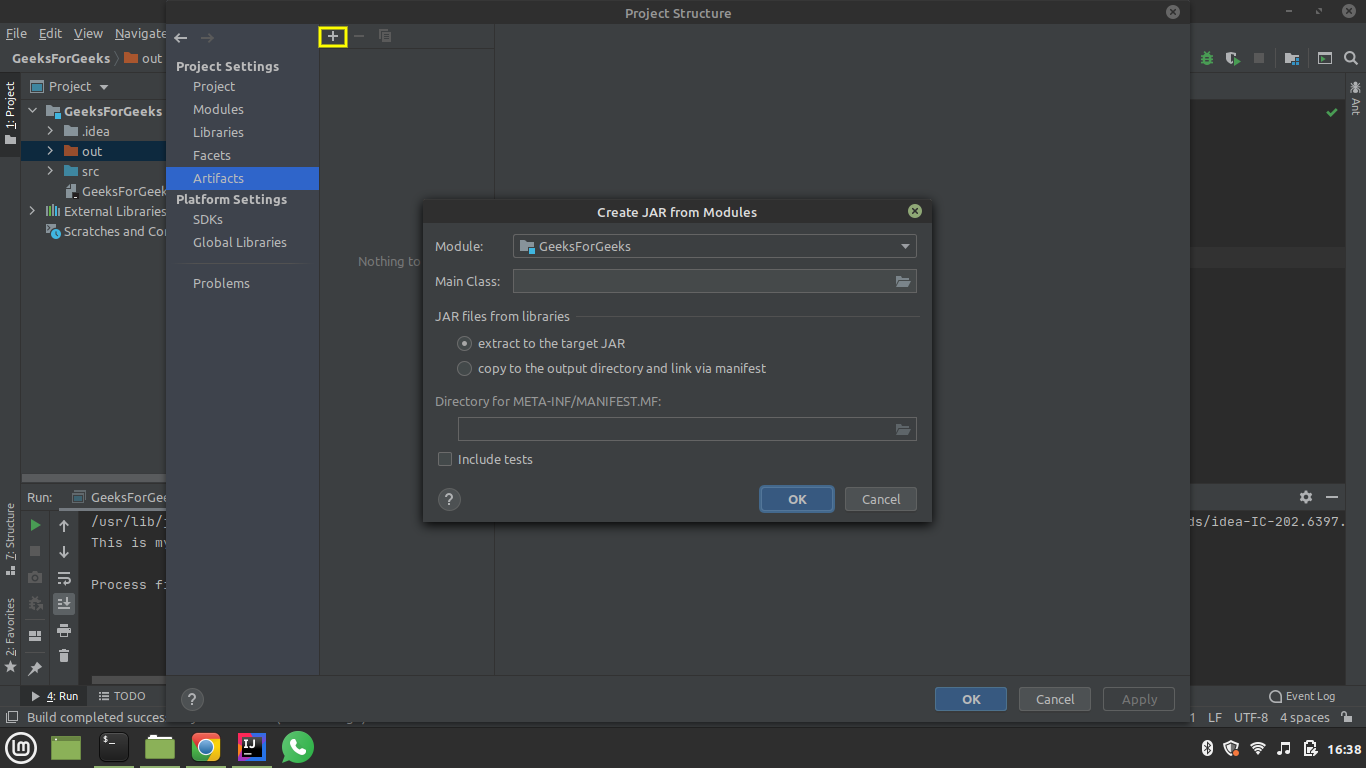
Note: Creating an artifact configuration does not generate the JAR file. You need to build the artifact explicitly.
Step 6: Build the Artifact
- Go to Build > Build Artifacts...
- Select the configured JAR artifact.
- Click Build.
Step 7: Configure JAR Application
- Select Edit Configurations from the toolbar.
- Click the + icon and choose JAR Application.
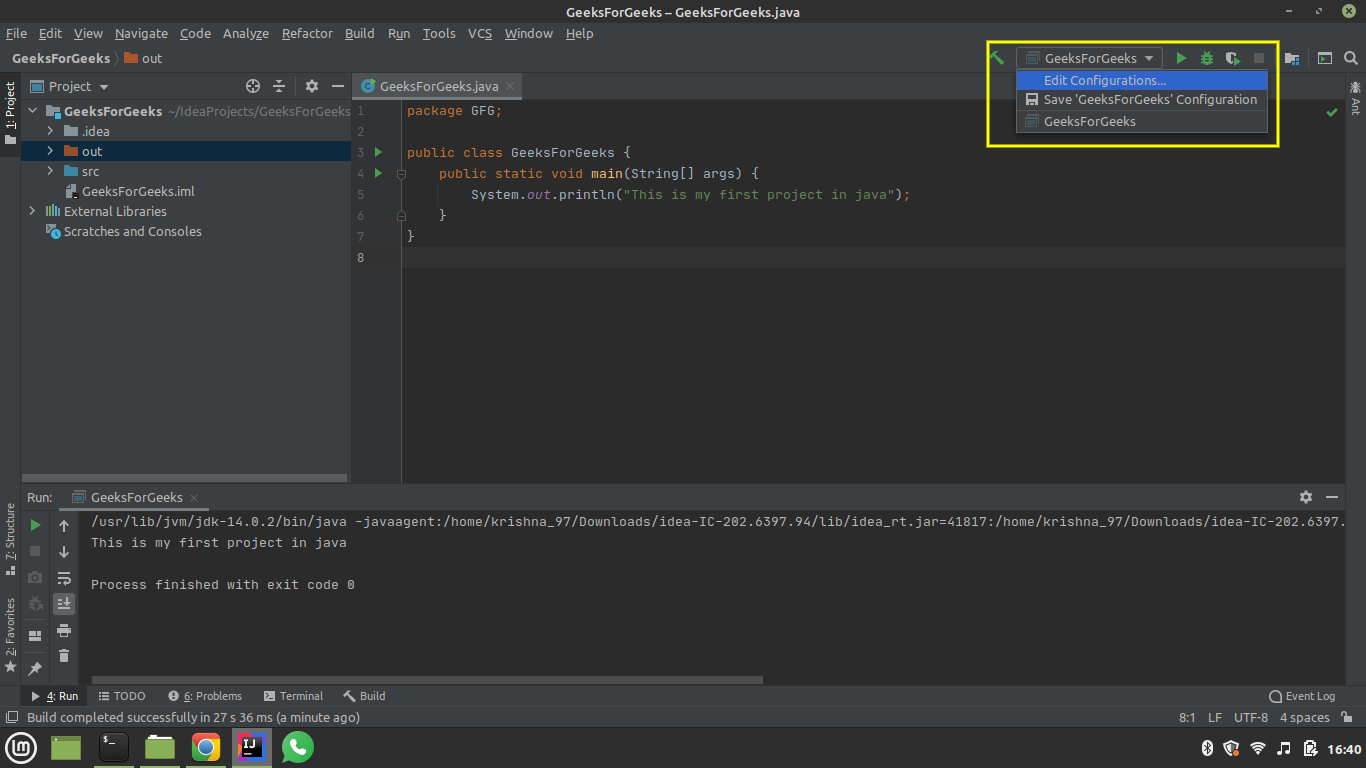

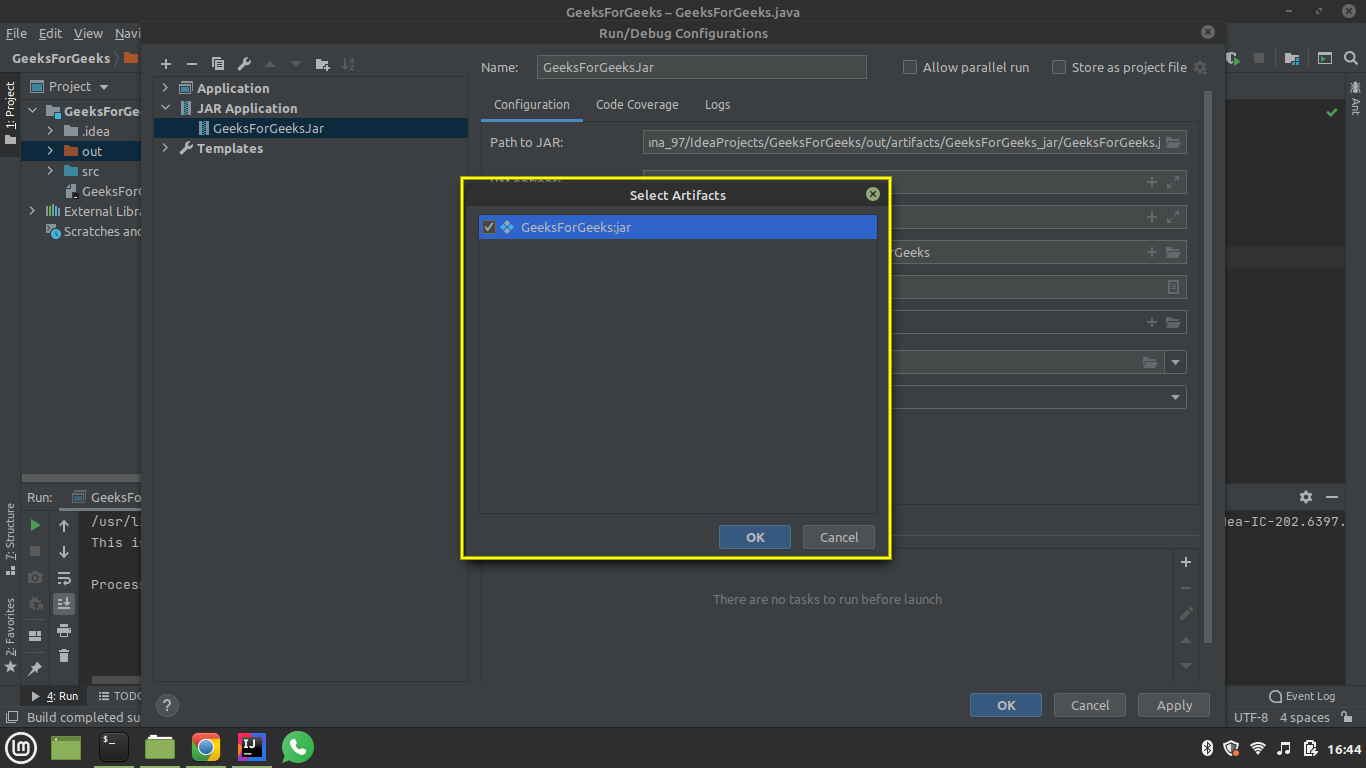
Choose the output directory for the .jar file.

Select GeeksForGeeks : jar from the menu and press OK.
Step 8: Execute the JAR File
- Select the JAR configuration from the toolbar.
- Click Run.
