Spring AOP allows you to add extra functionality (like logging, security, etc.) to existing code without modifying it. The older Spring 1.2-style AOP is supported but has limitations, so using AspectJ with Spring AOP is recommended for better flexibility.
- Adds behavior without changing existing code
- Helps separate cross-cutting concerns
- AspectJ provides more powerful AOP features
Advice in AOP
Advice is the action performed by an aspect at a specific join point in the program. It defines when and how additional behavior is applied to a method.
- Before Advice: Runs before the method execution
- After Advice: Runs after the method execution
- Around Advice: Runs before and after the method
- Throws Advice: Runs when an exception occurs
The architecture of Spring AOP Advice is as follows:

Spring AOP Advice Types – Step-by-Step Implementation
In Spring AOP, Advice defines what action should be taken and when it should be executed. Below are the main types of advice with clear step-by-step implementation.
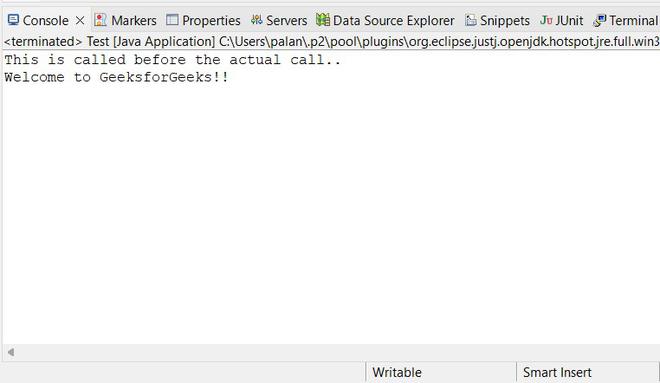
1. MethodBeforeAdvice (Before Advice)
This advice runs before the actual business method execution.
Step 1: Create Business Logic Class
This class contains the actual method where logic is executed.
public class Geeks {

    // Business logic method
    public void message() {
        System.out.println("Welcome to GeeksforGeeks!!");
    }
}
Step 2: Create Advisor Class
In this step, we will create an Advisor class and name it as BeforeAdvisor, and do remember this class will implement the interface MethodBeforeAdvice.
import java.lang.reflect.Method;
import org.springframework.aop.MethodBeforeAdvice;

// Class
public class BeforeAdvisor implements MethodBeforeAdvice {

    // Method
    // Executes before actual business logic call
    public void before(Method arg0, Object[] arg1,
                       Object arg2) throws Throwable
    {

        // Print statement
        System.out.println(
            "This is called before the actual call..");
    }
}
Step 3: Configure application-context.xml
In this step, we will create beans in the context file for our Geeks, Advisor, and ProxyFactoryBean class.
Note: You need to provide your class path and the package definition while creating beans.
File: application-context.xml
<?xml version="1.0" encoding="UTF-8"?>
<beans
    xmlns="http://www.springframework.org/schema/beans/"
    xmlns:xsi="https://www.w3.org/2001/XMLSchema-instance"
    xmlns:p="http://www.springframework.org/schema/p"
    xsi:schemaLocation="http://www.springframework.org/schema/beans/
    http://www.springframework.org/schema/beans//spring-beans-3.0.xsd">

    <bean id="geeksObj" class="com.geeksforgeeks.Geeks"></bean>
    <bean id="beforeAdvisorObj" class="com.geeksforgeeks.BeforeAdvisor"></bean>

    <bean id="proxyObj" class="org.springframework.aop.framework.ProxyFactoryBean">
        <property name="target" ref="geeksObj"></property>
        <property name="interceptorNames">
            <list>
            <value>beforeAdvisorObj</value>
            </list>
        </property>
    </bean>

</beans>
Step 4: Adding dependencies
Here, we will add the required dependencies in our pom.xml file.
File: pom.xml
<project xmlns="https://maven.apache.org/POM/4.0.0" xmlns:xsi="https://www.w3.org/2001/XMLSchema-instance" xsi:schemaLocation="https://maven.apache.org/POM/4.0.0 https://maven.apache.org/xsd/maven-4.0.0.xsd">
  <modelVersion>4.0.0</modelVersion>
  <groupId>com.geeksforgeeks</groupId>
  <artifactId>SpringAOP</artifactId>
  <version>0.0.1-SNAPSHOT</version>

<dependencies>

    <dependency>
    <groupId>org.springframework</groupId>
    <artifactId>spring-context</artifactId>
    <version>5.1.3.RELEASE</version>
    </dependency>

    <!-- <a href="https://mvnrepository.com/artifact/aspectj/aspectjrt">https://mvnrepository.com/artifact/aspectj/aspectjrt</a> -->
    <dependency>
    <groupId>aspectj</groupId>
    <artifactId>aspectjrt</artifactId>
    <version>1.5.4</version>
    </dependency>

    <!-- <a href="https://mvnrepository.com/artifact/org.aspectj/aspectjweaver">https://mvnrepository.com/artifact/org.aspectj/aspectjweaver</a> -->
    <dependency>
    <groupId>org.aspectj</groupId>
    <artifactId>aspectjweaver</artifactId>
    <version>1.9.2</version>
    </dependency>

    <!-- <a href="https://mvnrepository.com/artifact/org.aspectj/aspectjtools">https://mvnrepository.com/artifact/org.aspectj/aspectjtools</a> -->
    <dependency>
    <groupId>org.aspectj</groupId>
    <artifactId>aspectjtools</artifactId>
    <version>1.9.2</version>
    </dependency>

    <!-- <a href="https://mvnrepository.com/artifact/org.ow2.asm/asm">https://mvnrepository.com/artifact/org.ow2.asm/asm</a> -->
    <dependency>
    <groupId>org.ow2.asm</groupId>
    <artifactId>asm</artifactId>
    <version>7.0</version>
    </dependency>

    <!-- <a href="https://mvnrepository.com/artifact/org.springframework/spring-aspects">https://mvnrepository.com/artifact/org.springframework/spring-aspects</a> -->
    <dependency>
    <groupId>org.springframework</groupId>
    <artifactId>spring-aspects</artifactId>
    <version>5.1.3.RELEASE</version>
    </dependency>

  </dependencies>
</project>
Step 5: Create Main Class
In this step, we will create a Test.java class and initialize the beans and calls message() method of Geeks.java class.
Test.java
import java.util.ResourceBundle;
import org.springframework.beans.factory.BeanFactory;
import org.springframework.beans.factory.xml.XmlBeanFactory;
import org.springframework.core.io.ClassPathResource;
import org.springframework.core.io.Resource;

// Main class
public class Test {

    // Main driver method
    public static void main(String[] args)
    {
        // Reading the application-context file using
        // class path of spring context xml file
        Resource context = new ClassPathResource(
            "application-context.xml");

        BeanFactory beanFactory
            = new XmlBeanFactory(context);

        // Initializing geeks bean using bean factory
        Geeks geeks
            = beanFactory.getBean("proxyObj", Geeks.class);

        // Calling the message() method
        // inside main() method
        geeks.message();
    }
}
Output
we will run our application and get the output.
2. AfterReturningAdvice
Executes after method execution completes successfully.
Step 1: Create a business logic class
We will be using the same Geeks.java class for actual business logic.
Step 2: Create After Advisor
In this step, we will create a class and name it AfterAdvisor.java and implement the AfterReturningAdvice interface and implements its method afterReturning().
import java.lang.reflect.Method;
import org.springframework.aop.AfterReturningAdvice;

// Class
public class AfterAdvisor
implements AfterReturningAdvice
{
    // Method
    // Executes after the actual business logic call
    public void afterReturning(Object returnValue, Method method, Object[] args, Object target)
    throws Throwable
    {
        System.out.println("This is called after returning advice..");
    }
}
Step 3: Update XML Configuration
Here we will be updating our application-context.xml file according to the AfterAdvisor class and AfterReturningAdvice interface.
<?xml version="1.0" encoding="UTF-8"?>
<beans
    xmlns="http://www.springframework.org/schema/beans/"
    xmlns:xsi="https://www.w3.org/2001/XMLSchema-instance"
    xmlns:p="http://www.springframework.org/schema/p"
    xsi:schemaLocation="http://www.springframework.org/schema/beans/
    http://www.springframework.org/schema/beans//spring-beans-3.0.xsd">

    <bean id="geeksObj" class="com.geeksforgeeks.Geeks"></bean>
    <bean id="afterAdvisorObj" class="com.geeksforgeeks.AfterAdvisor"></bean>

    <bean id="proxyObj" class="org.springframework.aop.framework.ProxyFactoryBean">
        <property name="target" ref="geeksObj"></property>
        <property name="interceptorNames">
            <list>
            <value>afterAdvisorObj</value>
            </list>
        </property>
    </bean>

</beans>
Output
We will run our application.

3. ThrowsAdvice
Executes when an exception is thrown.
Step 1: Modify Business Class
Here we will be updating our business logic class Geeks.java. Below is the code for Geeks.java class.
public class Geeks {

    // For actual business logic class we will
    // define a public method to print some random text
    public void message(String str) {

        // Checking if string is equal or not
        if (str.equals("geeksforgeeks.org"))

            // Print statement as string is equal
            System.out.println("Welcome to GeeksforGeeks!!");
        else

            // Do throw exception
            throw new IllegalArgumentException("Invalid String");
    }
}
Step 2: Create Throws Advisor
In this step, we will create a class and name it 'ThrowsAdvisor.java' and we will implement the ThrowsAdvice interface and implement the afterThrowing() method. Here, we will put those concerns which will need to be thrown even if the exception has occurred.
import org.springframework.aop.ThrowsAdvice;

// Class
public class ThrowsAdvisor implements ThrowsAdvice {

    // Method
    public void afterThrowing(Exception e)
    {
        // Print statement
        System.out.println(
            "This will be called if exception occurs..");
    }
}
Step 3: Changing the application-context.xml file
In this step, we will update our application-context.xml file according to ThrowsAdvisor.
<?xml version="1.0" encoding="UTF-8"?>
<beans
    xmlns="http://www.springframework.org/schema/beans/"
    xmlns:xsi="https://www.w3.org/2001/XMLSchema-instance"
    xmlns:p="http://www.springframework.org/schema/p"
    xsi:schemaLocation="http://www.springframework.org/schema/beans/
    http://www.springframework.org/schema/beans//spring-beans-3.0.xsd">

    <bean id="geeksObj" class="com.geeksforgeeks.Geeks"></bean>
    <bean id="throwsAdvisorObj" class="com.geeksforgeeks.ThrowsAdvisor"></bean>

    <bean id="proxyObj" class="org.springframework.aop.framework.ProxyFactoryBean">
        <property name="target" ref="geeksObj"></property>
        <property name="interceptorNames">
            <list>
            <value>throwsAdvisorObj</value>
            </list>
        </property>
    </bean>

</beans>
Step 4: Creating Test.java class
In this step, we will create a new class and name 'Test.java'. In this class, we will initialize our beans and call message(String str) method of our business logic class Geeks.java. We will pass an invalid string so, our application will throw an exception and still call ThrowsAdvice
Test.java
import java.util.ResourceBundle;
import org.springframework.beans.factory.BeanFactory;
import org.springframework.beans.factory.xml.XmlBeanFactory;
import org.springframework.core.io.ClassPathResource;
import org.springframework.core.io.Resource;

// Main class
// Application Class
public class Test {

    // Main driver method
    public static void main(String[] args)
    {
        // Reading the application-context file
        // using class path of spring context xml file
        Resource context = new ClassPathResource(
            "application-context.xml");

        BeanFactory beanFactory
            = new XmlBeanFactory(context);

        // Initializing geeks bean
        // using bean factory
        Geeks geeks
            = beanFactory.getBean("proxyObj", Geeks.class);

        // Calling the message() method
        // inside main() method

        // Try block to check for exceptions
        try {
            geeks.message("gfg");
        }

        // Catch block to handle exceptions
        catch (Exception e) {

            // Display exceptions using line number
            // using printStackTrace() method
            e.printStackTrace();
        }
    }
}
Step 5: Run the application.
Output:

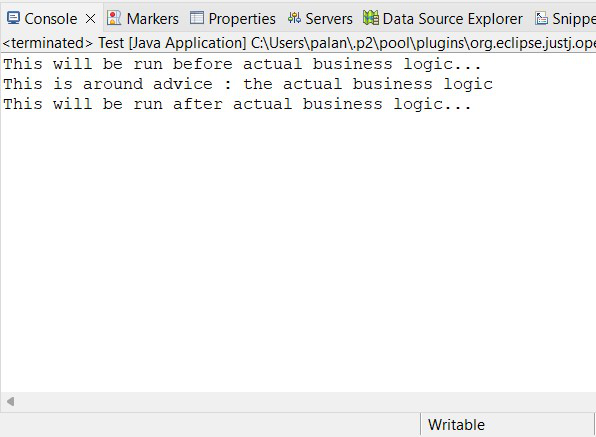
4. MethodInterceptor(AroundAdvice)
It is as Implementation below step by step as shown below as follows:
Step 1: Creating a business logic class
In this step, we will update our business logic class Geeks.java. Below is the code for Geeks.java class.
public class Geeks {

    // Method
    // Define a public method to print some random text
    // for actual business logic class we will
    public void message()
    {

        // Print statement
        System.out.println("This is around advice..");
    }
}
Step 2: Create AroundAdvice class
In this step, we will create a new class and name as AroundAdvice and with this class, we will implement the 'MethodInterceptor interface' and provide the definition for invoke() method.
import org.aopalliance.intercept.MethodInterceptor;
import org.aopalliance.intercept.MethodInvocation;

// Class
public class AroundAdvice implements MethodInterceptor {

    // Method
    public Object invoke(MethodInvocation invocation)
        throws Throwable
    {
        Object obj;

        System.out.println(
            "This will be run before actual business logic...");
        obj = invocation.proceed();

        // Print statement
        System.out.println(
            "This will be run after actual business logic...");

        return obj;
    }
}
Step 3: Update the application-context.xml file
Now, we will change our application-context.xml file according to AroundAdvice.
application-context.xml
<?xml version="1.0" encoding="UTF-8"?>
<beans
    xmlns="http://www.springframework.org/schema/beans/"
    xmlns:xsi="https://www.w3.org/2001/XMLSchema-instance"
    xmlns:p="http://www.springframework.org/schema/p"
    xsi:schemaLocation="http://www.springframework.org/schema/beans/
    http://www.springframework.org/schema/beans//spring-beans-3.0.xsd">

    <bean id="geeksObj" class="com.geeksforgeeks.Geeks"></bean>
    <bean id="aroundAdvisorObj" class="com.geeksforgeeks.AroundAdvice"></bean>

    <bean id="proxyObj" class="org.springframework.aop.framework.ProxyFactoryBean">
        <property name="target" ref="geeksObj"></property>
        <property name="interceptorNames">
            <list>
            <value>aroundAdvisorObj</value>
            </list>
        </property>
    </bean>
</beans>
Step 4: Create Test.java file
In this step, we will use our previous 'Test.java' and update it according to the business requirement.
Test.java
import java.util.ResourceBundle;
import org.springframework.beans.factory.BeanFactory;
import org.springframework.beans.factory.xml.XmlBeanFactory;
import org.springframework.core.io.ClassPathResource;
import org.springframework.core.io.Resource;

// Class
public class Test {

    // Main driver method
    public static void main(String[] args)
    {
        // Reading the application-context file using
        // class path of spring context xml file
        Resource context = new ClassPathResource(
            "application-context.xml");

        BeanFactory beanFactory
            = new XmlBeanFactory(context);

        // Initializing geeks bean using bean factory
        Geeks geeks
            = beanFactory.getBean("proxyObj", Geeks.class);

        // Calling message() method
        // inside() main() method
        geeks.message();
    }
}
Output
In this step, we will run our application.