Spring Boot provides built-in support for scheduling tasks that run automatically at specific intervals. This is useful for background jobs such as sending emails, cleaning logs, generating reports, or syncing data. Scheduling in Spring Boot is mainly done using the @Scheduled annotation along with @EnableScheduling.
- Allows automatic execution of tasks at fixed intervals.
- Supports cron expressions, fixed rate, and fixed delay scheduling.
Step-by-Step Implementation
Follow the steps below to implement task scheduling in a Spring Boot application.
Step 1: Create a Spring Boot Project
Create a new Spring Boot project using Spring Initializr.
Project Configuration
- Project: Maven
- Language: Java
- Spring Boot Version: Latest stable version
- Group: com.gfg
- Artifact: springBoot-scheduler-project
- Packaging: Jar
- Java Version: 17 or higher
Add Dependencies:
Select the following dependency:
- Spring Web
Download the project, extract it, and open it in your IDE.
Step 2: Enable Scheduling in Spring Boot
To enable scheduling support, add the @EnableScheduling annotation in the main Spring Boot application class.
SchedulerApplication.java
package com.gfg.scheduler;

import org.springframework.boot.SpringApplication;
import org.springframework.boot.autoconfigure.SpringBootApplication;
import org.springframework.scheduling.annotation.EnableScheduling;

@SpringBootApplication
@EnableScheduling
public class SchedulerApplication {

    public static void main(String[] args) {
        SpringApplication.run(SchedulerApplication.class, args);
    }
}
@EnableScheduling annotation facilitates Spring Boot with scheduled task execution capability.
Step 3: Create Scheduler Class
Create a class Scheduler.java that contains the scheduled task.
package com.gfg.scheduler;
import java.text.SimpleDateFormat;
import java.util.Date;
import org.springframework.scheduling.annotation.Scheduled;
import org.springframework.stereotype.Component;
@Component
public class Scheduler {
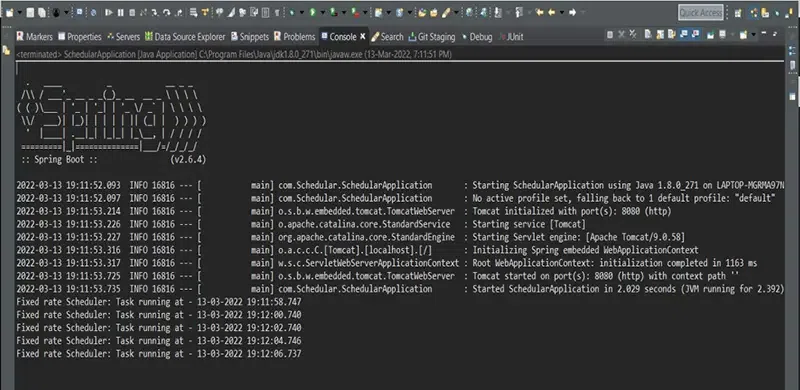
@Scheduled(cron = "0 * 19 * * ?")
public void scheduleTask() {
SimpleDateFormat dateFormat =
new SimpleDateFormat("dd-MM-yyyy HH:mm:ss.SSS");
String strDate = dateFormat.format(new Date());
System.out.println(
"Cron Scheduler: Task running at - " + strDate);
}
}
The cron element specified in the @Scheduled annotation allows defining cron-like expressions to include triggers on the second, minute, hour, day of the month, month, and day of the week. The expression specified here in the cron element directs spring boot to trigger the scheduler every one minute between 19:00.00 to 19:59.00.
On Running the Spring Boot Application, we can see the output in the console as follows:
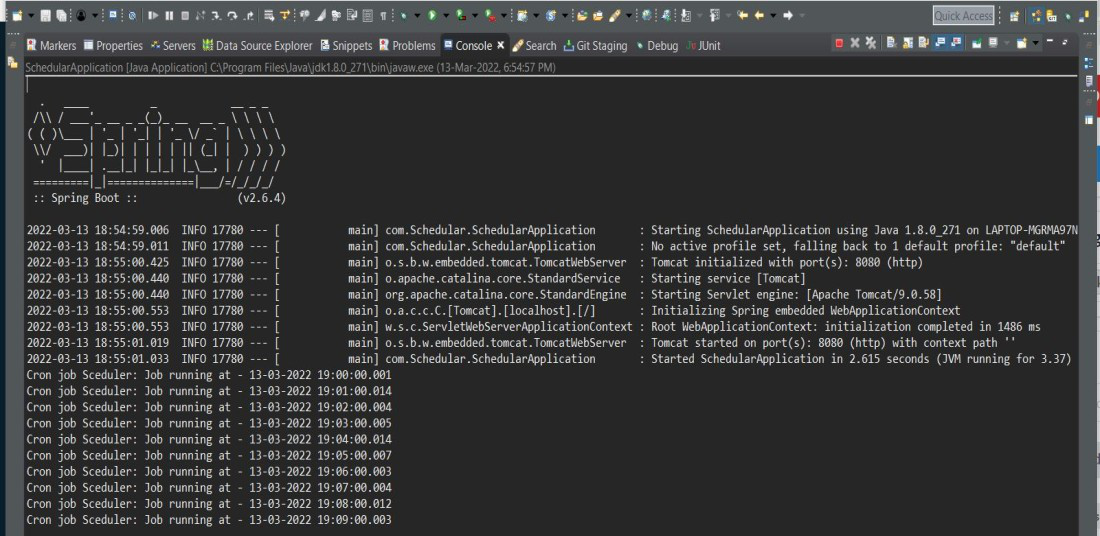
Step 4: Scheduling Using Fixed Rate
We can also schedule tasks using the fixedRate parameter.
@Scheduled(fixedRate = 2000)
public void scheduleTask() {

    SimpleDateFormat dateFormat =
            new SimpleDateFormat("dd-MM-yyyy HH:mm:ss.SSS");

    String strDate = dateFormat.format(new Date());

    System.out.println(
            "Fixed Rate Scheduler: Task running at - " + strDate);
}
The fixedRate element specified in the @Scheduled annotation executes the annotated method at a fixed time period between invocations. It does not wait for the previous task to be complete. The time value specified for this element is in milliseconds.
Here a fixed rate scheduler is defined which runs every 2 seconds starting at 19:11:58.
On Running the Spring Boot Application, we can see the output in the console as follows:
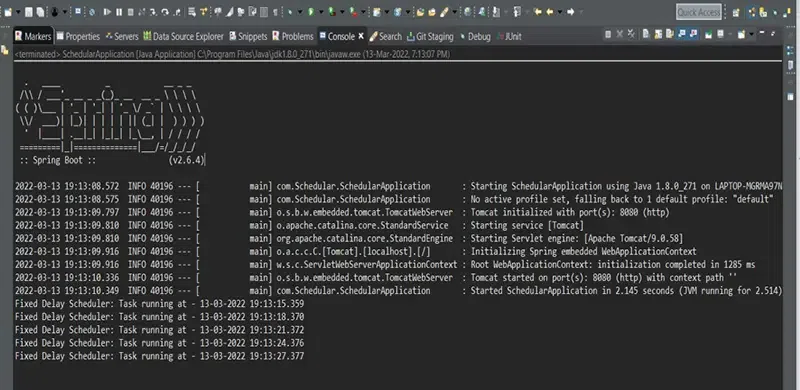
Step 5: Scheduling Using Fixed Delay
Another scheduling method is fixedDelay, which waits for the previous task to complete before running again.
@Scheduled(fixedDelay = 3000, initialDelay = 5000)
public void scheduleTask() {

    SimpleDateFormat dateFormat =
            new SimpleDateFormat("dd-MM-yyyy HH:mm:ss.SSS");

    String strDate = dateFormat.format(new Date());

    System.out.println(
            "Fixed Delay Scheduler: Task running at - " + strDate);
}
The fixedDelay element specified in the @Scheduled annotation executes the annotated method at a fixed time period between the end of the previous invocation and the start of the next invocation. It basically waits for the previous task to be complete. The time value specified for this element is in milliseconds.
The initialDelay element specified here allows mentioning the amount of time it waits before the invocation of the first task. The time value specified for this element is in milliseconds.
Here the scheduler defined starts with an initial delay of 5 seconds and goes on to execute the task at a fixed delay of 3 seconds.
On Running the Spring Boot Application, we can see the output in the console as follows: