The @RequestMapping annotation in Spring MVC is used to map HTTP requests to specific handler methods or controller classes. It defines the URL path, HTTP method, and other request conditions for handling incoming requests. This helps route client requests to the appropriate business logic in a structured way.
- Can be applied at both class and method level to define URL patterns
- Works with GET, POST, PUT, DELETE using attributes or specialized annotations
Real-World Example: In an e-commerce application, @RequestMapping("/products") can map all product-related requests, and methods like @RequestMapping(value="/add", method=POST) handle adding a new product, while /list fetches all available products.
@RequestMapping Annotation at Method Level
Step 1: Create Dynamic Web Project
Create a Dynamic Web Project in STS/Eclipse.
- Go to File -> New -> Dynamic Web Project
- Set project name and select Apache Tomcat
- This sets up a basic web application structure
Step 2: Add Spring JAR Files
Add required Spring framework libraries.
- Download Spring JARs from repository
- Place them in /WEB-INF/lib
- Enables Spring MVC features in the project
Step 3: Configure Tomcat Server
- Go to Properties -> Targeted Runtimes
- Select Apache Tomcat
- Run project using Run on Server
The DispatcherServlet is the front controller in Spring MVC that routes incoming HTTP requests to the appropriate handler methods. Let’s configure it in the web.xml file.
Step 4: Configure web.xml
The DispatcherServlet is the front controller in Spring MVC that routes incoming HTTP requests to the appropriate handler methods. Let’s configure it in the web.xml file.
Go to the src/main/webapp/WEB-INF/web.xml file and add the following configuration:
<?xml version="1.0" encoding="UTF-8"?>
<web-app xmlns:xsi="https://www.w3.org/2001/XMLSchema-instance"
         xmlns="http://www.oracle.com/webfolder/technetwork/jsc/xml/ns/javaee/index.html"
         xsi:schemaLocation="http://www.oracle.com/webfolder/technetwork/jsc/xml/ns/javaee/index.html
                             http://www.oracle.com/webfolder/technetwork/jsc/xml/ns/javaee/index.html/web-app_4_0.xsd" id="WebApp_ID" version="4.0">

  <display-name>myfirst-mvc-project</display-name>
  <welcome-file-list>
    <welcome-file>index.html</welcome-file>
    <welcome-file>index.jsp</welcome-file>
    <welcome-file>index.htm</welcome-file>
    <welcome-file>default.html</welcome-file>
    <welcome-file>default.jsp</welcome-file>
    <welcome-file>default.htm</welcome-file>
  </welcome-file-list>

  <servlet>
      <!-- Provide a Servlet Name -->
    <servlet-name>frontcontroller-dispatcher</servlet-name>
    <!-- Provide a fully qualified path to the DispatcherServlet class -->
    <servlet-class>org.springframework.web.servlet.DispatcherServlet</servlet-class>
    <load-on-startup>1</load-on-startup>
  </servlet>

  <servlet-mapping>
      <!-- Provide a Servlet Name that you want to map -->
    <servlet-name>frontcontroller-dispatcher</servlet-name>
    <!-- Provide a URL pattern -->
    <url-pattern>/student.com/*</url-pattern>
  </servlet-mapping>

</web-app>
- The DispatcherServlet is mapped to /student.com/*, meaning all requests starting with /student.com/ will be handled by Spring MVC controllers.
- Spring automatically looks for a configuration file named frontcontroller-dispatcher-servlet.xml.
Step 5: Configure frontcontroller-dispatcher-servlet.xml
Go to the src/main/webapp/WEB-INF folder and create an XML file named frontcontroller-dispatcher-servlet.xml. Add the following configuration:
<?xml version="1.0" encoding="UTF-8"?>
<beans xmlns="http://www.springframework.org/schema/beans/"
       xmlns:xsi="https://www.w3.org/2001/XMLSchema-instance"
       xmlns:context="http://www.springframework.org/schema/context/"
       xsi:schemaLocation="http://www.springframework.org/schema/beans/
        https://www.springframework.org/schema/beans/spring-beans.xsd
        http://www.springframework.org/schema/context/
        https://www.springframework.org/schema/context/spring-context.xsd">

  <context:component-scan base-package="com.student.controllers"></context:component-scan>

</beans>
The component-scan ensures that Spring scans the com.student.controllers package for annotated classes.
Step 6: Create Controller Class
Create DemoController in specified package
- Annotate class with @Controller
- Defines it as a Spring MVC controller
package com.student.controllers;

import org.springframework.stereotype.Controller;
import org.springframework.web.bind.annotation.RequestMapping;
import org.springframework.web.bind.annotation.ResponseBody;

@Controller
public class DemoController {

    @ResponseBody
    @RequestMapping("/hello")
    public String helloWorld() {
        return "Hello World!";
    }
}
- The @RequestMapping("/hello") annotation maps the /hello URL to the helloWorld() method.
- The @ResponseBody annotation indicates that the return value of the method will be the response body.
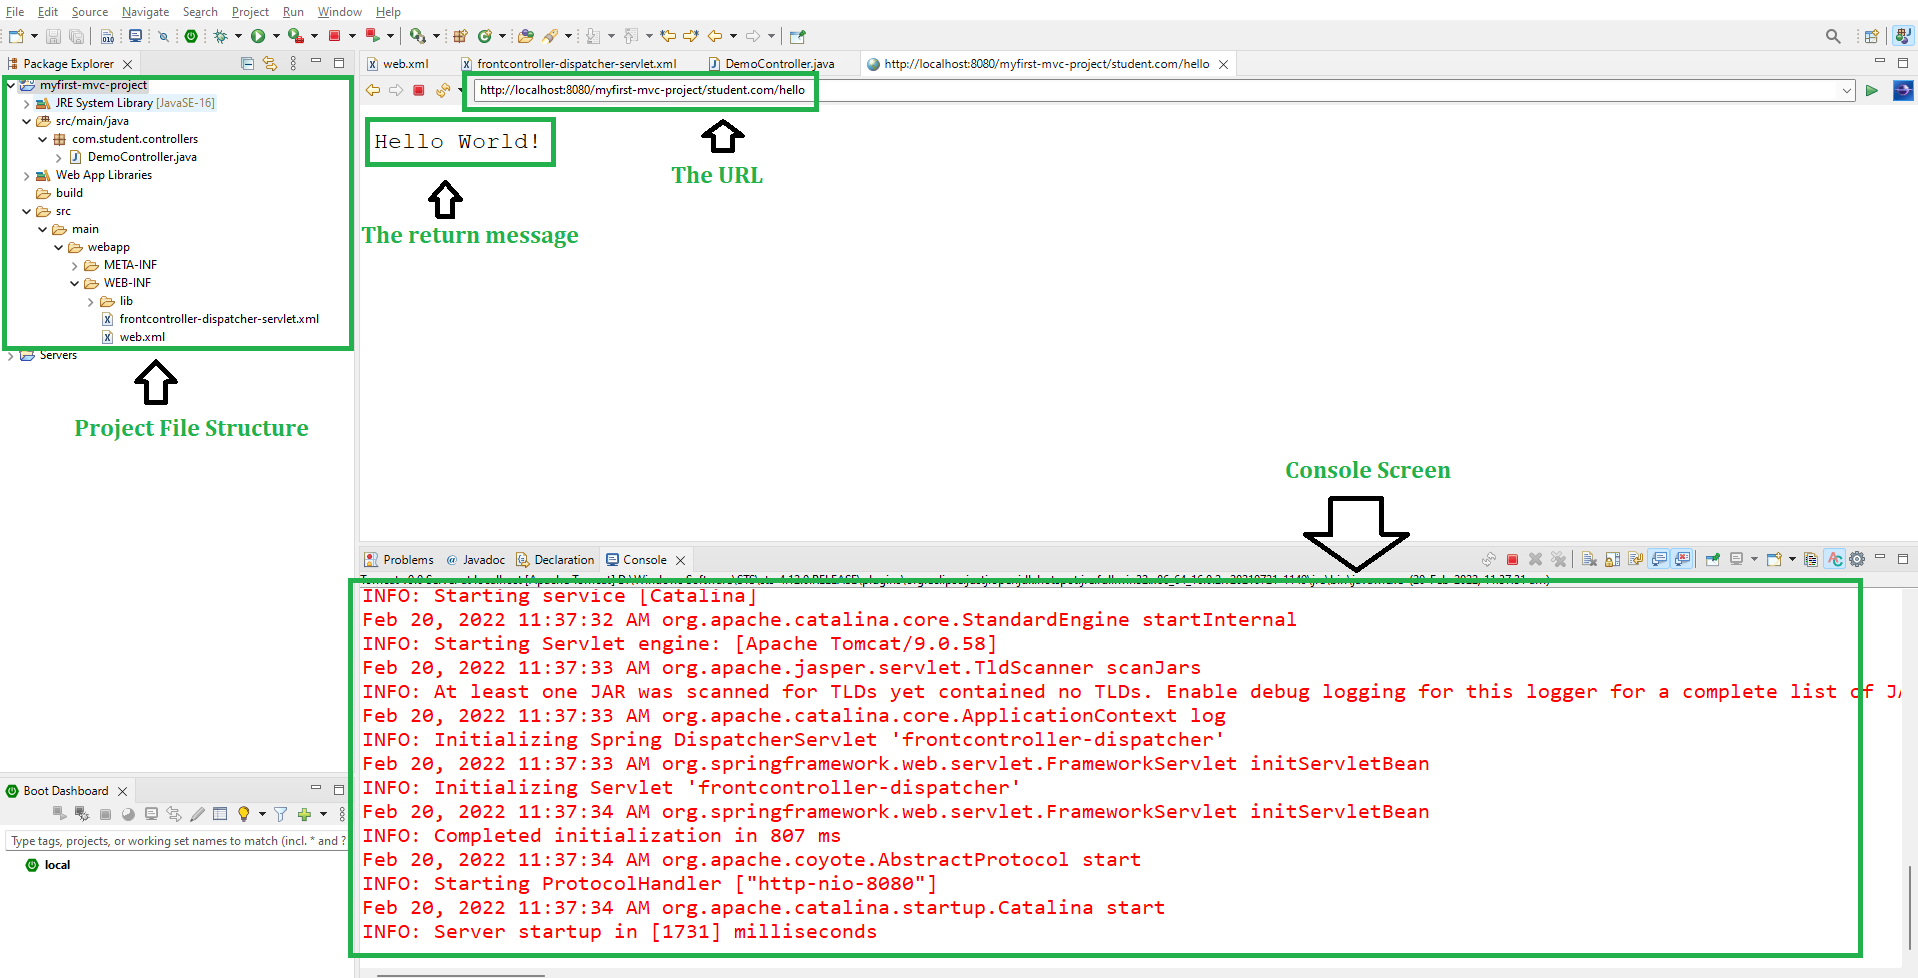
Step 7: Run the Application
Right-click on your project and select Run As > Run on Server.

Use the following URL to access the controller:
http://localhost:8080/myfirst-mvc-project/student.com/hello
Output:
The class-level @RequestMapping annotation maps a specific request path or pattern onto a controller. You can then apply additional method-level annotations to make mappings more specific to handler methods.
Multi-Action Controller
So in this example, we are going to create Multi-Action Controller. It's a Controller implementation that allows multiple request types to be handled by the same class. That means inside one controller class we can have many handler methods something like this.
Step 8 : Add Class-Level @RequestMapping
- Add
@RequestMapping("/boys")at class level - All methods inherit this base path
Step 9 : Add Multiple Handler Methods
Handle multiple requests in same controller.
- /boys/hello -> returns "Hello World!"
- /boys/geeksforgeeks -> returns welcome message
- Improves organization and reusability
package com.student.controllers;

import org.springframework.stereotype.Controller;
import org.springframework.web.bind.annotation.RequestMapping;
import org.springframework.web.bind.annotation.ResponseBody;

@Controller
@RequestMapping("/boys")
public class DemoController {

    @ResponseBody
    @RequestMapping("/hello")
    public String helloWorld() {
        return "Hello World!";
    }

    @ResponseBody
    @RequestMapping("/geeksforgeeks")
    public String welcomeGfgMessage() {
        return "Welcome to GeeksforGeeks";
    }
}
Step 10 : Test Updated URLs
Verify correct endpoint usage.
- Old URL /student.com/hello
- Correct URL /student.com/boys/hello
- /student.com/boys/geeksforgeeks
And now, if you use this "http://localhost:8080/myfirst-mvc-project/student.com/hello" URL to run your controller then you are going to get the following warning and there will be no response
WARNING: No mapping for GET /myfirst-mvc-project/student.com/hello
In order to run your controller, you have to hit the following URL
http://localhost:8080/myfirst-mvc-project/student.com/boys/hello
Similarly, for the welcomeGfgMessage() handler method, you have to hit the following URL
http://localhost:8080/myfirst-mvc-project/student.com/boys/geeksforgeeks