OneDrive is a cloud storage option that comes pre-installed in Windows 11, providing easy access to file storage and the ability to sync these files across devices. Nonetheless, not everyone requires or desires to utilize OneDrive, particularly if they opt for other cloud storage options. Removing OneDrive from Windows 11 can simplify your operating system and eliminate any unwanted background tasks. This instruction manual will guide you through the process of disabling OneDrive in Windows 11, offering a detailed solution for individuals looking to either disable or completely remove OneDrive from their devices. By adhering to these instructions, you can deactivate OneDrive and effectively manage your storage needs.
Disabling OneDrive most commonly involves unlinking OneDrive from the system. In this article, we'll discuss how to Disable OneDrive in Windows 11.
Table of Content
How to Disable OneDrive in Windows 11?
We can disable OneDrive in Windows either by temporarily disabling OneDrive syncing by turning off OneDrive or completely disabling it from Windows 11. We will see each method with a proper demonstration to disable OneDrive in Windows 11.
Method 1: Pause OneDrive in Windows 11
Pausing is the simplest way if the user wants OneDrive to stop backing up all the required files and folders. This temporarily stops OneDrive from uploading or downloading files. We need to follow the below-mentioned steps to pause OneDrive in Windows 11.
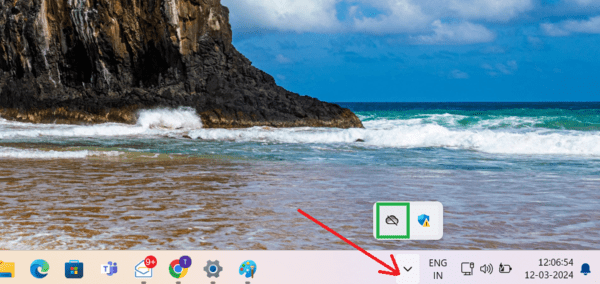
Step 1: On the Desktop, Select the small arrow icon and select OneDrive.
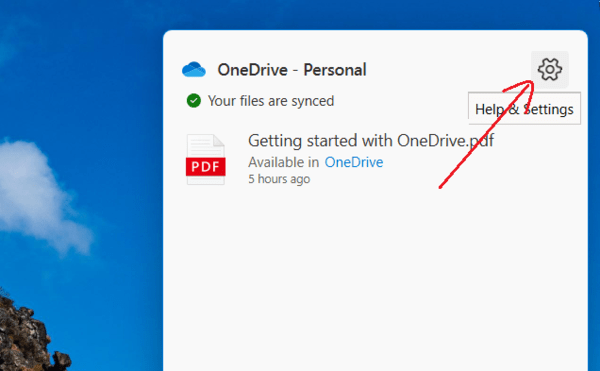
Step 2: Select Settings Cog > Pause Syncing
Step 3: Select the Duration of pause like 2, 8, or 24 hours.

Method 2: Turn Off OneDrive in Windows 11
To prevent OneDrive from operating while the system or computer is still on, users can shut it down properly. Users can restart the system or open the program to switch it back on the proper track. We need to follow the below-mentioned steps to turn off OneDrive in Windows 11.
Step 1: Select OneDrive Cloud > Settings
Step 2: Then, select Pause Syncing > Quit OneDrive. Users need to note that, one warning message for user permission.

Step 3: Select the Quite OneDrive Option to complete the process.

Method 3: Uninstall OneDrive in Windows 11
To stop backing the user's required files, the uninstall process is the most effective solution. We need to follow the below-mentioned steps to uninstall OneDrive in Windows 11.
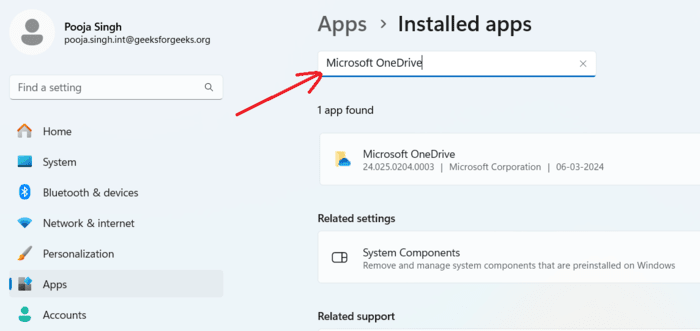
Step 1: Press the Windows key > type Add or Remove Programs

Step 2: From the list of installed applications, Search for Microsoft OneDrive either by scrolling or by typing in the search bar.
Step 3: Select the three-dot menu > Uninstall.

Step 4: A dialog box This app and its related info will be uninstalled will appear Select Uninstall again to Confirm.
Conclusion
Turning off OneDrive in Windows 11 is a simple procedure that lets you tailor your computer to fit your liking. Whether your aim is to halt OneDrive's background operations, remove it from the start-up list, or fully uninstall it, the instructions provided in this guide will assist you in reaching your objective. By adjusting your OneDrive options, you can improve your computer's speed and make sure your cloud storage meets your requirements. Should you choose to bring back OneDrive, you can effortlessly reinstall it and restore its features.