If you frequently use an external mouse or simply find the touchpad on your laptop more of a nuisance than a help, you might want to learn how to disable the touchpad on Windows 11. Whether it's accidental touches while typing or simply a preference for using a mouse, turning off the touchpad in Windows 11 can make your computing experience smoother. In this article, we'll walk you through the steps to easily disable the touchpad on Windows 11 and customize your device to suit your needs.
Table of Content
How to Disable the Touchpad on Windows 11?
Method 1: Disable Touchpad via Settings App
The Settings app in Windows 11 allows for an easy way to disable the touchpad in windows. Here's how you can do it:
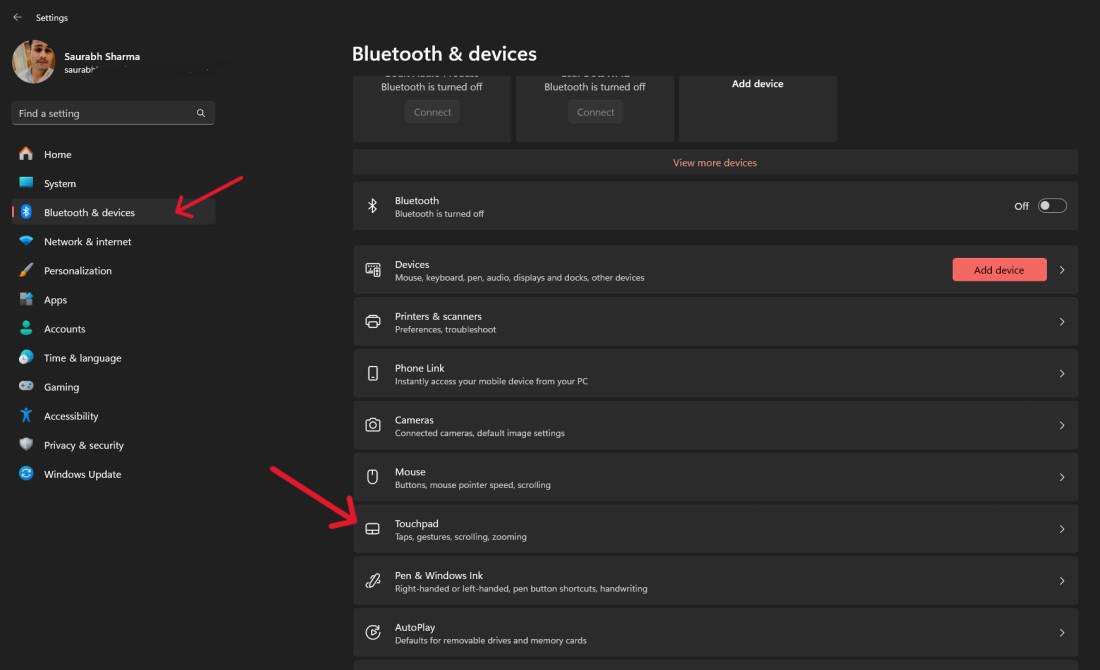
Step 1: Press Start and go to Settings (press Win + I to open it directly).
Step 2: Click "Touchpad" located on the right side and click "Bluetooth & devices” located on left side.
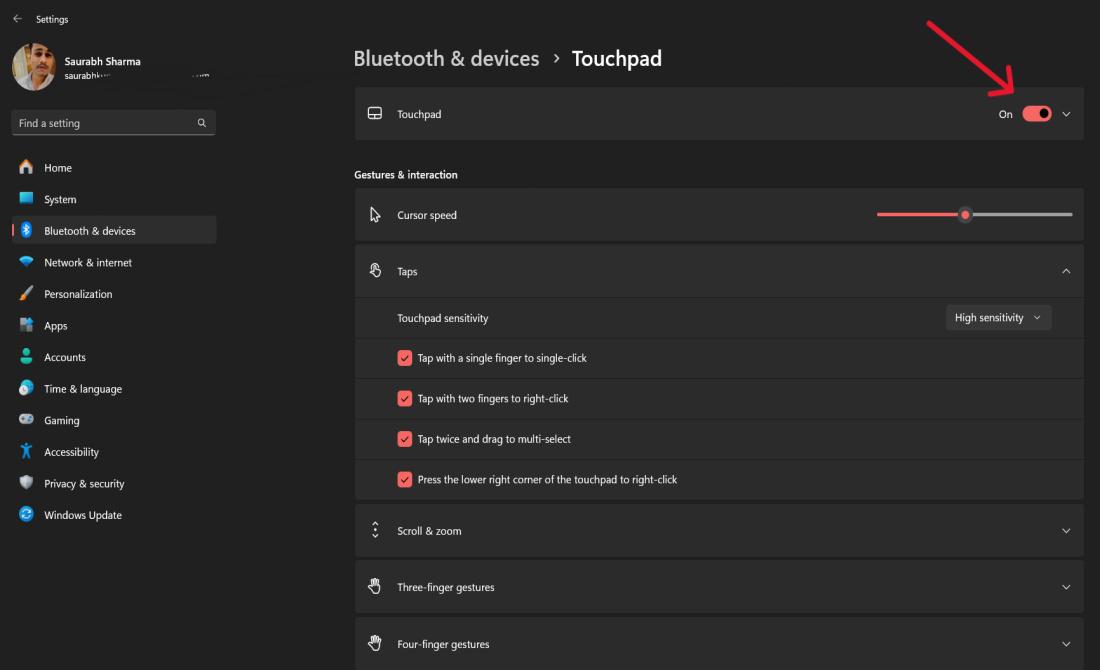
Step 3: After clicking the "Touchpad" section, and you'll see an option to toggle the touchpad on and off. Simply switch it off to disable the touchpad.
Method 2: Disable Touchpad via Control Panel
If you prefer the classic Control Panel, you can disable the touchpad in windows using these steps:
Step 1: Open Control Panel through right-click operation of Start Button. and by pressing together the Win + R on keysboard. Next, you type "control" and then press the enter key.
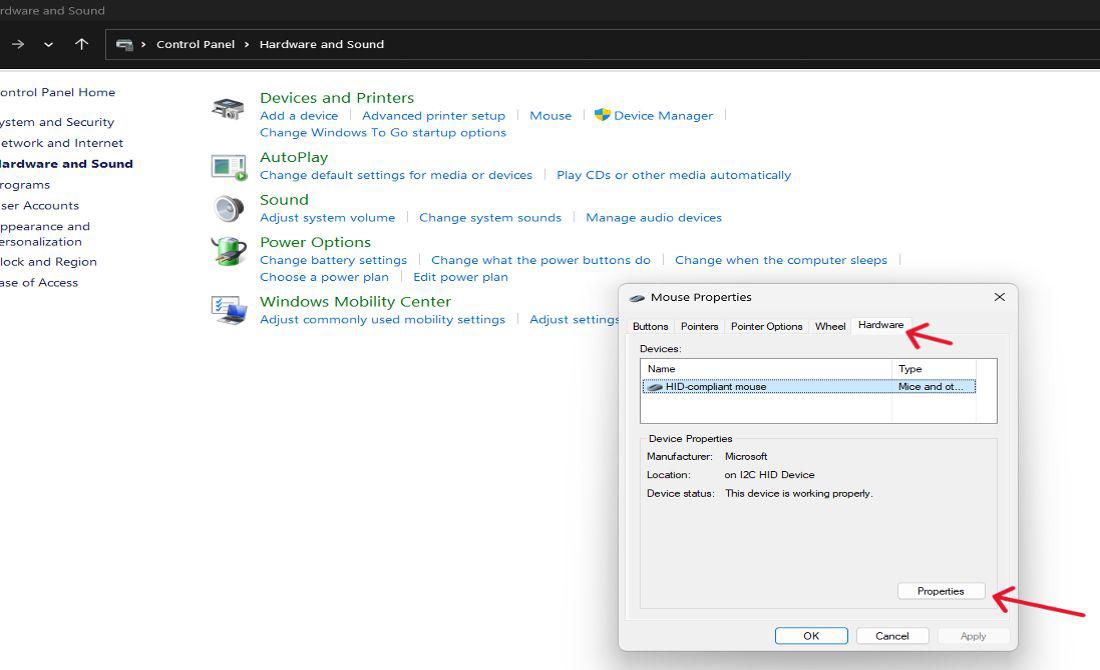
Step 2: Go to "Hardware and Sound", and the click on "Mouse" under the "Devices and Printers".
.png)
Step 3: Click the Properties button after choosing your touchpad from the list under the Hardware tab.
Step 4: Under the "General" Tab Click on "Change Setting" then a pop window will shown then click on YES button

Step 5: Under the "Driver" tab click on "Disable Device"

Step 6: A pop window will shown then click on Yes button to disable Touchpad
Method 3: Disable Touchpad via Device Manager
Device Manager provides a more detailed view of your system's hardware, and you can use it to disable the touchpad in windows:
Step 1: Select “Device manager” option by right-clicking on start button.
Step 2: Expand the “Mouse and Other Pointing Devices ” menu from the Device Manager Window.
Step 3: In order to disable this device, right click on (might label it as “HID-compliant touch pad”) and click on "Disable Device".
.png)
Method 4: Disable Touchpad Using Registry Editor
Discover how to disable your touchpad using the registry editor! In this guide, we'll show you a simple method to deactivate your touchpad using the Registry Editor. Whether you prefer using an external mouse or need to temporarily disable your touchpad, we'll walk you through the steps.
Step 1: Press Win + R to open the Run dialog, type "regedit," and press Enter to open the Registry Editor.
Step 2: In Registry Editor Navigate to
Computer\HKEY_CURRENT_USER\SOFTWARE\Microsoft\Windows\CurrentVersion\PrecisionTouchPad\StatusStep 3: Double click on Enabled then change Value data to 0 to disable touchpad

Step 4: Restart Your Windows laptop/pc
How to Activate Touchpad Without Using a Mouse?
Want to learn how to activate touchpad without using a mouse. In this guide, we'll show you how to activate your touchpad so you can navigate your computer easily, even without a mouse. Let's get started!
Step 1: Press the Win key to open search bar
Step 2: Type "Touchpad settings" then hit enter
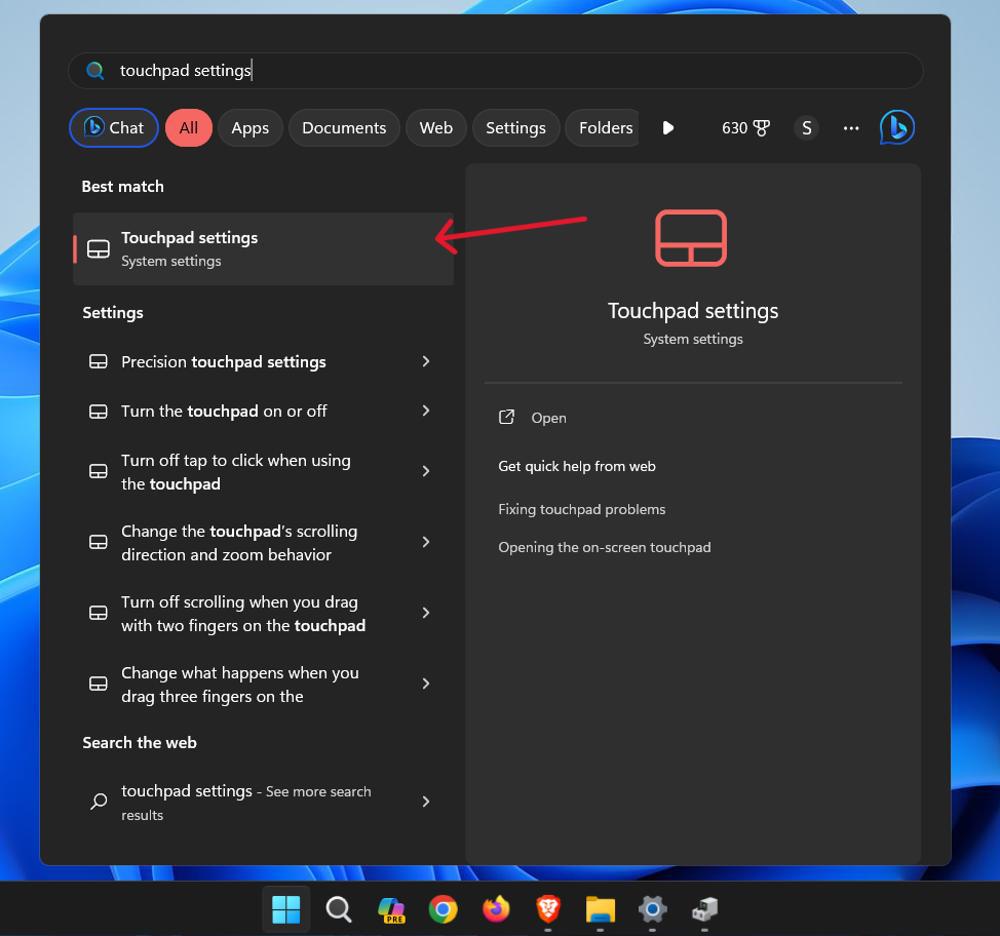
Step 3: Use the Tab key to navigate to the "Touchpad" toggle.
Conclusion
Knowing how to disable the touchpad on Windows 11 can greatly enhance your user experience, especially if you rely on an external mouse. With just a few clicks, you can turn off the touchpad in Windows 11 and avoid the frustration of unintended cursor movements. Whether you're working on important documents or simply browsing the web, disabling the touchpad allows you to work more efficiently on your laptop.