If you want to set up Windows 11 Remote Desktop, you're in the right place. The Remote Desktop feature on Windows 11 allows you to access and control your PC from another device, making it ideal for remote work or managing files from anywhere. This guide will walk you through enabling Remote Desktop on Windows 11, configuring the necessary settings, and ensuring a smooth connection process. With Windows 11 remote access, you can take control of your desktop without being physically present.
Table of Content
- How to Set Up Windows 11 Remote Desktop Access?
- Method 1: Set Up Windows 11 Remote Access using Windows Settings
- Method 2: Set Up Windows 11 Remote Access using Control Panel
- Method 3: Set Up Windows 11 Remote Access using Command Prompt
- Method 4: Set Up Windows 11 Remote Access using Windows Powershell
- How to Connect Two Devices Using Windows 11 Remote Desktop Access?
How to Set Up Windows 11 Remote Desktop Access?
The following guidelines should be followed to operate remote desktop access on Windows 11. We will start with the Windows Settings.
Method 1: Set Up Windows 11 Remote Access using Windows Settings
Step 1: Open Windows Settings & go for the Remote Desktop section.

Step 2: Enable the Button to start the system.
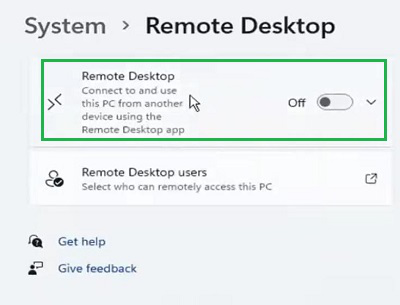
Hence, the Remote Desktop Access on Windows is started using the steps executed under the Windows Settings.
Method 2: Set Up Windows 11 Remote Access using Control Panel
Step 1: Open the Control Panel & select the System and Security option.

Step 2: Click on the Allow Remote Access option.

Step 3: Enable the button & press OK.

Congratulation! The Desktop Access By Remote on Windows can easily be created using a Control Panel.
Method 3: Set Up Windows 11 Remote Access using Command Prompt
Open Command Prompt & execute the following command to promptly open the Windows Remote Access Service.
Command: reg add "HKEY_LOCAL_MACHINE\SYSTEM\CurrentControlSet\Control\Terminal Server" /v fDenyTSConnections /t REG_DWORD /d 0 /f

Hooray! Using a simple Command on Command Prompt, the Remote Access System on Windows is now enabled.
Method 4: Set Up Windows 11 Remote Access using Windows Powershell
Open the Windows Powershell service & execute the following command. It will not show any output. But, the service will be enabled.
Command: Set-ItemProperty -Path 'HKLM:\System\CurrentControlSet\Control\Terminal Server' -name "fDenyTSConnections" -value 0

So, these are the methods needed to Execute Windows 11 Remote Desktop Access before starting the establish the connection with other devices.
How to Connect Two Devices Using Windows 11 Remote Desktop Access?
Step 1: Open the Remote Desktop Connection. And provide the IP Address of the device that should be shared. Click Connect.

Step 2: Click on Yes to move ahead in the process.

Conclusion
Setting up Windows 11 Remote Desktop is a straightforward process that enhances your ability to work remotely or provide technical support. By following the steps to configure Remote Desktop on Windows 11, you can easily access your PC from any location. This feature provides flexibility, convenience, and security for users who need remote control capabilities. Make sure to explore Remote Desktop settings on Windows 11 to customize your experience and make remote access as seamless as possible.