How to Create a Signature in Outlook: Quick Steps
- Open Outlook
- Click on File > Options > Mail > Signatures.
- Create New Signature >> Format your Signature
- Set Default Signature >> Save and Apply
Want to make your emails look professional and save time? Adding an email signature in Outlook allows you to automatically include your name, job title, company details, and even a logo in every email. Whether you’re using Outlook 365, Outlook Web, or the Outlook mobile app, this step-by-step guide will help you create, edit, and customize your email signature efficiently.
By the end of this tutorial, you’ll know how to add an image to an email Signature in Outlook, set up an automatic signature, and even insert a digital signature for secure emails.
How to Create Signature in Outlook 365
This method is perfect if you use Outlook in a browser (Outlook Web App - OWA). Follow the below steps to create an email signature in Outlook 365 Web:
Step 1: Sign In to Your Outlook 365 Account
- Open your web browser and Log in to Outlook 365.
- Enter your login credentials (email and password) to sign in to your Outlook 365 account.
Step 2: Access Settings
Once logged in, click the gear icon (⚙️) located in the upper-right corner of the screen to open the Settings menu.

Step 3: Search for Email Signature Settings
- In the Settings pane, type “Email signature” into the search box at the top.
- From the search results, click on Email signature to access the email signature settings.

Step 4: Create a New Signature
- In the Email signature section, click the + New signature button to create a new signature.
- Provide a name for your signature (e.g., "Personal Signature" or "Work Signature").
- In the text box, type the content for your signature, such as your name, job title, contact information, or any custom text. You can also format the text by adjusting the font, size, and color, or by adding images and hyperlinks.

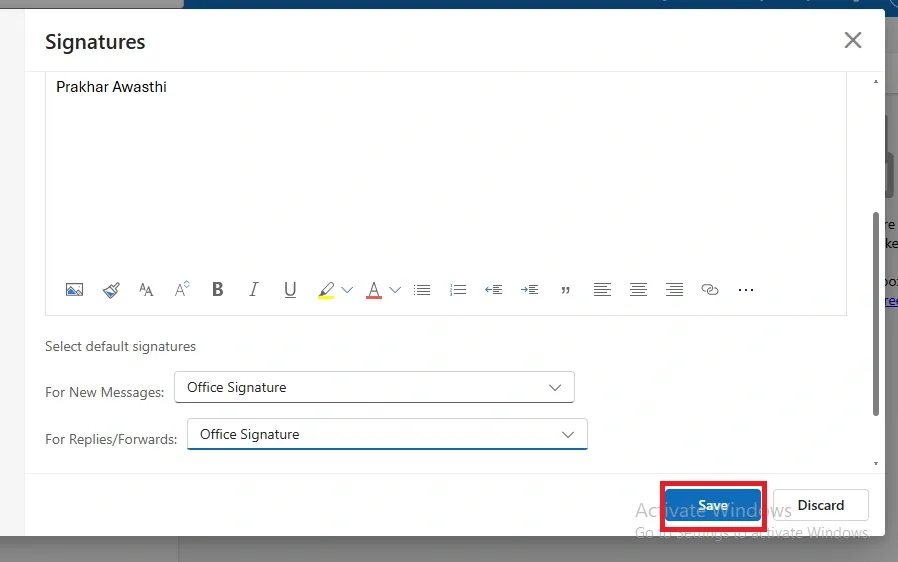
Step 5: Set Default Signature Options
Under the Choose default signature section, set your preferences for:
- New messages: Select which signature you want to automatically add to new emails.
- Replies/forwards: Choose whether you want the signature to appear in email replies and forwarded messages.

Step 6: Save Your Signature
After customizing your signature and setting the defaults, click Save to apply the changes.
Step 7: Start Using Your Signature
The next time you compose a new email or reply to an email, your signature will be automatically included based on your selected settings. You can also manually insert it by clicking Insert > Signature if needed.

Pro Tip: If your signature doesn’t appear automatically, manually insert it by clicking Insert > Signature while composing an email.
How to Set Up an Email Signature in Outlook (For Outlook 2016, 2019, and 2021)
To set up a signature in Outlook (all versions), follow the steps given below:
Step 1: Open Outlook
Launch the Outlook desktop app on your computer.
Step 2: Go to Signature Settings
Click File in the top menu and select Options. In the Mail category, find the Signatures button under the Compose messages section.
Step 3: Create a New Signature
- In the Signatures and Stationery window, click New.
- Enter a name for your signature (e.g., "Work Signature").
- Click OK to proceed.

Step 4: Edit Your Signature
- In the Edit signature box, type your desired signature text.
- Use the formatting tools to adjust the font, size, color, and style.
- Add images (such as a company logo) or hyperlinks if needed.

Step 5: Set Default Signature
Under Choose default signature, select:
- Email account: Choose the account for this signature.
- New messages: Set the signature for new emails.
- Replies/forwards: Select the signature for replies and forwarded emails if desired.
To automatically insert a signature in Outlook emails set the signature to Automatic from the drop-down.

Step 6: Save and Apply
- Click OK to save the signature settings.
- Click OK again in the Outlook Options window to apply the changes.

Step 7: Test Your Signature
- Open a New Email to check if your signature appears automatically.
- If it doesn’t, manually insert it by clicking Insert → Signatures → Select your signature.

For Outlook 2013 and Older Versions
The steps are mostly the same, but you can access the Signatures option by navigating to:
- Tools → Options → Mail Format → Signatures.
How to Add a Digital Signature in Outlook (For Secure Emails)
Follow the below steps to add a digital signature in outlook:
Step 1: Open Outlook
Launch Outlook on your computer and make sure you're signed in.
Step 2: Go to File Tab and Select Options
Click on the File tab in the top-left corner of Outlook. In the menu, click on Options to open the Outlook Options window.

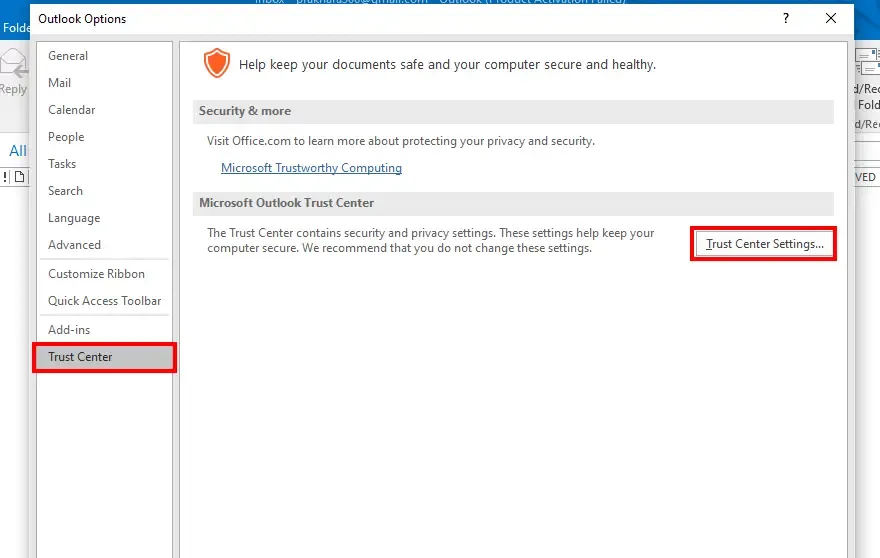
Step 3: Navigate to Trust Center and Choose Email Security
In the Outlook Options window, select Trust Center from the left-hand side menu, then click on Trust Center Settings. In the Trust Center window, select Email Security from the list.
Step 4: Set Up Digital ID (Certificate)
Under the Digital IDs (Certificates) section, click on Get a Digital ID if you don’t already have one. Follow the instructions to obtain a Digital ID (usually from a third-party certificate provider).
Step 5: Choose Signatures and Encryption Settings
Once you have a Digital ID, check "Add digital signature to outgoing messages" and enable "Encrypt contents and attachments for outgoing messages" if needed.

Step 6: Click OK and Save
Click OK to save your settings. Your digital signature is now set up.
Step 7: Sign an Email
When composing a new email, click on the Options tab, then click Sign to add the digital signature to your message before sending.
How to Add an Image to an Email Signature in Outlook (Desktop App)
To add a picture, such as a company logo or personal photo, to your Outlook email signature, follow these steps.
Step 1: Open Signature Settings
Open Outlook and click File in the top-left menu. Select Options, then go to the Mail category. Under the Compose messages section, click Signatures to open the signature settings.
Step 2: Select an Existing Signature
In the Signatures and Stationery window, choose the signature you want to edit from the list. Click inside the Edit signature box where you want the image to appear.
Step 3: Insert a Picture
Click the Insert Picture icon (🖼️) in the toolbar. Browse your computer to select the image file (JPG, PNG, or GIF formats work best). Once selected, click Insert to add the image to your signature.

Step 4: Save and Apply Changes
Under Choose default signature, make sure the correct email account is selected. Set the signature for New messages and Replies/forwards if required. Click OK to save the changes.
Step 5: Test Your Signature
Open a New Email in Outlook to check if the signature appears correctly with the image. If adjustments are needed, return to the Signatures settings and edit the placement as required.

Conclusion
Adding a professional email signature in Outlook is a simple yet effective way to personalize your emails, enhance your brand identity, and share important contact details. Whether you're using Outlook for Windows, Mac, iPhone, or Outlook 365, the process involves accessing the signature settings, creating or editing your signature, and setting it as the default for new messages and replies.
For those needing extra customization, Outlook allows you to add images, hyperlinks, and even digital signatures for security. By following the steps outlined in this guide, you can ensure that every email you send includes a well-formatted, professional signature that leaves a lasting impression.