Struggling to coordinate meetings and appointments? A shared calendar Outlook is the perfect solution for seamless scheduling. Whether you’re using Windows, Mac, Microsoft 365, or the Outlook Web App, you can easily share calendar from Outlook with colleagues, clients, or family, ensuring everyone stays updated.
In this guide, we’ll walk you through step-by-step instructions to share your Outlook calendar across different platforms, set permissions, and keep your schedule organized.
Table of Content
How to Share Your Outlook Calendar in Windows
This method is ideal for Outlook desktop users who want to share their schedule easily. Follow the below steps to share calendar in outlook:
Step 1: Open "Microsoft Outlook"
Locate the Outlook icon and click on it to launch the Outlook application on your Windows laptop.
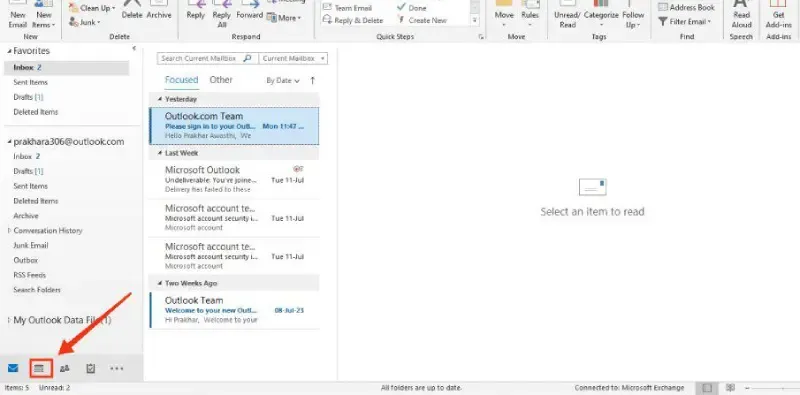
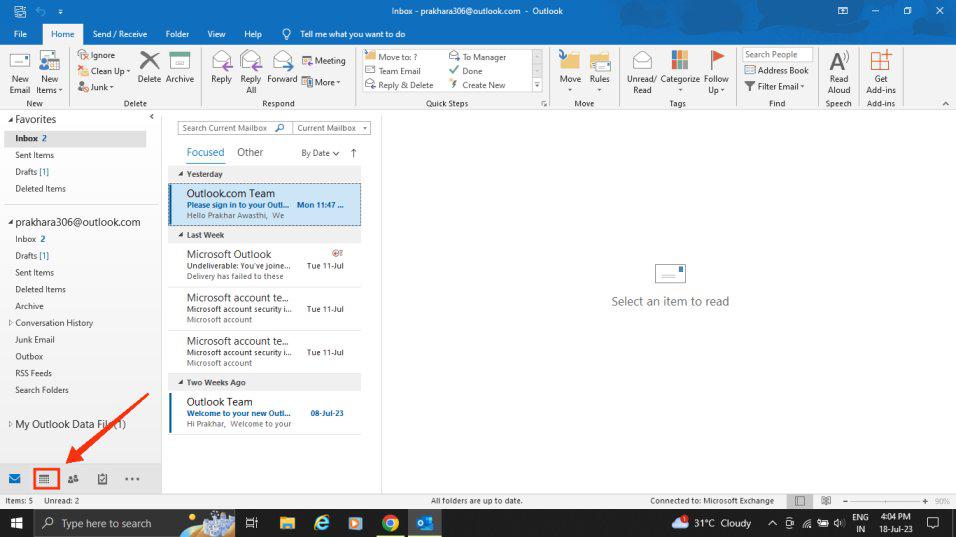
Step 2: Select the "Calendar" Icon
To access the calendar in Outlook, click on the Calendar icon located at the bottom left of the interface.
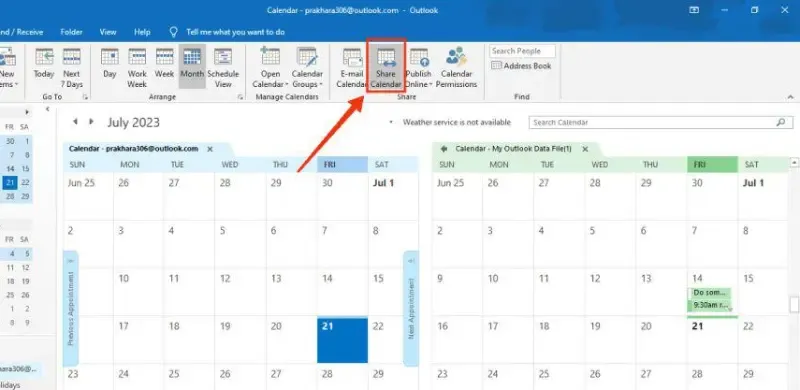
Step 3: Click Share Calendar
Now select the share calendar icon located in the home tab.
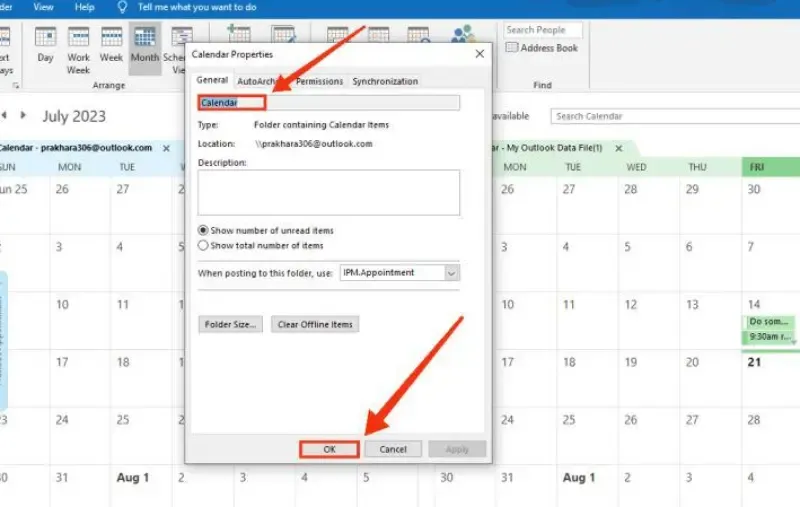
Step 4: Choose Calendar and Click Add
From the calendar properties dialog box choose calendar.
Step 5: Add People to Share with
Enter the email addresses of the recipients you want to share your calendar with.
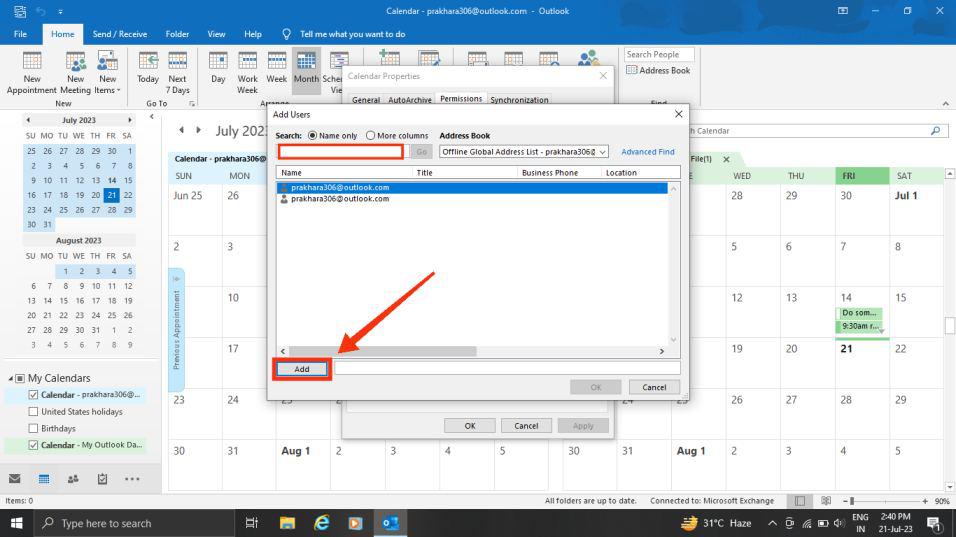
Step 6: Click on Calendar Permissions and Set Calendar Permissions
Now click on the "Calendar Permissions" tab to access the Permissions. Now, select the type of permission you wish to grant when sharing your calendar with specific individuals. Once you click "Ok," an email will be sent to notify the users with whom you've shared the calendar.
Typically, permissions in Microsoft Outlook are categorized into five types:
- Can view when I'm busy
- Can view titles and locations
- Can view all details
- Can edit
- Delegate

Step 6: Click "Send" to Share
Click "Send", and the recipients will receive an email invitation to access your calendar.
Your calendar is now shared! Recipients can view it under Shared Calendars in Outlook.
How to Share Your Outlook Calendar on Outlook Web
This method is perfect for Outlook Web users who want to share their calendar from any device without installing additional software. Follow the below steps to Share your outlook calendar on outlook web (Office 365 & Outlook.com).
Step 1: Log in to Outlook Web
Go to https://outlook.office.com/mail/ and sign in with your Microsoft account.
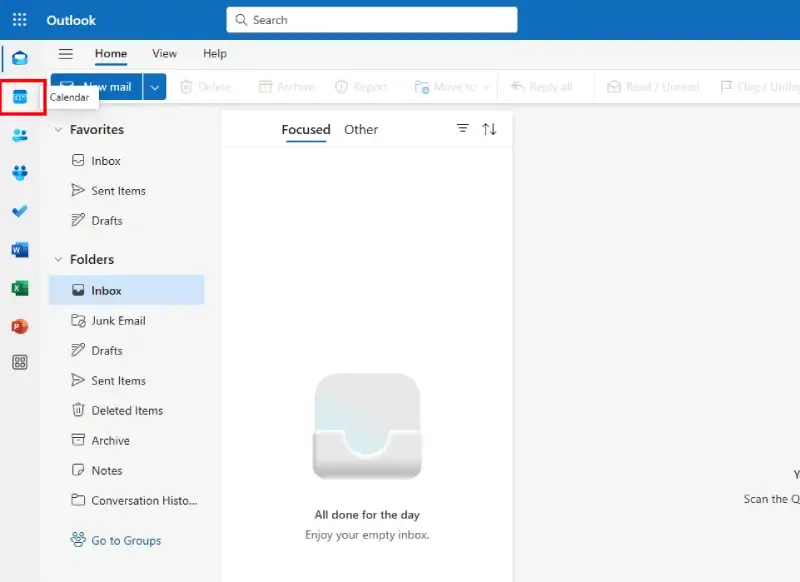
Step 2: Open Calendar
Click the Calendar icon in the left sidebar.
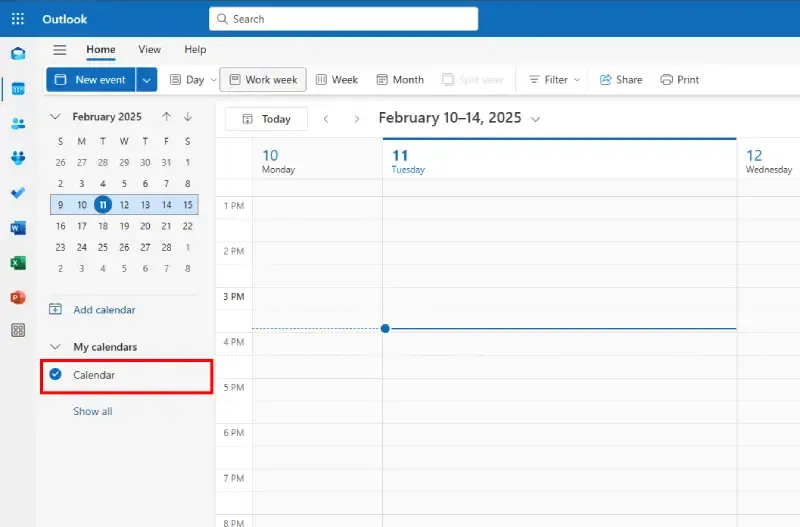
Step 3: Select the Calendar to Share
Click on the calendar you wish to share.
Step 4: Click "Share" and Add People
Click "Share" and enter the email addresses of the recipients.
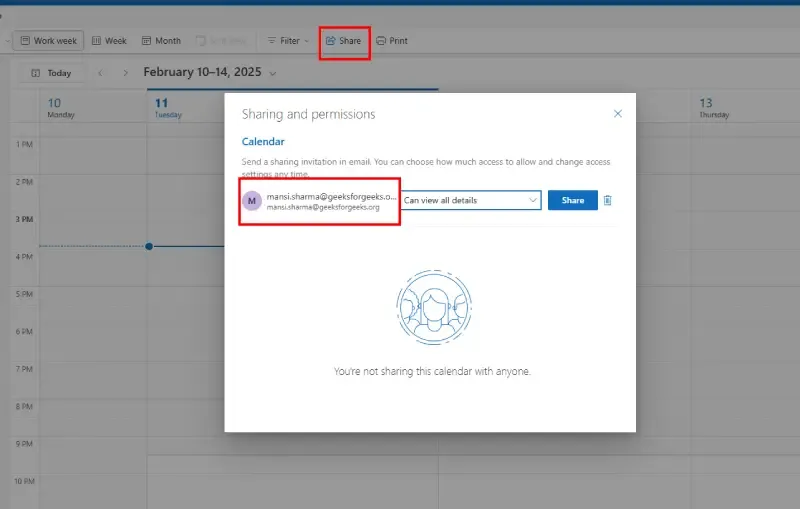
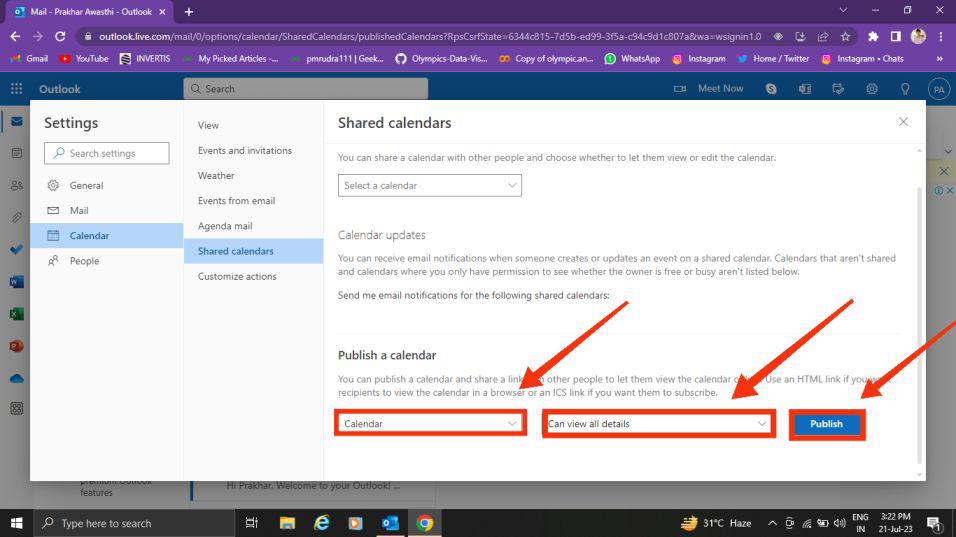
Step 5: Choose Permission Level
Select whether recipients can view only, edit, or fully manage your calendar.
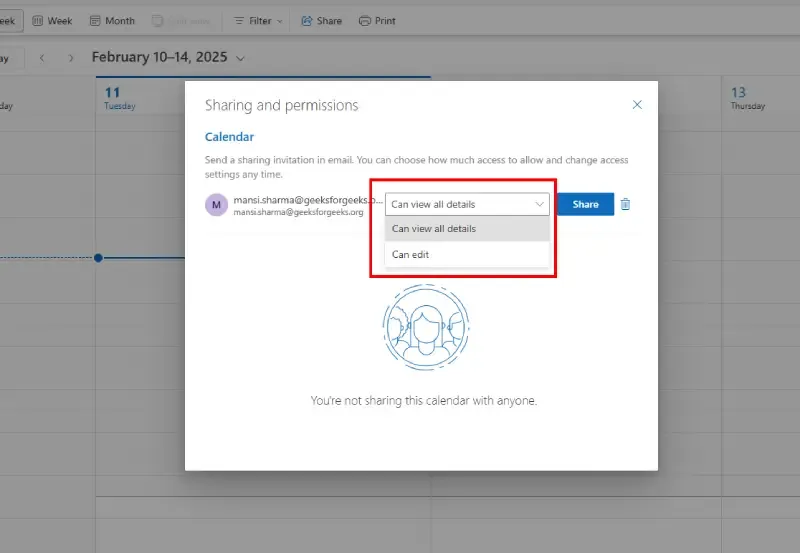
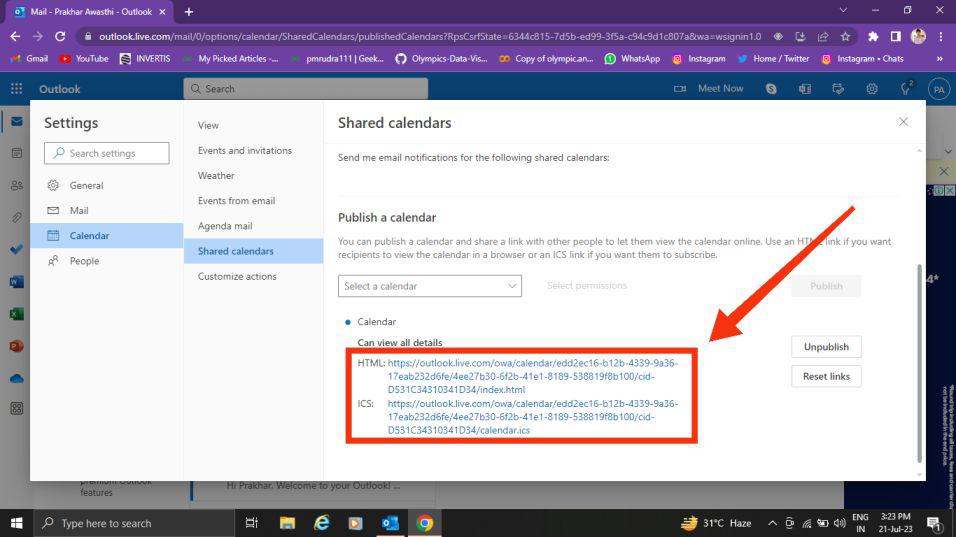
Step 6: Click "Share" to Send Invitation
Your calendar will now be shared, and the recipients will be notified via email.
How to Share Your Outlook Calendar on Mac
For Mac users, sharing your Outlook calendar is simple and helps streamline scheduling with colleagues or friends. Follow these steps to share your calendar seamlessly within the Outlook app.
Step 1: Open Outlook and Navigate to Calendar
Launch Outlook for Mac and click on the Calendar icon in the left navigation panel.
Step 2: Select the Calendar to Share
Choose the calendar you want to share, then click on "Share" from the top menu.
Step 3: Add Recipients
Enter the email addresses of the people you want to share your calendar with.
Step 4: Set Permissions
Select the desired permission level—allowing recipients to view, edit, or manage your calendar.
Step 5: Confirm and Share
Click "OK" to finalize the sharing process. Your calendar is now accessible to the selected recipients in their Outlook for Mac app.
Now, your colleagues or friends can easily view your schedule and stay updated!
How to Share your Outlook Calendar via Email
If you need to share a one-time snapshot of your schedule, sending your calendar via email is the best option. Follow the below steps to share your calendar in outlook via email:
Step 1: Open Outlook and Go to Calendar
To access the calendar in Outlook, click on the Calendar icon located at the bottom left of the interface.
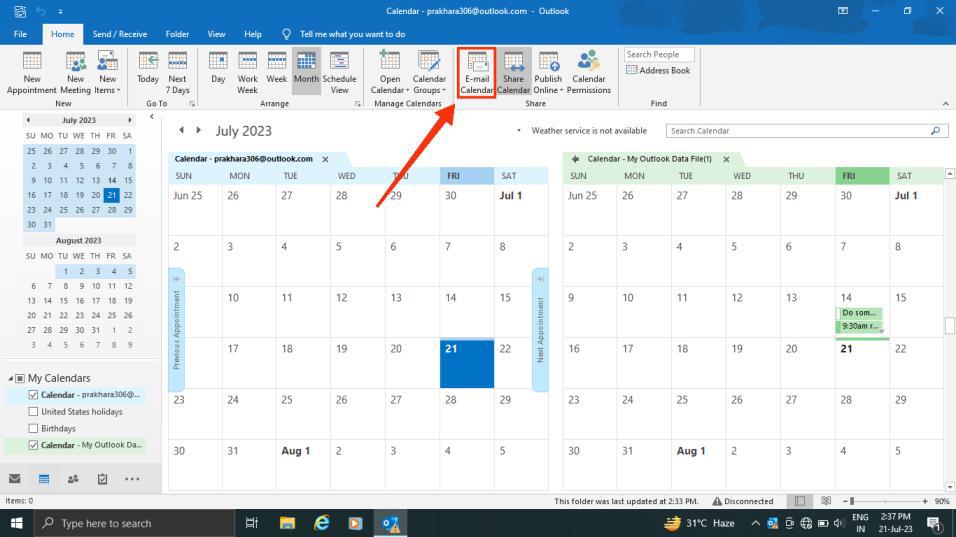
Step 2: Go to Home Tab and Click on E-mail Calendar
Now click on the Home tab and then click on the E-mail Calendar icon.
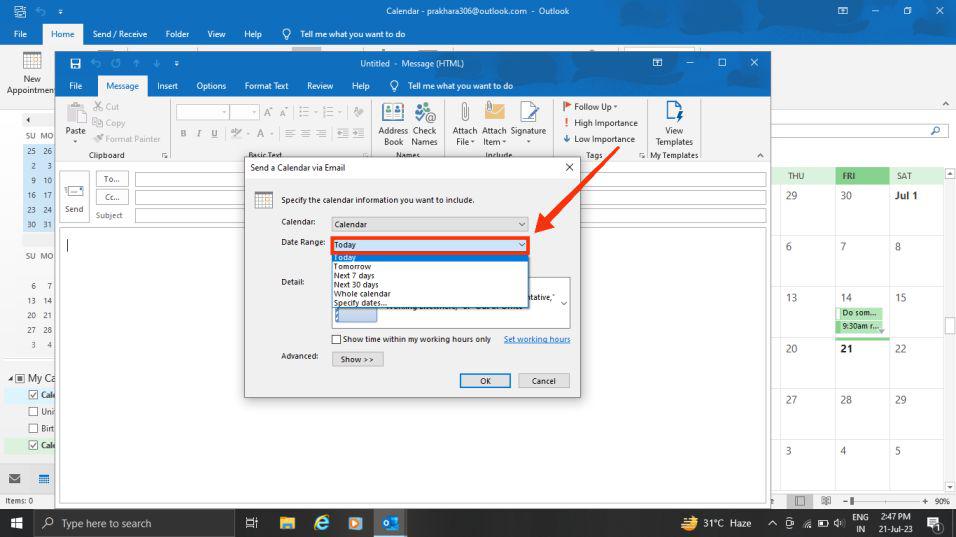
Step 3: Select Time Period
You are required to choose the time duration of your calendar that you wish to share.
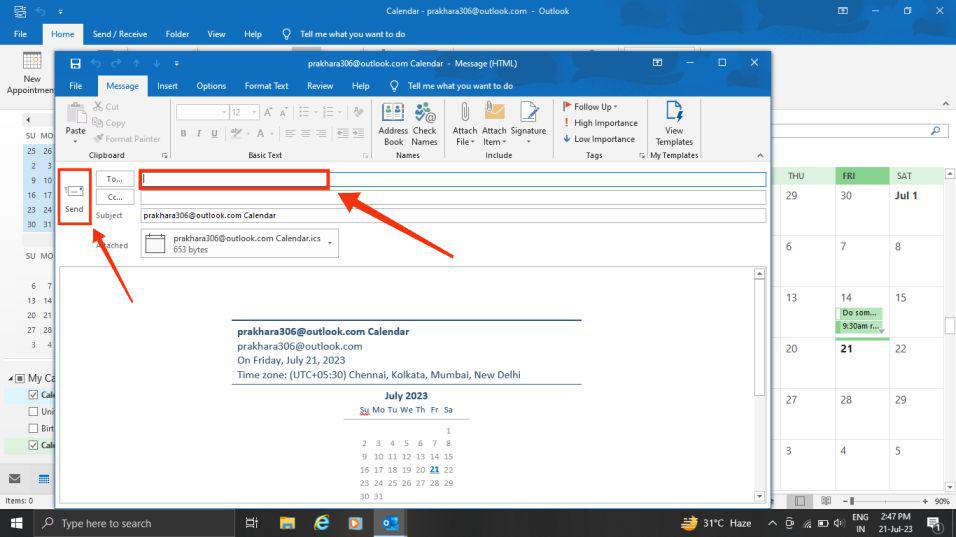
Step 4: Enter Recipient's Email and Click Send
Enter the username of the user you wish to share your calendar with, and then click the "Send" button.
Note: The recipient will be able to see a snapshot of your calendar inside the message you sent.
How to Share Your Outlook Calendar by Publishing
Learn how to publish your Outlook calendar online using a WebDAV server, making it accessible to others through a web page.
Note: If you are not sure that your server supports WebDAV? Your server administrator or internet service provider (ISP) should be able to tell you.
Step 1: Click Calendar
To access the calendar in Outlook, click on the Calendar icon located at the bottom left of the interface.
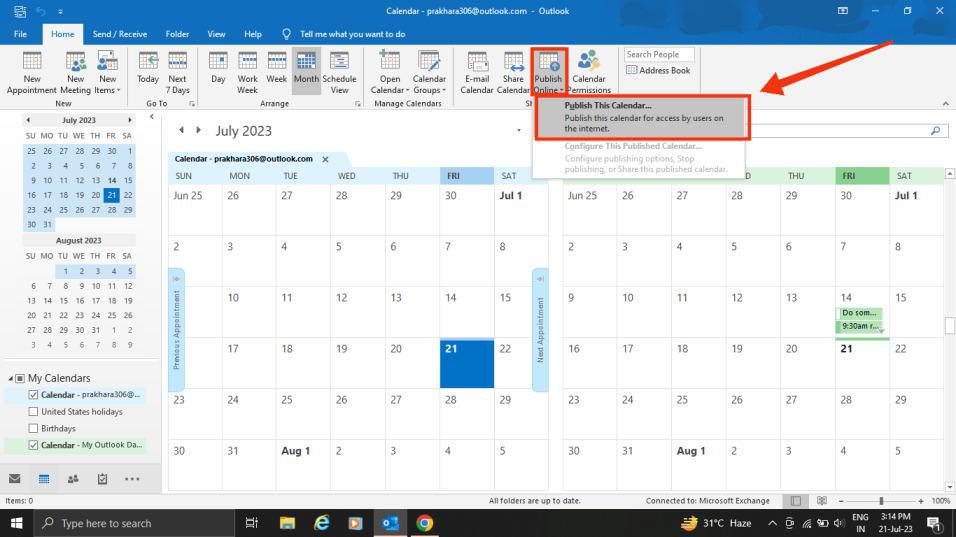
Step 2: Click Home and Select Publish Online
Select the Publish online icon located in the Home tab to publish your Calendar.
Step 3: Publish to WebDAV Server
Now, Publish it to WebDAV Server
Note: For Microsoft 365 users, publishing your calendar to a WebDAV server is still possible. However, before doing so, you need to remove {Anonymous: CalendarSharingFreeBusySimple} from the sharing policy. It's important to note that this action will prevent you from publishing your calendar in the future.
Step 4: Enter the Location of the WebDAV Server
In the Location box, enter the location of the WebDAV server, select any other publishing options you want, and then click Ok.
Conclusion
Sharing your Outlook calendar makes scheduling easier, improves collaboration, and helps avoid conflicts. Whether for work or personal planning, using a shared calendar Outlook ensures everyone stays updated. By following these steps, you can share calendar from Outlook, set permissions, and manage access with ease. Keep your Outlook mail schedule organized and streamline coordination across teams.
Start using Outlook’s shared calendar today for seamless scheduling and better time management!