Firebase is a powerful platform that offers a range of services to enhance our web application. From authentication to real-time database storage, Firebase provides everything you need to create a dynamic and engaging user experience.
In this guide, we will go through the process of setting up Firebase in a JavaScript project and integrating Firebase Authentication and Realtime Database into a simple web application.
Introduction to Firebase
Firebase offers a suite of services that can be integrated into our application such as:
- Authentication: It Securely authenticates users.
- Firestore and Realtime Database: It Store and syncs data in real-time.
- Cloud Storage: It stores and serves user-generated content.
- Cloud Functions: It Runs backend code in response to events.
- Firebase Hosting: It Hosts our web app.
Step 1: Set Up Your Firebase Project
Create a Firebase Project
- Go to Firebase Console: Navigate to the Firebase Console.
- Add a New Project:
- Click on "Add project."
- Enter your project name and configure Google Analytics (optional), and click "Create Project."
Register Your App
- Add Firebase to Your Web App:
- In the Firebase console, click on the Web icon (</>) to register your web app.
- Choose a name for your app and then click on "Register app."
- Firebase SDK Setup:
- Firebase will provide us with a code snippet to add to our project. This snippet includes our project's configuration.
Step 2: Set Up Your JavaScript Project
Let's Create a new directory for our project and follow it. Initialize a new Node.js project (if we are using Node.js) and install Firebase:
mkdir firebase-js-project
cd firebase-js-project
npm init -y
npm install firebase
Explanation: The above commands create a new directory named "firebase-js-project" navigate into it, initialize a new Node.js project with default settings, and then install the Firebase package as a dependency for the project.
Create the HTML Structure
Create an index.html file in your project directory with the following structure:
<!DOCTYPE html>
<html lang="en">
<head>
  <meta charset="UTF-8">
  <meta name="viewport" content="width=device-width, initial-scale=1.0">
  <title>Firebase JavaScript Project</title>
</head>
<body>
  <h1>Welcome to Firebase with JavaScript</h1>
  <div>
    <h2>Authentication</h2>
    <input type="email" id="email" placeholder="Email">
    <input type="password" id="password" placeholder="Password">
    <button onclick="signUp()">Sign Up</button>
    <button onclick="logIn()">Log In</button>
  </div>
  <div>
    <h2>Realtime Database</h2>
    <input type="text" id="message" placeholder="Message">
    <button onclick="sendMessage()">Send Message</button>
    <div id="messages"></div>
  </div>
  <script src="app.js"></script>
</body>
</html>
Output:
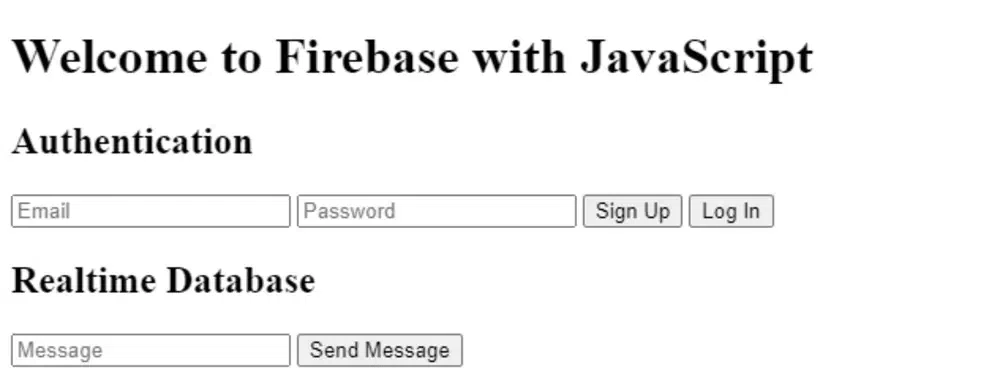
Explanation:
This is an HTML template for a web page that includes elements for user authentication (email, password inputs and sign-up/login buttons) and for interacting with a Firebase Realtime Database (input for sending messages and a display area for messages). The JavaScript file "app.js" is linked at the end for handling the functionality of these elements.
Add Firebase SDK to Your Project
Add the Firebase SDK to our project by including the provided Firebase configuration snippet in a firebase-config.js file:
// firebase-config.js
const firebaseConfig = {
  apiKey: "YOUR_API_KEY",
  authDomain: "YOUR_AUTH_DOMAIN",
  databaseURL: "YOUR_DATABASE_URL",
  projectId: "YOUR_PROJECT_ID",
  storageBucket: "YOUR_STORAGE_BUCKET",
  messagingSenderId: "YOUR_MESSAGING_SENDER_ID",
  appId: "YOUR_APP_ID"
};

// Initialize Firebase
firebase.initializeApp(firebaseConfig);
Create the Main JavaScript File
Create an app.js file to handle Firebase Authentication and Realtime Database interactions:
// app.js
import { initializeApp } from "firebase/app";
import { getAuth, createUserWithEmailAndPassword, signInWithEmailAndPassword } from "firebase/auth";
import { getDatabase, ref, set, push, onValue } from "firebase/database";
import firebaseConfig from './firebase-config.js';

// Initialize Firebase
const app = initializeApp(firebaseConfig);
const auth = getAuth(app);
const database = getDatabase(app);

// Authentication functions
function signUp() {
  const email = document.getElementById('email').value;
  const password = document.getElementById('password').value;
  createUserWithEmailAndPassword(auth, email, password)
    .then((userCredential) => {
      const user = userCredential.user;
      console.log('Sign Up Successful:', user);
    })
    .catch((error) => {
      console.error('Error signing up:', error.message);
    });
}

function logIn() {
  const email = document.getElementById('email').value;
  const password = document.getElementById('password').value;
  signInWithEmailAndPassword(auth, email, password)
    .then((userCredential) => {
      const user = userCredential.user;
      console.log('Log In Successful:', user);
    })
    .catch((error) => {
      console.error('Error logging in:', error.message);
    });
}

// Realtime Database functions
function sendMessage() {
  const message = document.getElementById('message').value;
  const messagesRef = ref(database, 'messages/');
  const newMessageRef = push(messagesRef);
  set(newMessageRef, {
    text: message
  });
  document.getElementById('message').value = '';
}

function displayMessages() {
  const messagesRef = ref(database, 'messages/');
  onValue(messagesRef, (snapshot) => {
    const messages = snapshot.val();
    const messagesDiv = document.getElementById('messages');
    messagesDiv.innerHTML = '';
    for (const key in messages) {
      const message = messages[key].text;
      const messageElement = document.createElement('p');
      messageElement.textContent = message;
      messagesDiv.appendChild(messageElement);
    }
  });
}

// Initialize display messages function
displayMessages();

// Expose functions to the global scope
window.signUp = signUp;
window.logIn = logIn;
window.sendMessage = sendMessage;
Explanation:
In the above code, The JavaScript file is used to interact with Firebase services, specifically Firebase Authentication and Firebase Realtime Database. It initializes Firebase using the provided configuration, sets up authentication functions for signing up and logging in users, and defines functions for sending and displaying messages in the real-time database. The functions are exposed to the global scope so they can be called from the HTML file.
Running the Project
To view your project, you can use a local server. If you have Node.js installed, you can use a simple HTTP server like http-server:
npm install -g http-server
http-server .
Explanation:
- The first command, npm install -g http-server, installs the http-server package globally on our system. This package provides a simple HTTP server that can serve static files from a directory.
- The second command, http-server, starts the http-serve in the current directory (`.`), which means it will serve files from the current directory.
- After running this command, we should see an output indicating that the server is running, along with information about the address and port where we can access the server (usually `http://localhost:8080`).
Step 3: Firebase Authentication
Firebase Authentication provides an easy way to handle user authentication with email/password, social media accounts, and more. In this step, we will focus on email/password authentication.
Sign Up Users
The signUp function creates a new user with email and password:
function signUp() {
  const email = document.getElementById('email').value;
  const password = document.getElementById('password').value;
  createUserWithEmailAndPassword(auth, email, password)
    .then((userCredential) => {
      const user = userCredential.user;
      console.log('Sign Up Successful:', user);
    })
    .catch((error) => {
      console.error('Error signing up:', error.message);
    });
}
Explanation: This signUp function is used to create a new user account using the Firebase Authentication service. It retrieves the email and password values from the input fields with the IDs `email` and `password`, respectively. Then, it calls the `createUserWithEmailAndPassword` method with these values to create a new user account. If the account creation is successful, it logs a success message to the console along with the user object. If there is an error during account creation, it logs an error message to the console.
Log In Users
The logIn function logs in a user with email and password:
function logIn() {
  const email = document.getElementById('email').value;
  const password = document.getElementById('password').value;
  signInWithEmailAndPassword(auth, email, password)
    .then((userCredential) => {
      const user = userCredential.user;
      console.log('Log In Successful:', user);
    })
    .catch((error) => {
      console.error('Error logging in:', error.message);
    });
}
Explanation: The `logIn` function is used to authenticate a user with Firebase Authentication using their email and password. It retrieves the email and password values from the input fields with the IDs `email` and `password`, respectively. Then, it calls the `signInWithEmailAndPassword` method with these values to authenticate the user. If the authentication is successful, it logs a success message to the console along with the user object. If there is an error during authentication, it logs an error message to the console.
Step 4: Firebase Realtime Database
Firebase Realtime Database allows you to store and sync data in real-time. Let's add functionality to send and display messages.
Sending Messages
The sendMessage function adds a new message to the database:
function sendMessage() {
  const message = document.getElementById('message').value;
  const messagesRef = ref(database, 'messages/');
  const newMessageRef = push(messagesRef);
  set(newMessageRef, {
    text: message
  });
  document.getElementById('message').value = '';
}
Explanation: The `sendMessage` function is used to send a message to the Firebase Realtime Database. It first retrieves the message content from an input field with the ID `message`. Then, it creates a reference to the `messages/` node in the database using the `ref` function. It generates a new unique key for the message using `push` and creates a new child node under `messages/` with this key. The message content is set as the value of this new node. Finally, it clears the input field to prepare for the next message.
Displaying Messages
The displayMessages function listens for changes in the database and updates the UI:
function displayMessages() {
  const messagesRef = ref(database, 'messages/');
  onValue(messagesRef, (snapshot) => {
    const messages = snapshot.val();
    const messagesDiv = document.getElementById('messages');
    messagesDiv.innerHTML = '';
    for (const key in messages) {
      const message = messages[key].text;
      const messageElement = document.createElement('p');
      messageElement.textContent = message;
      messagesDiv.appendChild(messageElement);
    }
  });
}

// Initialize display messages function
displayMessages();
Explanation: The `displayMessages` function fetches and displays messages stored in the Firebase Realtime Database. It first creates a reference to the `messages/` node, then listens for changes to this node using `onValue`. When data changes, it retrieves the updated messages, clears the existing messages displayed in the `messagesDiv`, and appends each message as a paragraph element to the `messagesDiv`. Finally, it initializes the function to display messages when the page loads.
Conclusion
Overall, Firebase services, including Authentication, Firestore, Realtime Database, Cloud Storage, Cloud Functions and Hosting provide developers with a comprehensive toolkit for building modern web applications. By following the steps outlined in this guide, you can easily set up Firebase in your JavaScript project and using its features to create a seamless and interactive user experience. Whether you are looking to add user authentication or real-time data syncing, Firebase has you covered with its easy-to-use APIs and powerful functionality.
Similar Reads
Setting up Firebase Hosting in your project
Firebase Hosting is a service by Google that allows you to host your web app quickly and securely. This article will guide you through the process of setting up Firebase Hosting for your project, from installing the necessary tools to deploying your app. By the end of this article, you'll have a liv
5 min read
Top 5 JavaScript Projects For Beginners on GFG
JavaScript, which is also known as JS, is an object-oriented programming language and is best known as the scripting language for Web pages. It was originally created to make web pages alive. JavaScript is a high-level programming language. It is very lightweight and is commonly used as a part of we
3 min read
How to Deploy React project on Firebase?
When developing any project we must host it somewhere so that the whole world can see our hard-work. Hosting websites can be hectic sometimes, but you don't need to worry as we can now host our React project on Firebase within a minute or two with a very simple setup. The Steps to deploy react proje
2 min read
How to use a jQuery library in your project ?
In this article, we will see how to use the jQuery library in a project. There are two methods to add a jQuery library to a project which are Include jQuery library from CDN linkDownload the jQuery library from the official website Include jQuery library from CDN link: CDN stands for Content Deliv
2 min read
How do you Run JavaScript Through the Terminal?
Running JavaScript through the terminal can be done in a few different ways, depending on your environment. Here are the most common methods:Note- First you need to install Node.js to run JavaScript through the terminal1. Running JavaScript Directly in the Terminal (REPL Mode)Once Node.js is install
2 min read
How to share code between files in JavaScript ?
JavaScript is a powerful and popular programming language that is widely used for web development. One of the key features of JavaScript is its ability to share code between files. This can be useful for organizing large projects, reusing code, and maintaining code quality. In this article, we'll se
6 min read
Differece between JavaScript Modules & NgModule
Modules play an important role in structuring and organizing the code of Javascript and Angular.js. They help us to use the code efficiently. Majorly NgModule in Angular.js and Modules in Javascript are widely used in different scenarios. In this article, We will learn about Modules and their import
5 min read
How to Run JavaScript in Visual Studio?
To run JavaScript in Visual Studio, you can either use Node.js in the Terminal or the Code Runner extension. Both methods allow you to execute JavaScript code easily and efficiently within the Visual Studio environment.Using Node.js in TerminalNode.js is a JavaScript runtime that allows you to execu
2 min read
How to Use Embedded JavaScript (EJS) as a Template Engine in Express JS ?
Embedded JavaScript (EJS) is a simple templating language that helps us to generate HTML markup with plain JavaScript. It's commonly used with Node.js to create dynamic web pages. It also helps to incorporate JavaScript into HTML pages. Approach to use EJS as Template Engine in Express JS:Install EJ
2 min read
How to Access EJS Variable in Javascript Logic ?
EJS stands for Embedded JavaScript. It is a templating language used to generate dynamic HTML pages with data from the server by embedding JavaScript code. Features of EJSDynamic Content: Based on data from servers or other sources, we can generate a dynamic HTML template.Partial Templates: Partials
3 min read