Authentication and Authorization with OAuth
Last Updated :
28 Jul, 2024
OAuth (Open Authorization) is the open standard for token-based authentication and authorization on the Internet. It can allow third-party services to exchange information without exposing the user credentials. In this article, we will guide you on how to implement the OAuth in the MERN stack application.
What is OAuth?
OAuth can be defined as Open Authorization. It is an open standard for the access delegation commonly used to grant websites or applications limited access to the user information without exposing the passwords. It can allow third-party services to exchange information on behalf of the user and enable seamless integration between the different services.
Key Components
- Resource Owner: The person who authorizes the application to access their account.
- Client: The application requesting access to the user account.
- Authorization Server: The server that can authenticate the user and issue the access tokens.
- Resource Server: The server that holds the user's resources and accepts the token for the resource requests.
1. OAuth 1.0a
It is the protocal that enables the applications to access the resources on behalf of the users. It can be known for its complexity and the need for the cryptographic methods of the application.
Use Case: It can rarely used due to its complexity.
2. OAuth 2.0
It can be simplifies the authentication process and widely adapted. It can allows for the secure API authorization and enables the access token for resources.
Use Case: Most commonly used for the integrating third party authentication providers like Google, Facebook etc.
3. OpenID Connect
The layer built on the top of OAuth 2.o for handling the user authentication. It can providers the user information through the ID tokens.
Use Case: It can be used for the both authentication and authorization.
Implementing the Authentication and Authorization with OAuth in MERN
Step 1: Initialize the Project
We can use the below command to initialize the MERN project.
npm init -y
Step 2: Install the Required Backend Dependencies
We can install the following required dependencies into the project.
- Express
- Mongoose
- dotenv
- passport
- passport-google-oauth20
- jsonwebtoken
- bcryptjs
We can use the below command to installed the dependencies.
npm install express mongoose dotenv passport passport-google-oauth20 jsonwebtoken bcryptjs
Dev Dependencies
npm install --save-dev nodemon
Backend Folder Structure
 Backend Folder Structure
Step 3: Backend Configuration
1. Create the .env file
MONGO_URI=mongodb://localhost:27017/authdatabase
JWT_SECRET=your_jwt_secret
GOOGLE_CLIENT_ID=66985898397-qaatut41pc4fqk931dsvmnaj7om2o2v3.apps.googleusercontent.com
GOOGLE_CLIENT_SECRET=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
2. Dependencies
"dependencies": {
    "bcryptjs": "^2.4.3",
    "connect-mongo": "^5.1.0",
    "cors": "^2.8.5",
    "dotenv": "^16.4.5",
    "express": "^4.19.2",
    "express-session": "^1.18.0",
    "jsonwebtoken": "^9.0.2",
    "mongoose": "^8.4.4",
    "passport": "^0.7.0",
    "passport-google-oauth20": "^2.0.0"
  },
"devDependencies": {
    "nodemon": "^3.1.4"
  }
Backend Code Implementation
JavaScript
//server.js

const express = require("express");
const mongoose = require("mongoose");
const dotenv = require("dotenv");
const passport = require("passport");
const session = require("express-session");
const MongoStore = require("connect-mongo");
const cors = require("cors");
const path = require("path");
const authRoutes = require("./routes/auth");

// Load environment variables
dotenv.config();

// Passport configuration
require("./config/passport");

// Initialize the app
const app = express();

// Middleware
app.use(express.json());
app.use(cors({ origin: "http://localhost:3000", credentials: true }));

app.use(
    session({
        secret:
            "9e961769c4d12f1e3e9f354250ba1a6ce430bbd7d041312356caaa9c1a91a7ad4c6166219c8d06e48ed4825a3f7f065ab6fcdeaab1f35e489e9a1ea7389fdca2",
        resave: false,
        saveUninitialized: false,
        store: MongoStore.create({ mongoUrl: process.env.MONGO_URI }),
    })
);

// Passport middleware
app.use(passport.initialize());
app.use(passport.session());

// MongoDB connection
mongoose
    .connect(process.env.MONGO_URI, {
        useNewUrlParser: true,
        useUnifiedTopology: true,
    })
    .then(() => console.log("MongoDB connected"))
    .catch((err) => console.log(err));

// Routes
app.use("/auth", authRoutes);

// Serve static files from the React frontend app
app.use(express.static(path.join(__dirname, "client/build")));

// Anything that doesn't match the above routes, send back index.html
app.get("*", (req, res) => {
    res.sendFile(path.join(__dirname + "/client/build/index.html"));
});

const PORT = process.env.PORT || 5000;
app.listen(PORT, () => console.log(`Server running on port ${PORT}`));
// config/passport.js

const passport = require("passport");
const GoogleStrategy = require("passport-google-oauth20").Strategy;
const mongoose = require("mongoose");
const User = require("../models/User");

passport.serializeUser((user, done) => {
    done(null, user.id);
});

passport.deserializeUser(async (id, done) => {
    try {
        const user = await User.findById(id);
        done(null, user);
    } catch (err) {
        done(err, null);
    }
});

passport.use(
    new GoogleStrategy(
        {
            clientID: process.env.GOOGLE_CLIENT_ID,
            clientSecret: process.env.GOOGLE_CLIENT_SECRET,
            callbackURL: "http://localhost:5000/auth/google/callback",
        },
        async (accessToken, refreshToken, profile, done) => {
            try {
                const existingUser = await User.findOne({ googleId: profile.id });
                if (existingUser) {
                    return done(null, existingUser);
                }
                const user = new User({ googleId: profile.id });
                await user.save();
                done(null, user);
            } catch (err) {
                done(err, null);
            }
        }
    )
);
// models/user.js

const mongoose = require('mongoose');
const { Schema } = mongoose;

const userSchema = new Schema({
    googleId: String
});

module.exports = mongoose.model('User', userSchema);
// routes/auth.js

const express = require("express");
const passport = require("passport");
const router = express.Router();

// Google OAuth routes
router.get(
    "/google",
    passport.authenticate("google", {
        scope: ["profile", "email"],
    })
);

router.get(
    "/google/callback",
    passport.authenticate("google", { failureRedirect: "/login" }),
    (req, res) => {
        res.redirect("/home");
    }
);

// Check authentication status
router.get("/current_user", (req, res) => {
    res.send(req.user);
});

// Logout
router.get("/logout", (req, res) => {
    req.logout((err) => {
        if (err) {
            return next(err);
        }
        res.redirect("/");
    });
});

module.exports = router;
Steps for Frontend React Project
We can use the below command to create the react project and also required dependencies.
npx create-react-app frontend
cd frontend
npm install axios react-router-dom
Folder Structure
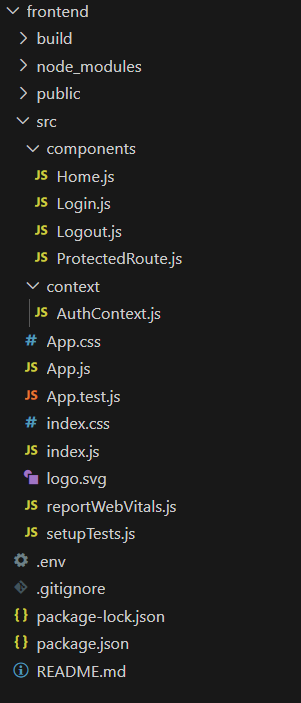 Frontend Folder Structire
Step 4: React Frontend Configuration
1. Create the .env File
REACT_APP_API_URL=http://localhost:5000
2. Dependencies Package.json
"dependencies": {
    "@testing-library/jest-dom": "^5.17.0",
    "@testing-library/react": "^13.4.0",
    "@testing-library/user-event": "^13.5.0",
    "axios": "^1.7.2",
    "react": "^18.3.1",
    "react-dom": "^18.3.1",
    "react-router-dom": "^6.24.1",
    "react-scripts": "5.0.1",
    "styled-components": "^6.1.11",
    "web-vitals": "^2.1.4"
}
3. Frontend Code Implementation
JavaScript
//context/AuthContext.js

import React, { createContext, useState, useEffect } from "react";
import axios from "axios";

const AuthContext = createContext();

const AuthProvider = ({ children }) => {
    const [user, setUser] = useState(null);

    useEffect(() => {
        const fetchUser = async () => {
            try {
                const res = await axios.get(
                    `${process.env.REACT_APP_API_URL}/auth/current_user`,
                    { withCredentials: true }
                );
                setUser(res.data);
            } catch (err) {
                console.log("Not authenticated");
            }
        };
        fetchUser();
    }, []);

    return (
        <AuthContext.Provider value={{ user, setUser }}>
            {children}
        </AuthContext.Provider>
    );
};

export { AuthProvider, AuthContext };
// components/Home.js

import React from "react";
import Logout from "./Logout";

const Home = () => {
    return (
        <div>
            <h1>Welcome to the Home Page</h1>
            <Logout />
        </div>
    );
};

export default Home;
//component/Login.js

import React, { useContext, useEffect } from "react";
import { useNavigate } from "react-router-dom";
import { AuthContext } from "../context/AuthContext";

const Login = () => {
    const navigate = useNavigate();
    const { user } = useContext(AuthContext);

    useEffect(() => {
        if (user) {
            navigate("/home");
        }
    }, [user, navigate]);

    const googleLogin = () => {
        window.open(`${process.env.REACT_APP_API_URL}/auth/google`, "_self");
    };

    return (
        <div>
            <h1>MERN OAuth Example Project</h1>
            <button onClick={googleLogin}>Login with Google</button>
        </div>
    );
};

export default Login;
//component/Logout.js

import React, { useContext } from "react";
import { AuthContext } from "../context/AuthContext";
import axios from "axios";

const Logout = () => {
    const { setUser } = useContext(AuthContext);

    const handleLogout = async () => {
        await axios.get(`${process.env.REACT_APP_API_URL}/auth/logout`, {
            withCredentials: true,
        });
        setUser(null);
    };

    return <button onClick={handleLogout}>Logout</button>;
};

export default Logout;
// components/ProtectedRoute.js

import React, { useContext } from "react";
import { Navigate } from "react-router-dom";
import { AuthContext } from "../context/AuthContext";

const ProtectedRoute = ({ children }) => {
    const { user } = useContext(AuthContext);

    if (!user) {
        return <Navigate to="/login" />;
    }

    return children;
};

export default ProtectedRoute;
//App.js

import React from "react";
import { BrowserRouter as Router, Route, Routes } from "react-router-dom";
import { AuthProvider } from "./context/AuthContext";
import Login from "./components/Login";
import Logout from "./components/Logout";
import ProtectedRoute from "./components/ProtectedRoute";
import Home from "./components/Home";

const App = () => {
    return (
        <AuthProvider>
            <Router>
                <Routes>
                    <Route path="/login" element={<Login />} />
                    <Route path="/logout" element={<Logout />} />
                    <Route
                        path="/home"
                        element={
                            <ProtectedRoute>
                                <Home />
                            </ProtectedRoute>
                        }
                    />
                </Routes>
            </Router>
        </AuthProvider>
    );
};

export default App;
Step 5: Step Run the Application
1. Run the Backend Server
cd backend
npm run dev
2. Run the Frontend Client
cd frontend
npm start
Output
Similar Reads
Authentication and Authorization with React Hooks
Authentication and Authorization are fundamental aspects of web development, ensuring that users have secure access to resources within an application. With the introduction of React Hooks, managing authentication and authorization in React applications has become more streamlined and efficient. In
3 min read
Spring Boot - OAuth2 Authentication and Authorization
OAuth2 is a widely-used protocol for authorization that enables applications to securely access resources on behalf of users. When combined with Spring Boot, OAuth2 facilitates authentication and authorization for both REST APIs and web applications. This article will walk you through setting up OAu
7 min read
Authentication and Authorization with JWT in a GraphQL
Authentication and authorization are important aspects of building secure web applications by including those powered by GraphQL. JSON Web Tokens (JWT) provide a popular mechanism for implementing authentication and authorization in GraphQL applications. In this article, we'll explore the concepts o
6 min read
Authentication and Authorization in Microservices
In microservices, ensuring data security is paramount. Authentication and authorization are two crucial components of this security framework. This article provides a straightforward overview of how authentication verifies user identity and how authorization controls access to resources within micro
11 min read
API Gateway Authentication and Authorization in Spring Boot
In modern web applications, securing the communication between the clients and backend services is crucial. The API Gateway can serves as the reverse proxy and managing the client requests, and routing them to the appropriate the backend services. It enhance the security, we can implement the authen
12 min read
Spring Security – Customizing Authentication and Authorization
Spring Security is the powerful and customizable framework that provides the authentication, authorization, and other security features for the Java applications, especially the Spring-based ones. When building secure applications, controlling access to resources is important. Customizing authorizat
7 min read
What is AAA (Authentication, Authorization, and Accounting)?
Authentication, Authorization, and Accounting (AAA) is an architectural framework to gain access to computer resources, enforcing policies, auditing usage, to provide essential information required for billing of services and other processes essential for network management and security. This proces
2 min read
5 Simple Steps for Authentication and Authorization in MERN Stack
Implementing authentication and authorization in a MERN stack application is crucial for ensuring the security of your application and protecting sensitive data. Here's an elaboration on the five simple steps you can take to achieve this: Table of Content Implementing Authentication and Authorizatio
8 min read
How to Add Authentication to App with Flask-Login
We can implement authentication, login/logout functionality in flask app using Flask-Login. In this article, we'll explore how to add authentication to a Flask app using Flask-Login. To get started, install Flask, Flask-Login, Flask-SQLAlchemy and Werkzeug using this command: pip install flask flask
6 min read
How to Build a React App with User Authentication?
To implement user authentication in a React app, you can use Auth0, a popular authentication service that simplifies the process of handling login, logout, and user profile management. With Auth0, you can avoid managing authentication from scratch, which saves time and ensures security. In this arti
3 min read