Automated Email Classifier Project in n8n
Last Updated :
11 Jul, 2025
n8n is an open-source automation tool that integrates with a wide variety of services and APIs to help automate workflows. Using n8n, we can build an email classifier that automates the sorting of incoming emails based on the content such as scheduling of meeting or leave request. Lets build a n8n based project which labels the mails according to their category such as a meeting information or leave request and many more.
 Overview of Email Classifier based on n8n
API Authentication
Firstly we need to get API Authentication for our Gmail API and Google Calendar API. Follow the steps to get them.
Step 1: Go to the official website of google cloud console and login.
Step 2: After successful login, create a New Project.
 New Project
Step 3: Find and enter the APIs & Services tab.
 APIs & Services tab
Step 4: From the menu, select Enabled APIs & Services. Search for Google Calendar API and Gmail API.
Step 5: Enable the APIs.
Step 1: Go to the official website of Google Gemini API.
Step 2: Click on Create New API Key.
 Create API Key
Step 3: Select Your Project or Create a new project.
 Create a new project.
Step 4: Copy the created API Key and save it for use.
 API
APIWorkflow Creation on n8n
Follow the steps to build the email classifier agent.
For setting up your n8n refer to: What is n8n?
Creating Gmail Trigger
Step 1: Create a new workflow.
 new workflow
Step 2: Click on add first step button.
 add first step button
Step 3: Search for Gmail.
 Gmail
GmailStep 4: Select the On message received trigger.
 On message received
Step 5: The Gmail trigger will open.
 Gmail trigger
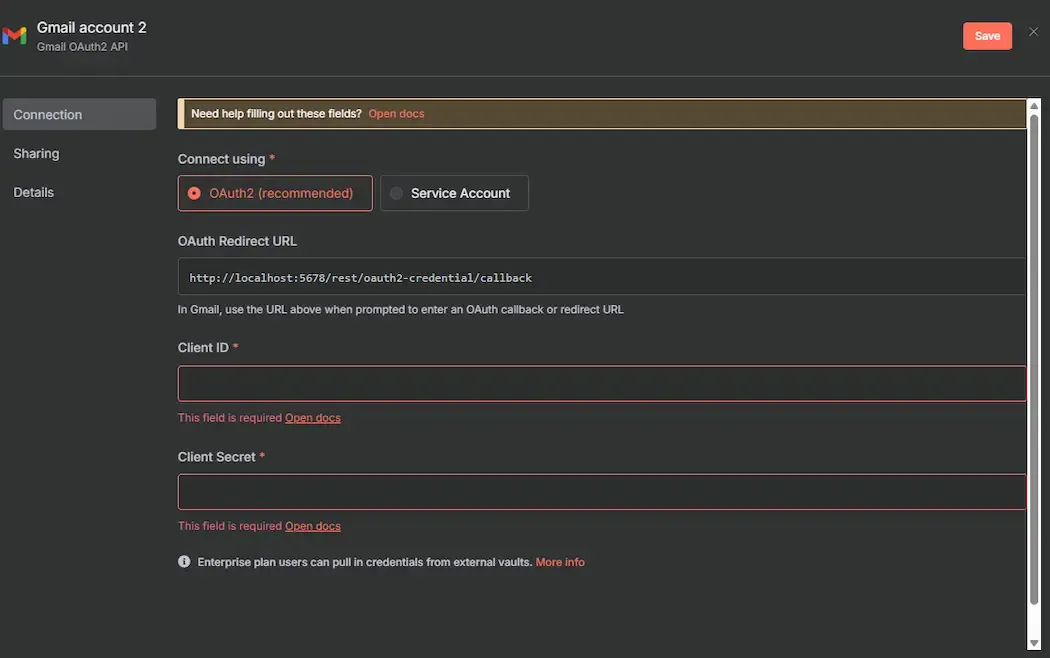
Step 6: Select Create new credential under the Credentials to connect with.
 Create new credential
 Step 7: Enter the Client ID and Client Secret that was extracted from google cloud console.
 Data
DataStep 8: If entered details are correct and the login was successful, a pop-up will notify that account connected and you can also verify by executing the Gmail trigger.
Creating Text Classifier Node
Step 1: Add another node, on the right top corner of the canvas and search for text classifier.
 another node
Step 2: Inside the text classifier node, select the expression option from the fixed and expression.
 expression
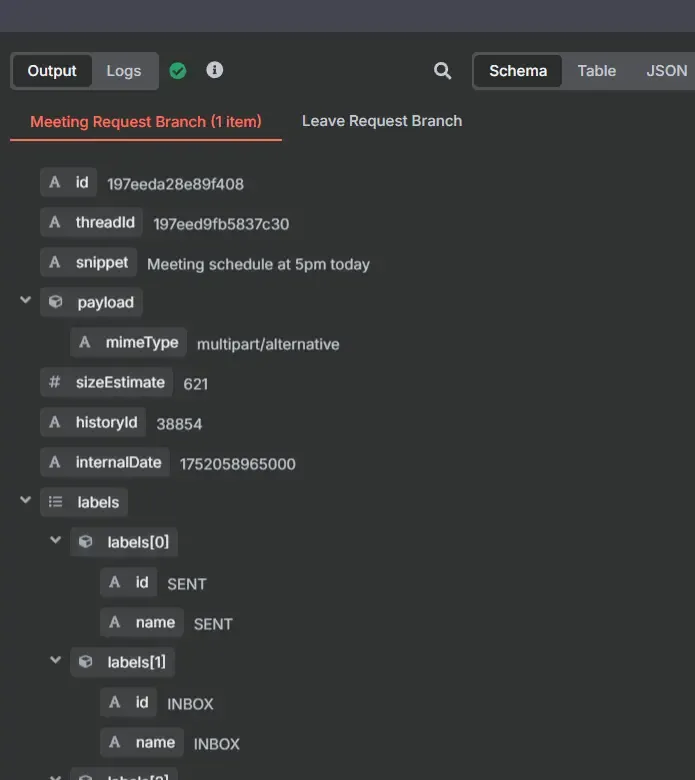
Step 3: Select the snippet from the schema of previous node and add it to the Text to classify box.
 snippet
 Step 4: Define the required categories such as Meeting Request and Leave Request.
 required categories
Step 5: Give the description of the categories.
 description
 Step 6: Click on Add Option and select System Prompt Template from the drop box.
Step 7: Execute step and check for any issue.
 check for any issue
Creating Chat Model Node
Step 1: From the top right corner of canvas, click on add node option and search for Chat model.
 Chat model
Step 2: Choose the model that we want to use in our workflow, here we are going to use Google Gemini Chat Model.
Step 3: Click on the Create New Credential.
 Create New Credential
Step 4: Enter the API Key extracted from the Google Gemini API key website.
Step 5: Select the model which we want to use in the workflow. Here we are using google gemini 1.5 flash.
 Select the model
 Step 6: If the details are correct then it will run successfully.
 checking
Creating Meeting Request and Leave Request Nodes
Step 1: From the add new node option, search for Gmail and click on it.
Step 2: From the list of actions, select Add label to message.
 Add label to message
Step 3: Attach the same Gmail account that was used in the Gmail trigger Credentials.
Step 4: Select Message in the Resource option. And select Add Label operation.
 select Add Label operation
Step 5: In the message ID Dialog box, paste ID from the Input schema.
 paste ID
Step 6: Add the required label from the drop box.
 required label
Step 7: Execute the step to check for any issues, if the workflow works fine the output will be shown.
Creating the Google Calendar Node
Step 1: From the add new node option, search for Google Calendar.
Step 2: Search for Create an event under the Event Actions.
 Create an event
Step 3: Attach the same Gmail account that was used in the Gmail trigger Credentials.
Step 4: Select the Create operation, select the Calendar and define the Start and End.
 Create operation
Workflow Execution
 Workflow Execution
We can also check our Gmail to see for changes.
Before execution.
 Before execution
After execution.
 After execution
Workflow Activation
After the workflow is created, we can activate it and now it will automatically perform its task on a fixed interval of time.
 Workflow Activation
Similar Reads
Interview Preparation
Practice @Geeksforgeeks
Data Structures
Algorithms
Programming Languages
Web Technologies
Computer Science Subjects
Data Science & ML
Tutorial Library
GATE CS