Azure Content Delivery Network (CDN) is used to deliver high bandwidth web like static and dynamic web content web-like images, javascript , css files , videos by caching the content to some specific places around the globe. This results in faster delivery of content and reduces the loading time .
What are the Key Features and Benefits of Integrating Azure CDN ?
- Global Reach- Azure CDN has a large network of edge servers in more than 90 cities globally which ensure that are web content is delivered quickly and efficiently to the users.
- High Performance- Azure uses advanced caching and optimization techniques which reduce the delivery speed of our content, reduce the loading time, and enhances the overall user experience.
- Scalability- Azure CDN is designed to handle a large volume of traffic.
- Security- It has several security features like HTTPS and access control which will help to protect our content from cyber attacks.
- Cost Effective- Azure CDN charges you only for the bandwidth and storage we use which makes it cost effective.
How does Azure CDN enhance performance and user experience?
- Reduced Latency: By caching content from the edge server nearest to the user with this way Azure CDN is able to deliver content over long distances and this reduces latency.
- Faster Page Loads: It accelerates the delivery of the web content resulting in faster page loads.
- Improved Availability: Azure CDN is highly scalable and can handle large traffic easily, hence, it always ensures the availability of the web content.
- Enhanced Security: Azure CDN uses features like HTTPS and access control to prevent our content from unauthorized access.
- Better User Engagement: By providing faster loading time, content delivery services and a reliable user experience Azure CDN aims to improve user engagement.
Step-by-Step Process for Azure CDN Integration
Creating a Storage Account
Step 1: Login into your Microsoft Azure portal
- After logging into the portal you will plan to distribute our data through Blob storage
Step 2: Click on Storage > Storage accounts
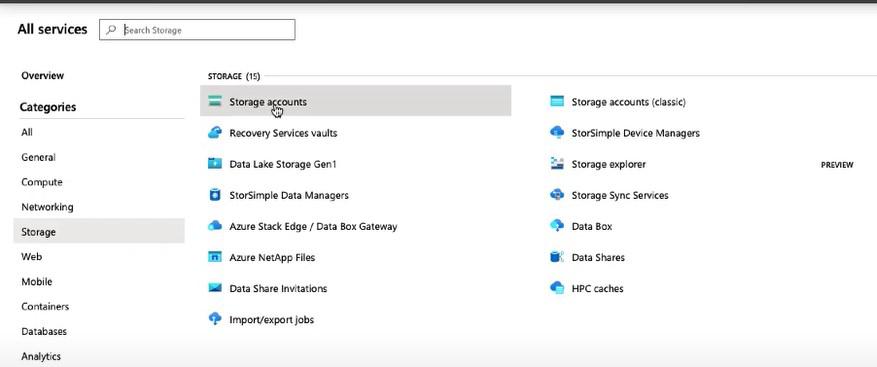
Step 3: Click on Add to create a new Storage account in which we will create a Blob

Step 4: Create a new Storage Account
- Resource Group: AzureClass
- Storage Account Name: <Write any name>
- Performance: Standard
- Account Kind: Storage(general purpose v1)
- Replication: Local redundant storage(LRS)
Step 5: Click on Next:Networking,Click on Next:Advanced,Click on Next:Tags and Click on Next: Review+Create
- Our Storage Account will be created.
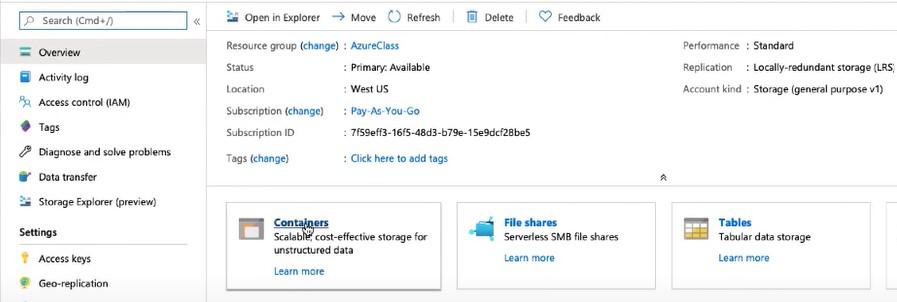
Step 6: Check if the Storage Account is created and Open the Storage Account then Click on Containers
Creating a New Container in the Storage Account
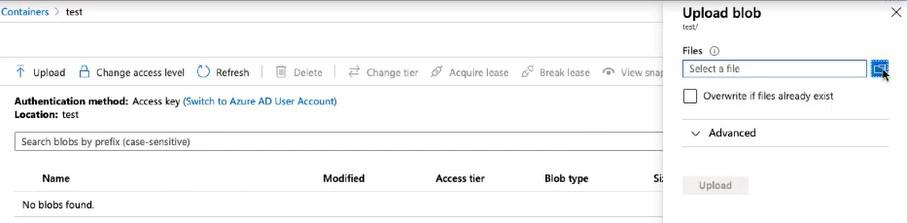
Step 1: Click on container to create a new container.

Step 2: Click on the container created and Upload Blob
- Select the file that you want to share and click on upload.
Configuring Azure CDN with Azure services (e.g., Azure Blob Storage, Web Apps)
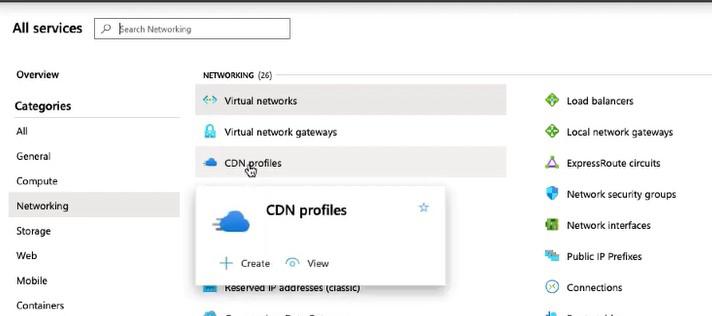
Step 1: Click on All Services in the top left corner
Step 2: Click on Networking>CDN Profile
Step 3: Click on Add and create a CDN profile
- Name: <Write any name>
- Resource Group: AzureClass
- Pricing Tier: Standard Microsoft (you can choose on the basis of their services)
- Endpoint: I'll be creating a endpoint later so DO NOT tick mark.
Wait for a few minutes and our CDN profile will be validated and created.
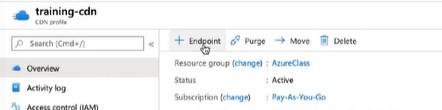
Step 4: Click on endpoint
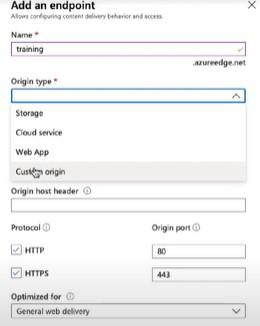
- Name: <Write Any Name>
- Origin type: Storage (choose the origin in which your data is saved)
- Origin hostname: <Name of the Data Storage Created in which Blob is present>
- Origin path: /<name of the container>/<name of the file uploaded> example- /test/aws.png
Click on Add and our endpoint will be created.
Step 5: Click on the created Endpoint.
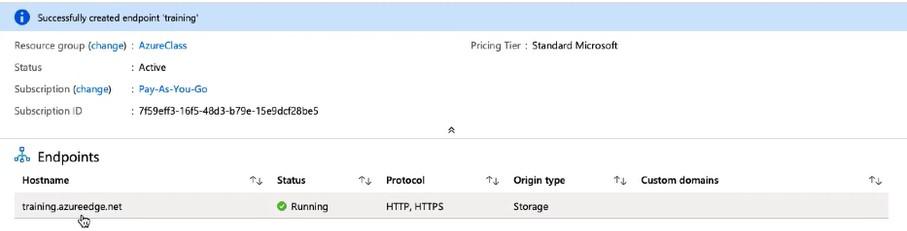
Step 6: Copy Origin hostname URL
- Paste the copied url in a browser and add the origin path behind the url
- Example- <copied url>/test/aws.png
Integrating Azure CDN with third-party applications and services
Step 1: Follow the steps written above in "Step-by-Step Process for Azure CDN Integration" till you create a CDN Profile.
Step 2: Click on CDN Profile created.
Step 3: Click on Endpoint.
Step 4: Fill in the details.
- Name: <Write Any Name>
- Origin type: Custom Origin ( It allows us to configure a specific external server as our origin server, with the help of this Azure CDN allows us to deliver content hosted on a third-party platform)
- Origin hostname: <Name of the Data Storage Created in which Blob is present>
- Origin path: /<name of the container>/<name of the file uploaded> example- /test/aws.png
- Click on Add and our endpoint will be created.
Explore
DevOps Basics
Version Control
CI & CD
Containerization
Orchestration
Infrastructure as Code (IaC)
Monitoring and Logging
Security in DevOps