Git prune is used to remove the unreachable objects and clear up the local repository.
Git is a powerful version control system that helps developers manage their code efficiently. However, as your project evolves, you may accumulate unnecessary data that clutters your repository. This is where git prune comes in view.
What is git prune?
git prune is a Git command that removes objects that are no longer referenced by any branch or tag. These unreferenced objects, often called "dangling objects", can accumulate over time as you make changes to your repository. Pruning these objects helps free up disk space and keeps your repository organized.
Syntax:
git prune [options]
Command options:
- -n or --dry-run: is used to just display the removable items in the repository.
- -v or -verbose: provide details of pruning process.
Note: It operates on the hidden data and usually runs in conjunction with Git gc.
What are Git Objects?
Git stores data as objects within its database. These objects include:
- Commits: Representing snapshots of your project at different points in time.
- Trees: Representing directories and their structure.
- Blobs: Representing individual files.
Over time, as you create, modify, and delete files and commits, Git’s internal database can accumulate objects that are no longer referenced by any branch or tag. These objects become “unreachable” or “dangling” and can consume unnecessary disk space.
Why Usegit prune?
- Free Up Disk Space: Over time, your Git repository can become cluttered with unused objects, which consume disk space. Pruning helps to remove these objects and free up space.
- Improve Performance: A cleaner repository with fewer dangling objects can lead to better performance when running Git commands.
- Maintain Organization: Regular pruning helps keep your repository clean and well-organized, making it easier to manage and navigate.
When to Use git prune
git prune is particularly useful in the following scenarios:
- After Deleting Branches: When you delete branches, the commits associated with those branches might still exist in your repository as dangling objects. Pruning helps remove these unreferenced commits.
- After Rewriting History: If you've used commands like git rebase or git filter-branch, you may end up with orphaned commits that need to be pruned.
- Regular Maintenance: Periodically running git prune as part of your repository maintenance routine helps keep it clean and efficient
How to Use
Git prune is a command that deletes all the files that are not reachable from the current branch. The prune command is useful when you have a lot of files in your working directory that you don’t want to keep. The primary use of git prune is to clean up your working directory after you have finished working on a project.
What actually git prune does is, suppose you have an object or commit that is no longer reachable from the current branch. Then git prune will delete that object or commit. The basic idea is that git prune is a way to clean up your working directory to make it lighter and easier to work on a project.
Cleaning Up Your Local Repository
To clean up your local working directory, use:
Syntax:
git fetch --prune <remote>
This command deletes objects that are not reachable from the remote repository. If you want to prune the remote repository without fetching it, use:
git remote prune origin
Configuring Automatic Pruning
To configure Git to automatically prune the remote repository when you fetch it, run:
git config --global fetch.prune true
Example of git prune
Consider this scenario, suppose you have a project that you are working on. You have a bunch of files in your working directory, and a commit becomes unreachable from the current branch. Then you want to delete all the objects or commit that are not reachable from the current branch.
1. creating a new repository and initializing it
mkdir git-prune-demo-geeks
cd git-prune-demo-geeks
git init .
echo "Hello World" > hello.txt
git add hello.txt
git commit -m "first commit"
The above command sequence will:
- create a new repository called git-prune-demo-geeks
- change the current directory to git-prune-demo-geeks
- initialize the repository
- create a file hello.txt with the content "Hello World"
- add the file hello.txt to the staging area
- commit the file hello.txt with the message "first commit"
Output:
 creating repository
2. Modify the file hello.txt and create a new commit
echo "Hello from the other side" > hello.txt
git add hello.txt
git commit -m "second commit"
Output:
 Adding commit
This will add the line "Hello from the other side" to the file hello.txt and commit it with the message "second commit". To verify the above command sequence, we can use the following command:
git log
Output:
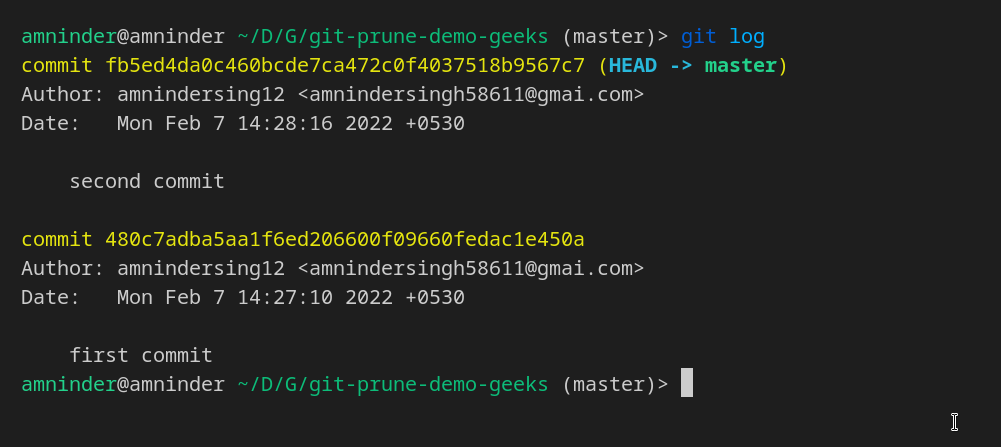 git log output
Here, the git log will display the commit history of the repository.
3. Making commit unreachable from the current branch
git reset --hard HEAD~1
Output:
 git reset
Here, HEAD~1 is the commit that is unreachable from the current branch. And now if we try to see the git log output again, we will see that the commit is no longer reachable from the current branch, it will show only the commit that is reachable from the current branch.
git log
Output:
 git log
This repository now has a commit that is a detached commit. So if you try to check out the commit, it will not check out the commit but will create a detached branch. The second commit is a detached commit and no longer showing in the git log output.
git checkout HEAD~1
Output:

The HEAD~1 is the commit that is detached from the current branch.
4. Running git prune
After checkout the detached commit, we have to return back to the master via the git checkout command and then run the git prune command. We have to pass certain options to the git prune command so that the output of the command displays what is set to be pruned.
git prune --dry-run --verbose
Output:
 git prune
Here, empty output means that nothing is pruned. Because somewhere in the repository, git is keeping the commit reference that is detached from the current branch. So git prune will not delete the commit. And to conclude our scenario, we must have to clear reflog first.
git reflog expire --expire=now --expire-unreachable=now --all
This will forcefully expire the reflog. After removing the reflog we can run the git prune command again.
git prune --dry-run --verbose --expire=now
Output:
 Pruned the unreachable commit
This will result in displaying git SHA object references of commit and tree objects that are no longer reachable from the current branch.
Similar Reads
Git Ignore and .gitignore When working with Git, you often have files and directories that you don't want to be tracked in your repository. These could be sensitive data files, temporary files, or even operating system-specific files. Managing these untracked files is where the .gitignore file comes into play. In this articl
6 min read
Git - Squash Commits In Git, squashing refers to combining two or more commits into a single commit. This is typically done to improve the organization and clarity of the commit history, especially when working on a collaborative project with other developers. In this article, we will review the feature git squashing, w
2 min read
Git Reset Head In Git, the term "HEAD" refers to the current branch's latest commit or you can say that to the tip of the current branch. To undo changes or revert to a previous state for a particular branch, resetting to HEAD is a common method. Resetting to HEAD can help you discard changes in your working direc
2 min read
Git LFS Install Git Large File Storage (LFS) is a Git extension that helps developers manage large files in a more efficient way. Git LFS is especially useful for repositories that deal with large media files, such as images, videos, datasets, or binaries, which can slow down regular Git operations.In this article,
4 min read
How to use GIT in Ubuntu ? (Part -2) Git is a powerful version control system that helps developers track changes in their code, collaborate with others, and manage project versions effectively. Using Git on Ubuntu is simple and efficient. In the previous article, we learnt how to use basic GIT. In this article, we will try to learn so
5 min read