
How To Build a Basic CRUD App With Node and React ?
In this article, we will explore how to build a simple CRUD (Create, Read, Update, Delete) application using Node.js for the backend and React for the frontend. Additionally, we will integrate MongoDB as the database to store our data.
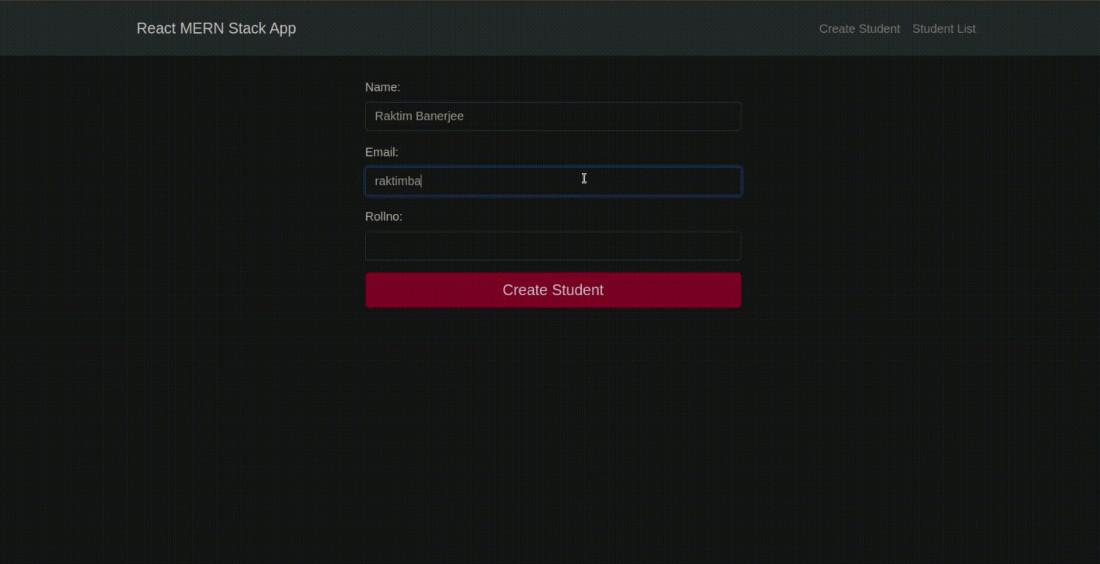
Preview of final output:
App functionality
- Create a new student (CREATE)
- Update an existing student (UPDATE)
- Show all students list (READ)
- Delete a student (DELETE)
Prerequisites
- Node.js and npm: You need Node.js installed. You can check if you have it installed by running
node -vandnpm -vin the terminal. - MongoDB: A MongoDB instance is required for the backend. You can either use a local MongoDB instance or use MongoDB Atlas (a cloud database service).
- React: You’ll need basic knowledge of React and how to set up React applications.
REST API in this project
REST API Request | URL |
| GET | http://localhost:4000/students |
| GET | /students/students/id |
| POST | /students/students |
| PUT | /students/students/id |
| DELETE | /students/students/id |
Building a basic CRUD app with Node and React is a perfect way to learn full-stack development.
Now, first of all, we will work on the frontend part of our application using React.js.
Steps to Create React Application and Installing modules
Step 1: Initialize React App for Front End
Let’s start building the Front-end part with React. To create a new React App, enter the following code into terminal and hit enter.
npx create-react-app mern-stack-crudStep 2: Switch to Project Directory
Move into the React project folder.
cd mern-stack-crudStep 3: Run The Frontend
To run the React App, run the following command:
npm startThis command opens the React App to the browser on the following URL: http://localhost:3000/
Step 4: Install Required Modules
To build the React App we need to install some external modules.
NPM | Detail |
|---|---|
| React-Bootstrap | React-Bootstrap has evolved and grown alongside React, making it an excellent choice for your UI. |
| React-Router-Dom | React Router DOM enables you to implement routing in a React App. |
| Axios | It is a promise base HTTP Client and use for network request. |
| Formik | A great library to build form in React. |
| Yup | Yup is a JavaScript schema builder for form validation. |
To install, run the following code on the terminal.
npm install react-bootstrap bootstrap react-router-dom axios formik yupStep 5: Creating Simple React Components
In this step we will create some React Components to manage student data.
Head over to src folder, make a folder and name it Components and within that directory create the following components.
- StudentForm.js – Reusable Student form
- create-student.component.js – Responsible for create new student
- edit-student.component.js – Responsible for update student data
- student-list.component.js – Responsible for display all student
- StudentTableRow.js – Responsible for display a single student
Frontend Project Structure:

front-end project structure
Dependencies
 "dependencies": {
    "@testing-library/dom": "^10.4.0",
    "@testing-library/jest-dom": "^6.6.3",
    "@testing-library/react": "^16.3.0",
    "@testing-library/user-event": "^13.5.0",
    "axios": "^1.2.1",
    "bootstrap": "^5.2.0",
    "formik": "^2.2.9",
    "react": "^19.1.0",
    "react-bootstrap": "^2.7.0",
    "react-dom": "^19.1.0",
    "react-router-dom": "^6.6.1",
    "react-scripts": "5.0.1",
    "web-vitals": "^2.1.4",
    "yup": "^0.32.11"
  },
Approach
For the Frontend of this Student database App
- We will build a reusable student form with Formik and React-Bootstrap. This form has all the necessary fields to enter student details. We have also made client-side form validation with Yup. In the future, we will use this component for creating and update a student. Go to src/Components/StudentForm.js.
- We will create a component to add a new student. We have already created a StudentForm component to enter student details. Now, it’s time to use this component. Go to src/Components/create-student.component.js.
- We will create a component to update details. We have reusable StudentForm component, let’s use it again. We will fetch student details to reinitialise form. Go to src/Components/edit-student.component.js.
- We will build a component to display the student details in a table. We will fetch student’s data and iterate over it to create table row for every student. Go to src/Components/student-list.component.js.
- We will return table row which is responsible to display student data. Go to src/Components/StudentTableRow.js.
- Finally, include the menu to make routing in our MERN Stack CRUD app. Go to src/App.js and write the following code.
Example: This example creates frontend for Student database app including a student form and table to display data.
/* App.css */

.wrapper {
    padding-top: 30px;
}

body h3 {
    margin-bottom: 25px;
}

.navbar-brand a {
    color: #ffffff;
}

.form-wrapper,
.table-wrapper {
    max-width: 500px;
    margin: 0 auto;
}

.table-wrapper {
    max-width: 700px;
}

.edit-link {
    padding: 7px 10px;
    font-size: 0.875rem;
    line-height: normal;
    border-radius: 0.2rem;
    color: #fff;
    background-color: #28a745;
    border-color: #28a745;
    margin-right: 10px;
    position: relative;
    top: 1px;
}

.edit-link:hover {
    text-decoration: none;
    color: #ffffff;
}

/* Chrome, Safari, Edge, Opera */
input::-webkit-outer-spin-button,
input::-webkit-inner-spin-button {
    -webkit-appearance: none;
    margin: 0;
}

/* Firefox */
input[type=number] {
    -moz-appearance: textfield;
}
// Import React
import React from "react";

// Import Bootstrap
import { Nav, Navbar, Container, Row, Col }
    from "react-bootstrap";
import "bootstrap/dist/css/bootstrap.css";

// Import Custom CSS
import "./App.css";

// Import from react-router-dom
import {
    BrowserRouter as Router, Routes,
    Route, Link
} from "react-router-dom";

// Import other React Components
import CreateStudent from
    "./Components/create-student.component";
import EditStudent from
    "./Components/edit-student.component";
import StudentList from
    "./Components/student-list.component";

// App Component
const App = () => {
    return (
        <Router>
            <div className="App">
                <header className="App-header">
                    <Navbar bg="dark" variant="dark">
                        <Container>
                            <Navbar.Brand>
                                <Link to={"/create-student"}
                                    className="nav-link">
                                    React MERN Stack App
                                </Link>
                            </Navbar.Brand>

                            <Nav className="justify-content-end">
                                <Nav>
                                    <Link to={"/create-student"}
                                        className="nav-link">
                                        Create Student
                                    </Link>
                                </Nav>

                                <Nav>
                                    <Link to={"/student-list"}
                                        className="nav-link">
                                        Student List
                                    </Link>
                                </Nav>
                            </Nav>
                        </Container>
                    </Navbar>
                </header>

                <Container>
                    <Row>
                        <Col md={12}>
                            <div className="wrapper">
                                <Routes>
                                    <Route path="/" element={<CreateStudent />} />
                                    <Route path="/create-student" element={<CreateStudent />} />
                                    <Route path="/edit-student/:id" element={<EditStudent />} />
                                    <Route path="/student-list" element={<StudentList />} />
                                </Routes>
                            </div>
                        </Col>
                    </Row>
                </Container>
            </div>
        </Router>
    );
};

export default App;
// src/Components/StudentForm.js

import React from "react";
import * as Yup from "yup";
import {
    Formik, Form,
    Field, ErrorMessage
} from "formik";
import {
    FormGroup,
    FormControl, Button
} from "react-bootstrap";

const StudentForm = (props) => {
    const validationSchema =
        Yup.object().shape({
            name: Yup.string().required("Required"),
            email: Yup.string()
                .email(
`You have enter an invalid email address`
                )
                .required("Required"),
            rollno: Yup.number()
                .positive("Invalid roll number")
                .integer("Invalid roll number")
                .required("Required"),
        });
    console.log(props);
    return (
        <div className="form-wrapper">
            <Formik {...props}
                validationSchema={validationSchema}>
                <Form>
                    <FormGroup>
                        <Field name="name" type="text"
                            className="form-control" />
                        <ErrorMessage
                            name="name"
                            className="d-block
                                invalid-feedback"
                            component="span"
                        />
                    </FormGroup>
                    <FormGroup>
                        <Field name="email"
                            type="text"
                            className="form-control" />
                        <ErrorMessage
                            name="email"
                            className="d-block
                                invalid-feedback"
                            component="span"
                        />
                    </FormGroup>
                    <FormGroup>
                        <Field name="rollno"
                            type="number"
                            className="form-control" />
                        <ErrorMessage
                            name="rollno"
                            className="d-block
                                invalid-feedback"
                            component="span"
                        />
                    </FormGroup>
                    <Button variant="danger" size="lg"
                        block="block" type="submit">
                        {props.children}
                    </Button>
                </Form>
            </Formik>
        </div>
    );
};

export default StudentForm;
// src/Components/create-student.component.js

// CreateStudent Component for add new student
// Import Modules
import React,
{
    useState,
    useEffect
} from "react";
import axios from 'axios';
import StudentForm
    from "./StudentForm";

// CreateStudent Component
const CreateStudent = () => {
    const [formValues, setFormValues] =
        useState(
            {
                name: '',
                email: '',
                rollno: ''
            })
    // onSubmit handler
    const onSubmit =
        studentObject => {
            axios.post(
'http://localhost:4000/students/students',
                studentObject)
                .then(res => {
                    if (res.status === 200)
                        alert('Student successfully created')
                    else
                        Promise.reject()
                })
                .catch(err => alert('Something went wrong'))
        }

    // Return student form
    return (
        <StudentForm initialValues={formValues}
            onSubmit={onSubmit}
            enableReinitialize>
            Create Student
        </StudentForm>
    )
}

// Export CreateStudent Component
export default CreateStudent
//src/Components/edit-student.component.js

// EditStudent Component for update student data
// Import Modules
import React,
{
    useState,
    useEffect
} from "react";
import axios from "axios";
import StudentForm
    from "./StudentForm";

// EditStudent Component
const EditStudent = (props) => {
    const [formValues, setFormValues] =
        useState(
            {
                name: "",
                email: "",
                rollno: "",
            }
        );

    //onSubmit handler
    const onSubmit = (studentObject) => {
        axios
            .put(
"http://localhost:4000/students/students/" +
                props.match.params.id,
                studentObject
            )
            .then((res) => {
                if (res.status === 200) {
                    alert("Student successfully updated");
                    props.history.push("/student-list");
                } else Promise.reject();
            })
            .catch(
                (err) =>
                    alert("Something went wrong")
            );
    };

    // Load data from server and reinitialize student form
    useEffect(() => {
        axios
            .get(
"http://localhost:4000/students/update-student/"
                + props.match.params.id
            )
            .then((res) => {
                const {
                    name,
                    email,
                    rollno
                } = res.data;
                setFormValues(
                    {
                        name,
                        email,
                        rollno
                    });
            })
            .catch(
                (err) =>
                    console.log(err)
            );
    }, []);

    // Return student form
    return (
        <StudentForm
            initialValues={formValues}
            onSubmit={onSubmit}
            enableReinitialize>
            Update Student
        </StudentForm>
    );
};

// Export EditStudent Component
export default EditStudent;
//src/Components/student-list.component.js

import React, { useState, useEffect } from "react";
import axios from "axios";
import { Table } from "react-bootstrap";
import StudentTableRow from "./StudentTableRow";

const StudentList = () => {
    const [students, setStudents] = useState([]);

    useEffect(() => {
        axios
            .get("http://localhost:4000/students/")
            .then(({ data }) => {
                setStudents(data);
            })
            .catch((error) => {
                console.log(error);
            });
    }, []);

    const DataTable = () => {
        return students.map((res, i) => {
            return <StudentTableRow
                obj={res} key={i} />;
        });
    };

    return (
        <div className="table-wrapper">
            <Table striped bordered hover>
                <thead>
                    <tr>
                        <th>Name</th>
                        <th>Email</th>
                        <th>Roll No</th>
                        <th>Action</th>
                    </tr>
                </thead>
                <tbody>{DataTable()}</tbody>
            </Table>
        </div>
    );
};

export default StudentList;
//src/Components/StudentTableRow.js

import React from "react";
import { Button } from "react-bootstrap";
import { Link } from "react-router-dom";
import axios from "axios";

const StudentTableRow =
    (props) => {
        const {
            _id,
            name,
            email,
            rollno
        } = props.obj;

        const deleteStudent = () => {
            axios
                .delete(
"http://localhost:4000/students/students/" + _id)
                .then((res) => {
                    if (res.status === 200) {
                        alert("Student successfully deleted");
                        window.location.reload();
                    } else Promise.reject();
                })
                .catch(
                    (err) =>
                        alert("Something went wrong"));
        };

        return (
            <tr>
                <td>{name}</td>
                <td>{email}</td>
                <td>{rollno}</td>
                <td>
                    <Link className="edit-link"
                        to={"/edit-student/" + _id}>
                        Edit
                    </Link>
                    <Button
                        onClick={deleteStudent}
                        size="sm" variant="danger">
                        Delete
                    </Button>
                </td>
            </tr>
        );
    };

export default StudentTableRow;
Now, we have successfully created the frontend for our mern-stack-app. Let’s build the backend part. Before, jumping to next section take a look how the frontend part working without backend.
Step to Run the application: Open the terminal and type the following command.
npm startOutput
Steps to Setup the Backend
Step 1: Create Backend Directory
Run command to create backend folder for server and get inside of it.
mkdir backend
cd backend
Step 2: Initialize Backend Project
Create package.json – Next, we need to create a separate package.json file for managing the server of our mern-stack-crud app.
npm init -yStep 3: Install Node Dependencies
Install the following Node dependencies.
| Package | Description |
|---|---|
express | Web framework to handle routing and server logic. |
cors | Middleware to handle Cross-Origin Resource Sharing. |
mongoose | ODM (Object Data Modeling) library for MongoDB. |
dotenv | Loads environment variables from a .env file. |
To install the above dependencies, run the following code on the terminal.
npm install express cors mongoose dotenv
npm install --save-dev nodemon
Backend Project Structure:

folder structure
Dependencies
"dependencies": {
    "express": "^4.18.2",
    "mongoose": "^7.2.2",
    "cors": "^2.8.5",
    "dotenv": "^10.0.0"
  },
  "devDependencies": {
    "nodemon": "^2.0.22"
  }
Approach
For backend of Student database app
- We will set up a MongoDB database for our app. Before, starting make sure you have latest version of MongoDB is installed on your system. Create folder inside the backend folder and name it database. Create a file by the name of db.js inside the database folder. Go to backend/database/db.js. We have declared the MongoDB database and name it reactdb.
- Now, create MongoDB schema for interacting with MongoDB database. Create a folder called models inside backend folder to keep schema related files and create a file Student.js inside of it to define MongoDB schema. Go to backend/models/Student.js.
- We are set up some routes (REST APIs) for CREATE, READ, UPDATE and DELETE using Express and Node.js. These routes will help us to manage the data in our mern-stack-crud app.
- We have almost created everything for our mern-stack-crud app. Now, create the server.js file in the root of the backend folder. Go to backend/server.js and write the following code.
Example: This example uses mongo and node, express to setup the backend.
// server.js

const express = require('express');
const mongoose = require('mongoose');
const cors = require('cors');
require('dotenv').config();

const studentRoute = require('./routes/student.route');
const app = express();

// Middleware
app.use(cors());
app.use(express.json());
app.use(express.urlencoded({ extended: true }));

// MongoDB Connection
mongoose.connect(process.env.MONGODB_URI, {
    useNewUrlParser: true,
    useUnifiedTopology: true
}).then(() => {
    console.log('Database connected!');
}).catch((err) => {
    console.error('MongoDB connection error:', err);
});

// Routes
app.use('/students', studentRoute);

// 404 Error
app.use((req, res) => {
    res.status(404).send('Error 404: Not Found!');
});

// Global Error Handler
app.use((err, req, res, next) => {
    console.error(err.stack);
    res.status(err.statusCode || 500).send(err.message);
});

// Server Start
const PORT = process.env.PORT || 4000;
app.listen(PORT, () => {
    console.log(`Server is running on port ${PORT}`);
});

});
// models/Student.js

const mongoose = require('mongoose');
const Schema = mongoose.Schema;

const studentSchema = new Schema({
    name: { type: String, required: true },
    email: { type: String, required: true },
    rollno: { type: Number, required: true }
}, {
    timestamps: true,
    collection: 'students'
});

module.exports = mongoose.model('Student', studentSchema);
// backend/routes/student.route.js

const express = require('express');
const router = express.Router();
const Student = require('../models/Student');

// CREATE
router.post('/', async (req, res, next) => {
    try {
        const data = await Student.create(req.body);
        res.status(201).json(data);
    } catch (error) {
        next(error);
    }
});

// READ All
router.get('/', async (req, res, next) => {
    try {
        const data = await Student.find();
        res.json(data);
    } catch (error) {
        next(error);
    }
});

// READ One
router.get('/:id', async (req, res, next) => {
    try {
        const data = await Student.findById(req.params.id);
        res.json(data);
    } catch (error) {
        next(error);
    }
});

// UPDATE
router.put('/:id', async (req, res, next) => {
    try {
        const data = await Student.findByIdAndUpdate(req.params.id, req.body, { new: true });
        res.json(data);
    } catch (error) {
        next(error);
    }
});

// DELETE
router.delete('/:id', async (req, res, next) => {
    try {
        const data = await Student.findByIdAndDelete(req.params.id);
        res.json({ message: "Student deleted", data });
    } catch (error) {
        next(error);
    }
});

module.exports = router;

module.exports = router;
Now, we have successfully created the backend for our mern-stack-app.
Open a terminal and run the following command to start the Nodemon server by staying in the backend folder.
nodemon server.jsOutput:
Summary
This article creates a Student database application using MERN (Mongo, Express, React, Node) to show the Basic CRUD Operations in a MERN App. It uses the api endpoints for HTTP requests like GET, POST, PUT, DELETE to create, read, update and detele the student data in the mongo database.

