How to Insert a Signature in Word Document: Complete Guide
Last Updated :
30 Dec, 2024
Adding a signature to a Word document is a crucial step for personalizing and authenticating your documents, whether it’s for contracts, official letters, or personal correspondence. This guide covers two simple methods: adding a handwritten signature and using the Draw tool to create one directly in Word, ensuring you can easily customize your documents with a polished and professional finish.
 How to Insert a Signature in a Word Document
How to Insert a Handwritten Signature in a Word Document
Follow these steps to add a handwritten signature in Word document. This method is ideal if you already have a digital copy of your signature and want to add a personal touch to your document.
Step 1: Open Your Word Document
Start by opening Microsoft Word and the document you want to add your signature to. If you don’t have one ready, create a new blank document.
 Open Your Word Document
Step 2: Insert a Handwritten Signature Image
If you have a scanned or photographed image of your handwritten signature, you can easily insert it into your document:
- Click the Insert tab in the top menu.
- Select Pictures, then click This Device.
- Locate the folder where your signature image is saved, select the file, and click Insert.
This method is perfect if you already have a digital copy of your signature.
 Insert a Handwritten Signature Image
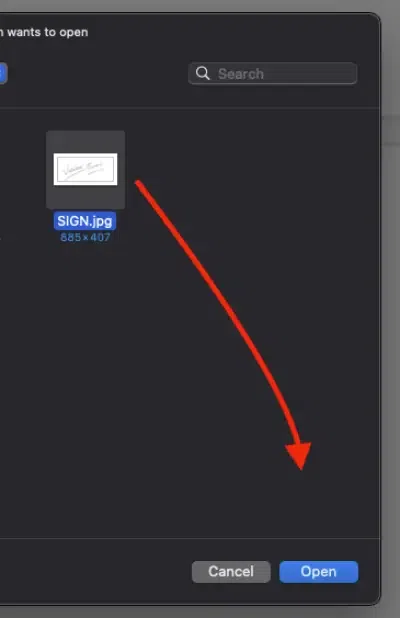
Step 3: Upload Your Sign image
After clicking "This Device", you just click on the signed image and click "Open"
 Upload Your Sign image
Step 4: Preview the Image and Resize
Once the signature image is uploaded:
- It will appear in the document editor.
- Resize and position the image by dragging its corners or moving it to the desired location.
 Preview the Image and Resize
Note : To make the signature look more natural:
- Click on the inserted image to activate the Format Picture panel.
- Go to Transparency Settings under Format Options and adjust the transparency slider until the signature blends naturally with the document.
How to Draw a Signature in Word
This method is best for users who don’t have a scanned signature or prefer a fully personalized, digital signature. It’s ideal for quick, one-time use or when working on touch-enabled devices with a stylus for greater precision.
Step 1: Go to Draw features
- Go to the Draw tab in the menu bar.
- Select a pen or stylus tool.
- Use your mouse, touchpad, or stylus to draw your signature directly on the document.
Tip for Stylus Users: On touch-enabled devices, use a stylus for smoother and more precise strokes.
Adjust the pen’s thickness or color in the menu to match your preferred style.
 Go to Draw features
Step 2: Save the Drawing
- After completing your signature, click the Save and Close button.
 Save the Drawing
Step 3: Save Your Signature as a Reusable Quick Part
For frequent use, store your signature as a reusable element in Word:
- Select your signature by clicking on it.
- Right-click and choose Save as Quick Part.
- Assign a name and click Save.
To reuse your saved signature:
- Go to the Insert tab, click Quick Parts, and select your saved signature.
Step 4: Add Typed Text to Your Signature
Enhance your signature by adding typed information like your name, title, or the date.
- Click the Insert tab and choose Text Box.
- Type your text in the box and format it with your preferred font and size.
- Drag the text box below your signature to position it correctly.
Best For: Adding extra context to professional documents or legal paperwork.
 Add Typed Text to Your Signature
Step 5: Group Your Signature and Text (Optional)
Combine your signature and accompanying text to create a single movable element.
- Hold down the Ctrl key and click on both the signature and the text box.
- Right-click and select Group > Group.
- Now, you can move them together as one unit in your document.
 Group Your Signature and Text
Step 6: Finalize and Save Your Document
- Review the document to ensure everything is properly positioned and formatted.
- Save your file by clicking File > Save As and selecting your preferred file format.
Conclusion
Inserting a signature in Word is an effective way to add a personal or professional touch to your documents. Whether you choose to add a handwritten signature or draw one directly using Word’s tools, these methods offer convenience and flexibility. Try these techniques to create polished documents that leave a lasting impression.
Similar Reads
How To Use WhatsApp Web on Your PC, Laptop or Tablet There have been many social media platforms that have been very popular among the people. Since the early days of the internet, there has been a desire among people to have social media platforms that help them connect and talk with each other. Within a few years, we started to see platforms such as
8 min read
GATE 2026 - Exam Dates, Registration, Application Form, Fees, Eligibility Criteria, Syllabus, Admit Card GATE 2026 (Graduate Aptitude Test in Engineering) is going to be conducted by IIT Guwahati. In this comprehensive guide get all the latest information on Exam Date, Registration, Eligibility, Syllabus, Admit Card and every information related to GATE 2026 Exam.GATE 2026: All You Want to Know About t
15 min read
How to Fix DeepSeek "Server is Busy Issue Please try again later" Issue If you've encountered the "Server is Busy, please try again later" error on DeepSeek, you’re not alone. Many users are looking for solutions to this common issue, especially when they’re trying to generate content or access AI-driven tools but are faced with delays. This error typically happens due
6 min read
How to Fix ChatGPT "Our Systems Have Detected Unusual Activity from Your System" Issue The "Our systems have detected unusual activity from your system" error in ChatGPT occurs when OpenAI’s security systems flag your account or network for suspicious behavior. This often happens due to rapid requests, VPN usage, or violations of OpenAI’s policies. Below is a step-by-step guide to res
7 min read
How to See deleted Messages on Whatsapp [5 Methods] Ever received a WhatsApp message only to see it disappear with a “This message was deleted†notification? Whether it’s curiosity or the need to retrieve important information, figuring out how to see deleted messages on WhatsApp can feel like solving a mystery. While WhatsApp doesn’t make it easy, t
6 min read
What is VPN? How It Works, Types of VPN A VPN (Virtual Private Network) is a powerful tool that enhances online privacy, protects sensitive data, and enables secure access to the internet. In today's interconnected world, online privacy and data security are more important than ever. One of the best ways to protect yourself and enhance yo
8 min read
How To Make Timestamps On Discord Understanding Discord's timestamp format is essential for accurately marking time in messages, especially when dealing with users across different time zones. A Discord timestamp converter helps to easily translate timestamps between regions, considering the user's Discord timestamp timezone. Using
6 min read
How To Make Your Name Invisible On Discord Creating an invisible name and avatar on Discord is a fun way to maintain anonymity or add a unique twist to your profile. By making your username and avatar appear invisible, you can blend into the background during chats, which can be a great way to surprise your friends or keep a low profile on s
6 min read
How to Track Someone's Location with Phone Number Finding a Location with a Phone Number has become a common requirement for various reasons, including safety and security. Whether you've misplaced your phone or need to locate a friend or family member, there are several ways to find a phone location by phone number. From using free tools like Goog
10 min read
Introduction to Microsoft Word Microsoft Word is one of the most widely used word processing programs, known for its flexibility and ease of use in creating, editing, and formatting documents. Whether you're drafting a simple letter, preparing a resume, or working on a formal report, MS Word provides a rich set of tools to help y
7 min read