How to use GIT in Ubuntu ? (Part -2)
Last Updated :
20 Jun, 2024
Git is a powerful version control system that helps developers track changes in their code, collaborate with others, and manage project versions effectively. Using Git on Ubuntu is simple and efficient.
In the previous article, we learnt how to use basic GIT. In this article, we will try to learn some more basic concepts like branching and merging.
Some of the very helpful commands while using git are:
1. git: Type this in the terminal and you'll see a bunch of commonly used GIT commands with their usage. To know about a command in detail, you can type in 'git help <command>'.

2. git status: This is one of the most useful commands of GIT. If, at any point of time, you wish to know your current branch or changes in the files which aren't staged for commit or untracked files, type in this command.

Here, the branch is master and everything is up-to-data. Let's make some changes in the file and then use this command again.


There are changes which are not staged for commit in the file helloworld.c and we have the option of adding these changes in the final commit or discarding the changes in the final commit. We can add them with the git add . command (as discussed previously) and discard the changes in the file by the command git checkout -- helloworld.c (NOTE: There is a space in between '--' and 'helloworld.c')
3. git log: With this command one can see the commit logs with the Date, Time, Name of the Author and commit notes. This command is very useful in a group of developers working on the same project.

4. git add: As discussed previously, we must add the file(s) to the list while we would commit later. We can add the files with the help of git add . or git add helloworld.c But, let's say we want to add only a specific group of files with similar extensions. Let's say all the files ending with .txt . Then we can do it by git add *.txt command. This would add only the files which ends with .txt .
Now, if we want to ignore a specific group of files with similar extensions ( .txt, .cpp, etc) then we can also do it with git. For example, Let us consider we want to ignore the .c~ files that we can see (helloworld.c~). I have made another file named newfile.c so that there is another .c~ file which would be ignored. We need to follow two simple steps:
- We need to make a .gitignore file where we would store all the extensions to be ignored. We can make a such a file by typing touch .gitignore in the terminal and then open it with a text editor.
- Type in all the extensions of files which you want to ignore. Here, I want to ignore all the .c~ files and the.gitignore~ file.

We can see the file newfile.c~ by typing the command ls but when we check the status ( git status), we can see just two untracked files (.gitignore and newfile.c) . Note that there is no newfile.c~ file which means that it has been ignored successfully. We can now add the untracked files and then commit as we have been doing earlier.

BRANCHING & MERGING
Branching allows you to work on a copy of code in the mainline without actually effecting the main line directory. For example, Let's say if you want to work on a new module of the project, then you can choose a new branch on which you'll work. Everyone else can work on the same project by working on their branches without being affected by your work. When you're done, then you can merge all your work back into the main branch. A few important commands used for branching and merging are :
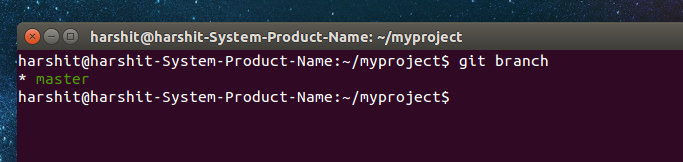
1. git branch: This lists all the local branches of your account. If you have not created a branch, then it's by default the master branch.
2. git branch NewBranchName: This creates a new branch starting at the some point in history as the current branch. Note that it doesn't make it the current working branch so we need to change it manually with the command git checkout newBranchName

Now if we execute the command git status then it would also show the current branch to be newmodule.
If on this branch we made some changes to the file aboutme.txt and then we want to merge the two files aboutme.txt (on branch: newmodule) and aboutme.txt (on branch: master). For merging, you must ensure that the current branch is your destination branch. Here, the destination branch would be the master branch. So, we would switch our current branch from newmodule to master by git checkout master and then merge them.
3. git merge SourceBranchName: This would Merge the specified branch ( SourceBranchName) into the current branch and auto-commit the results.
Here, we made some changes in the aboutme.txt file in the branch: newmodule

Now, after staging and committing the changes in the newmodule branch, we changed out current branch to master by git checkout master and open aboutme.txt.

Note that this aboutme.txt file is not updated with the second line as in branch: newmodule
Now , we would use the command git merge newmodule to merge both the branches. Now, opening aboutme.txt , we see that the file is updated with the second line as well.

This would run pretty smooth but mostly we're going to run into Merge Conflicts even in the simplest cases. You can imagine how complex this can get while working in real-life projects. But whenever we run into a merge conflict, we can launch a mergetool which can help fixing a conflict in a far more easier way. Meld is a mergetool available on the Ubuntu software center. You can also install it using command line on Ubuntu, Windows and Mac.
Similar Reads
How to Setup Git Server on Ubuntu? Git is a popular version control system that is widely used for software development and other collaborative projects. Setting up a Git server on Ubuntu allows you to host Git repositories on your Git, which can be useful for collaborating with a team or hosting open-source projects that others can
6 min read
How to Install, Configure and Use GIT on Ubuntu? Git is a powerful version control system widely used for tracking changes in source code during software development. This article will walk you through the steps to install, configure, and use Git on an Ubuntu system. Table of Content Installing Git with Default PackagesInstalling/Downloading Git f
5 min read
How to Save Username And Password in Git? Managing credentials efficiently is important for seamless interaction with remote Git repositories. By default, Git prompts for a username and password each time you interact with a remote repository. To simplify this process, you can configure Git to save your credentials, allowing for a smoother
3 min read
How to Login to Git? Git is a popular version control system used by developers to manage code and collaborate on projects. To fully utilize Git’s features, you need to log in, which involves setting up authentication with a Git hosting service like GitHub, GitLab, or Bitbucket. In this article, we’ll guide you through
3 min read
What is GitHub and How to Use It? GitHub is a web-based platform that hosts Git repositories, providing developers with tools for version control and collaboration. Whether you are working on a small personal project or a large enterprise application, GitHub can streamline your workflow and enhance productivity.This article explains
12 min read