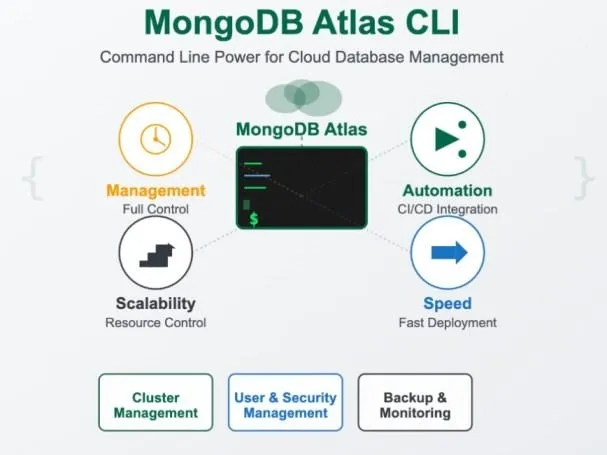
In the modern world of application development, where speed, automation, and scalability are essential, database management must keep up with the pace. MongoDB Atlas CLI is a powerful tool that brings the full capabilities of MongoDB’s cloud platform, Atlas, directly to the command line. It allows developers, DevOps engineers, and database administrators to create, configure, and monitor clusters, projects, and users without leaving the terminal.
Imagine you need to quickly spin up a new cluster for testing, create a database user with specific permissions, or check the status of your deployments without logging into the Atlas web console.
With the MongoDB Atlas CLI, all of these tasks can be completed in just a few commands. You can easily list available clusters, view connection strings, manage backups, and even automate resource provisioning as part of your deployment scripts. This level of control from the command line not only saves time but also enables seamless integration with CI/CD pipelines and other automation tools.
1. Installing and Setting Up MongoDB Atlas CLI
Getting started with MongoDB Atlas CLI is straightforward. The tool is available for major operating systems, including macOS, Windows, and Linux. You can install it using your preferred package manager or by downloading it directly from MongoDB’s official website.
For Example:
brew install mongodb-atlas-cli
choco install mongodb-atlas-cli
sudo apt install mongodb-atlas-cli
Once the installation is complete, you need to authenticate the CLI with your Atlas account.
This can be done using the command:
atlas login
Running this command opens a browser window where you can sign in with your MongoDB Atlas credentials and complete the setup steps shown in your terminal. Once authentication is successful, the CLI becomes fully operational and saves your session locally, enabling you to manage your projects and clusters directly from the command line.
2. Basic Commands and Use Cases
Once your MongoDB Atlas CLI is installed and authenticated, you can start managing your Atlas resources directly from the terminal. The CLI provides commands for working with organizations, projects, clusters, databases, and users, all through simple and consistent syntax.
If you ever want to check the latest available features or see a list of supported commands, run:
atlas --help
The example below shows what you will see after running the command:
CLI tool to manage MongoDB Atlas. The Atlas CLI is a command line interface built for MongoDB Atlas.
Use the --help flag with any command for more information.
Usage:
atlas [command]
Example:
atlas config --help Display help for the config command.
2.1 Available Commands:
| Command | Description |
|---|
| config | Configure and manage user profiles. |
| auth | Manage authentication state. |
| setup | Register, authenticate, and access clusters. |
| projects | Manage Atlas projects. |
| organizations | Manage Atlas organizations. |
| users | Manage Atlas users. |
| teams | Manage Atlas teams. |
| clusters | Manage project clusters. |
| dbusers | Manage database users. |
| customDbRoles | Manage custom database roles. |
| accessLists | Manage IP access lists. |
| alerts | Manage project alerts. |
| backups | Manage cloud backups. |
| events | Manage organization or project events. |
| metrics | Get MongoDB process metrics. |
| performanceAdvisor | Get suggestions for slow queries. |
| logs | Download host logs. |
| processes | Manage MongoDB processes. |
| privateEndpoints | Manage private endpoints. |
| networking | Configure network peering. |
| security | Manage project security settings. |
| integrations | Configure third-party integrations. |
| maintenanceWindows | Manage maintenance windows. |
| customDns | Manage AWS DNS configuration. |
| cloudProviders | Manage cloud provider access (IAM roles). |
| streams | Manage stream processing deployments. |
| liveMigrations | Manage live migrations to Atlas. |
| accessLogs | Return cluster access logs. |
| dataFederation | Manage data federation. |
| auditing | Manage auditing settings. |
| deployments | Manage cloud and local deployments. |
| federatedAuth | Manage federated authentication. |
| api | Access Atlas Administration API (Preview). |
| kubernetes | Manage Kubernetes resources. |
| plugin | Manage Atlas CLI plugins. |
| help | Show help for any command. |
| completion | Generate shell autocompletion script. |
3. Understanding the MongoDB Atlas Structure
Before you start managing your resources with the MongoDB Atlas CLI, it is important to understand how Atlas organizes its components. Each element in the hierarchy depends on the one above it, forming a clear structure that helps you manage resources efficiently.
At the top level is the organization, which represents your company or team and contains multiple projects. Each project groups related clusters, databases, and users, making it easier to manage different environments such as development, staging, and production. Inside a project, you can create one or more clusters, which host your MongoDB databases. Finally, each database can include collections, users, and backups, ensuring data protection and recovery options.
This hierarchy helps maintain logical separation and control, allowing you to scale and secure your environment effectively while using simple Atlas CLI commands to navigate between levels.

4. Creating an Organization, Project, and Free Cluster
Once you understand the MongoDB Atlas structure, you can start building your environment step by step using the CLI. The process usually begins with creating an organization, then a project within that organization, and finally a cluster where your data will be stored.
4.1 Creating an Organization
Before you can create projects or clusters, you need an organization in MongoDB Atlas. An organization serves as the top-level container for all your Atlas resources and users. To create your first organization, run the following command:
atlas organizations create "MyOrganization"
After creating it, you can display all organizations linked to your account to confirm that the new one has been added:
atlas organizations list
This command shows a table containing organization names, IDs, and creation details.
| ID | NAME |
|---|
| 68e971bc1afcd57c9ba2375c | MyOrganization |
The organization ID will be required in the next step.
Now, use the atlas config set command, which saves configuration settings in your Atlas CLI profile so that you don’t have to provide the same parameters every time you run commands. This allows you to set default values once, such as your organization ID (org_id) or project ID (project_id), and the Atlas CLI will automatically use them in subsequent commands.
It simplifies your workflow and shortens command syntax, especially when frequently creating resources within the same organization or project.
Run the following command, replacing the example ID with your organization’s identifier:
atlas config set org_id 68e971bc1afcd57c9ba2375c
You should see the following message:
Updated property 'org_id'
The Atlas CLI stores your organization ID in your local profile. From now on, you don’t need to include the ```--orgId``` option in future commands, as the tool will automatically use the saved value.
The Atlas CLI uses a configuration file named config.toml, which stores information such as organization and project IDs, output format, and authentication details. The file is created automatically the first time you run atlas config set or atlas auth login.
The file location depends on your operating system:
macOS: /Users/[username]/Library/Application Support/atlascli/config.toml
Linux: $XDG_CONFIG_HOME/atlascli/config.toml
If the environment variable XDG_CONFIG_HOME is not set, the file will be saved at:
$HOME/.config/atlascli/config.toml
Windows: %AppData%\atlascli\config.toml
To display the saved configuration settings, use the command:
atlas config list
This command shows all profiles available in your system. By default, the Atlas CLI uses the default profile.
Example output:
PROFILE NAME
default
To view detailed information about the active profile, run:
atlas config describe default
Example output:
| Key | Value |
|---|
| access_token | [redacted - source: secure storage] |
| auth_type | user_account |
| org_id | 68e971bc1afcd57c9ba2375c |
| output | plaintext |
| project_id | 68e97287deb6c050b886bb39 |
| refresh_token | [redacted - source: secure storage] |
| service | cloud |
Explanation of selected fields:
- access_token: temporary access token used for authentication (stored securely)
- auth_type: auth method (user_account indicates an Atlas user account)
- org_id: the identifier of the current organization
- project_id: the identifier of the default project
- output: the default output format (plaintext, json, yaml, or table)
- service: the service type (cloud for MongoDB Atlas)
These commands help verify that your Atlas CLI is properly configured and that the correct organization and project identifiers are stored.
4.2 Creating a Project
After setting up your organization, the next step is to create a project. A project helps you group related clusters, databases, and users under a single environment. You can create multiple projects to separate development, staging, and production environments. To create a new project within your organization, use the following command. The Organization ID is already configured in your Atlas CLI settings file, so you don’t need to specify it manually:
atlas projects create "MyProject"
Once the project is created, you can verify it by listing all projects in your account:
atlas projects list
The output will include project names, IDs, and their associated organizations.
| ID | NAME |
|---|
| 68e97287deb6c050b886bb39 | MyProject |
You will need the project ID in the next step.
Each project has its own unique identifier (Project ID). Just like the organization ID, it is recommended to save it in the CLI configuration so that you don’t have to specify it every time you run a command. Use the following command:
atlas config set project_id 68e97287deb6c050b886bb39
Replace the numeric value of ```project_id``` with your actual project identifier. After executing the command, you should see the message:
Updated property 'project_id'
The Atlas CLI will save the project identifier in the config.toml file and automatically use it for subsequent operations, such as creating clusters or managing users. To verify that everything has been configured correctly, you can display your profile settings again using:
atlas config describe default
Example output:
| Key | Value |
|---|
| org_id | 68e971bc1afcd57c9ba2375c |
| project_id | 68e97287deb6c050b886bb39 |
From now on, the Atlas CLI “knows” which organization and project to operate in.
In the next step, you will create your first MongoDB cluster within this project, which will serve as your test environment.
4.3 Creating a Free Cluster
Once your project is ready, you can create your first cluster. A cluster is the core of your MongoDB Atlas environment where your databases and collections are stored. For learning or testing purposes, you can start with a free-tier cluster, which provides a small but fully functional environment at no cost.
To create a free cluster, use the following command:
atlas clusters create MyCluster \
--provider AWS --region EU_WEST_1 \
--tier M0
This command creates a free-tier cluster (M0) named MyCluster within the project whose Project ID is already configured in the Atlas CLI settings file. The cluster will be deployed on Amazon Web Services (AWS) in the EU_WEST_1 region.
Keep in mind that the values for the ```--provider``` and ```--region``` flags are case sensitive, so make sure to use the correct lowercase format when specifying them.
MongoDB Atlas will automatically handle the provisioning, setup, and configuration of the cluster, making it ready for use within a few minutes.
You can also choose a different cloud provider if you prefer. Instead of AWS, you can use:
- --provider GCP to deploy the cluster on Google Cloud Platform
- --provider AZURE to deploy the cluster on Microsoft Azure
This flexibility allows you to select the cloud provider and region that best fit your infrastructure or compliance requirements.
To verify that your cluster was created successfully, list all clusters in your project with the following command:
atlas clusters list
This command displays a table containing all clusters associated with your project.
The output includes important details such as:
| ID | NAME | MDB VER | STATE |
|---|
| 68e975c713b7ce25ba891d88 | MyCluster | 8.0.14 | IDLE |
- ID: the unique ID of your cluster
- Name: the name of your cluster (for example, MyCluster)
- MongoDB version: current database version (8.0.14)
- State: the current status of the cluster, such as CREATING, IDLE, or RUNNING
5. Creating a Database User and Whitelisting Your IP
Before connecting to your cluster or loading any data, you need to create a database user and allow network access to your cluster. These two steps are required for authentication and security in MongoDB Atlas.
5.1 Creating a Database User
Use the following command to create your first database user. You will specify a username and role.
atlas dbusers create \
--username myUser \
--role readWriteAnyDatabase
You will now be prompted to set a password for your new user named myUser. Once entered, the user will be created.
To verify that the user was added successfully, list all users:
atlas dbusers list
USERNAME DATABASE
myUser admin
5.2 Allowing Access from Your IP Address
By default, MongoDB Atlas blocks all incoming connections for security reasons. You need to add your IP address to the access list to connect to your cluster.
To whitelist your current IP address, run:
atlas accessList create --currentIp
You can check your access list with:
atlas accessLists list
Your output should be similar to:
| CIDR BLOCK | AWS SECURITY GROUP |
|---|
| 86.69.216.246/32 | N/A |
Once the user and IP access are configured, your cluster is ready for connections from the MongoDB Shell (mongosh) or your application.
5.3 Loading a Sample Dataset
Once your free cluster is up and running, you can populate it with sample data to start exploring MongoDB features right away. MongoDB Atlas provides several ready-to-use datasets that help you experiment with queries, aggregations, and data modeling without the need to create your own data manually. To load a sample dataset into your cluster, use the following command:
atlas clusters sampleData load MyCluster
This command loads a predefined set of sample databases and collections into the specified cluster. The process might take a few minutes to complete, depending on your network connection and cluster performance.
Once the sample data is loaded, your cluster will contain several databases that cover different real-world domains. Each database includes one or more collections that you can explore to learn about MongoDB’s document structure, relationships, and query capabilities. Below is an overview of the sample datasets and their collections:
| Database | Collections |
|---|
| sample_airbnb | listingsAndReviews |
| sample_analytics | accounts, customers, transactions |
| sample_geospatial | shipwrecks |
| sample_guides | planets |
| sample_mflix | comments, embedded_movies, movies, theaters, users |
| sample_supplies | sales |
| sample_training | companies, grades, inspections, posts, routes, trips, zips |
| sample_weatherdata | data |
Each collection includes realistic JSON documents that are ideal for practicing queries, aggregations, and indexing techniques. For example, sample_mflix contains movie and user data suitable for testing relationships, while sample_airbnb includes listings that can be used for geospatial queries.
6. Connecting to Your Cluster with Mongosh
After loading the sample data, you can connect to your MongoDB Atlas cluster and start exploring the databases using the MongoDB Shell (mongosh). The Shell provides an interactive environment for running queries, managing collections, and testing aggregation pipelines directly from your terminal.
6.1 Getting the Connection String
To connect, you first need your cluster’s connection string. You can display it using the following command:
atlas clusters connectionStrings describe MyCluster
The output will include a standard SRV connection string, which looks similar to this:
STANDARD CONNECTION STRING
mongodb+srv://mycluster.xxx.mongodb.net
An SRV connection string is a DNS-based connection format used by MongoDB. It uses the mongodb+srv:// prefix and relies on DNS SRV and TXT records to automatically resolve hostnames and connection options like replica set members and TLS settings. It simplifies configuration by reducing the need to list all hosts manually.
To connect, you must include the username and password you created in the Creating a Database User section. The complete connection string should look like this:
mongodb+srv://myUser:[email protected]
Here:
- myUser is the username of the database user.
- MyStrongPassword123 is the password you set when creating the user.
6.2 Connecting with Mongosh
Now, you can connect to your cluster directly from the terminal:
mongosh\"mongodb+srv://myUser:MyStrongPassword123mycluster.xxx.mongodb.net"
After running this command, you will connect to your MongoDB Atlas cluster using the credentials you created earlier. Once connected, you can explore your data with commands such as:
C++
Atlas atlas-rqepyl-shard-0 [primary] test> show dbs
sample_airbnb        59.45 MiB
sample_analytics     12.93 MiB
sample_geospatial     2.08 MiB
sample_guides        72.00 KiB
sample_mflix        114.20 MiB
sample_restaurants   10.88 MiB
sample_supplies       2.02 MiB
sample_training      63.46 MiB
sample_weatherdata    4.26 MiB
admin               356.00 KiB
local                 2.81 GiB
Atlas atlas-rqepyl-shard-0 [primary] test>
You can also select a specific database immediately after connecting by using the use command—for example:
use sample_mflix
db.movies.findOne()
You will see output similar to the example below:
C++
Atlas atlas-rqepyl-shard-0 [primary] sample_mflix> db.movies.findOne()
{
  _id: ObjectId('573a1390f29313caabcd42e8'),
  plot: 'A group of bandits stage a brazen train hold-up, only to find a determined posse hot on their heels.',
  genres: [ 'Short', 'Western' ],
  runtime: 11,
  cast: [
    'A.C. Abadie',
    "Gilbert M. 'Broncho Billy' Anderson",
    'George Barnes',
    'Justus D. Barnes'
  ],
  title: 'The Great Train Robbery',
  fullplot: "Among the earliest existing films in American cinema - notable as the first film that presented a narrative story to tell - it depicts a group of cowboy outlaws who hold up a train and rob the passengers. They are then pursued by a Sheriff's posse.",
  languages: [ 'English' ],
  released: ISODate('1903-12-01T00:00:00.000Z'),
  directors: [ 'Edwin S. Porter' ],
  rated: 'TV-G',
  awards: { wins: 1, nominations: 0, text: '1 win.' },
  year: 1903,
  imdb: { rating: 7.4, votes: 9847, id: 439 },
  countries: [ 'USA' ],
  type: 'movie'
}
Atlas atlas-rqepyl-shard-0 [primary] sample_mflix>
If you want to learn more about the Atlas CLI, visit the official MongoDB documentation.
Explore
Introduction
Installation
Basics of MongoDB
MongoDB Methods
Comparison Operators
Logical Operators
Arithmetic Operators
Field Update Operators
Array Expression Operators
Array Update Operators