Online Group Chat application using PHP
Last Updated :
07 Aug, 2021
Prerequisites:
Technical knowledge:
- HTML
- CSS
- Javascript (basics)
- PHP (Database connectivity)
- SQL queries
Softwares to be installed:
- XAMPP server: This is a free software which contains web server Apache, Database management system for MySQL (or MariaDB). It can be downloaded for free from the official site.
- phpmyadmin: It is a free and open source software for administering MySQL and MariaDB. You can download it from the official site. The zip file downloaded must be pasted in the following location.
C:\xampp\htdocs</strong
- Unzipping the file anywhere else won't work well. Just unzip the contents there is enough.
- Text editor: Any text editor like Notepad++ or ordinary Notepad is enough to implement this.
- Browser: Any JavaScript enabled will be enough to run the code.
The Group Chat application: This is a simple group chat application to demonstrate the idea of the one you see in WhatsApp messenger with the localhost server. Multiple users can come and share their views here. The MySQL database stores the chats and retrieves it effectively. To implement this application successfully, we have to build the CSS and JavaScript for styling the UI, HTML part to render it, PHP code for storing and retrieving from the database. This application will contain two fields namely the username and the text message. The messages of the user who texts first will be aligned to the right side of the chatroom and messages of the others at the left side. Let us look at the implementation.
CSS: Place this under the style tag or in an external stylesheet file and link it. This CSS file comprises the styles for the chatroom, the text messages and the chat bubbles.
HTML
<style>
*{
    box-sizing:border-box;
}
body{
    background-color:#abd9e9;
    font-family:Arial;
}
#container{
    width:500px;
    height:700px;
    background:white;
    margin:0 auto;
    font-size:0;
    border-radius:5px;
    overflow:hidden;
}
main{
    width:500px;
    height:700px;
    display:inline-block;
    font-size:15px;
    vertical-align:top;
}
main header{
    height:100px;
    padding:30px 20px 30px 40px;
    background-color:#622569;
}
main header > *{
    display:inline-block;
    vertical-align:top;
}
main header img:first-child{
    width:24px;
    margin-top:8px;
}
main header img:last-child{
    width:24px;
    margin-top:8px;
}
main header div{
    margin-left:90px;
    margin-right:90px;
}
main header h2{
    font-size:25px;
    margin-top:5px;
    text-align:center;
    color:#FFFFFF;
}
main .inner_div{
    padding-left:0;
    margin:0;
    list-style-type:none;
    position:relative;
    overflow:auto;
    height:500px;
    background-image:url(
https://media.geeksforgeeks.org/wp-content/cdn-uploads/20200911064223/bg.jpg);
    background-position:center;
    background-repeat:no-repeat;
    background-size:cover;
    position: relative;
    border-top:2px solid #fff;
    border-bottom:2px solid #fff;

}
main .triangle{
    width: 0;
    height: 0;
    border-style: solid;
    border-width: 0 8px 8px 8px;
    border-color: transparent
    transparent #58b666 transparent;
    margin-left:20px;
    clear:both;
}
main .message{
    padding:10px;
    color:#000;
    margin-left:15px;
    background-color:#58b666;
    line-height:20px;
    max-width:90%;
    display:inline-block;
    text-align:left;
    border-radius:5px;
    clear:both;
}
main .triangle1{
    width: 0;
    height: 0;
    border-style: solid;
    border-width: 0 8px 8px 8px;
    border-color: transparent
   transparent #6fbced transparent;
    margin-right:20px;
    float:right;
    clear:both;
}
main .message1{
    padding:10px;
    color:#000;
    margin-right:15px;
    background-color:#6fbced;
    line-height:20px;
    max-width:90%;
    display:inline-block;
    text-align:left;
    border-radius:5px;
    float:right;
    clear:both;
}
main .triangle2{
    width: 0;
    height: 0;
    border-style: solid;
    border-width: 0 8px 8px 8px;
    border-color: transparent
    transparent #58b666 transparent;
    margin-left:20px;
    clear:both
}
main .message2{
    padding:10px;
    color:#000;
    margin-left:15px;
    background-color:#58b666;
    line-height:20px;
    max-width:90%;
    display:inline-block;
    text-align:left;
    border-radius:5px;
    clear:both
}
main footer{
    height:150px;
    padding:20px 30px 10px 20px;
    background-color:#622569;
}
main footer .input1{
    resize:none;
    border:100%;
    display:block;
    width:120%;
    height:55px;
    border-radius:3px;
    padding:20px;
    font-size:13px;
    margin-bottom:13px;
}
main footer textarea{
    resize:none;
    border:100%;
    display:block;
    width:140%;
    height:55px;
    border-radius:3px;
    padding:20px;
    font-size:13px;
    margin-bottom:13px;
    margin-left:20px;
}
main footer .input2{
    resize:none;
    border:100%;
    display:block;
    width:40%;
    height:55px;
    border-radius:3px;
    padding:20px;
    font-size:13px;
    margin-bottom:13px;
    margin-left:100px;
    color:white;
    text-align:center;
    background-color:black;
    border: 2px solid white;
}
}
main footer textarea::placeholder{
    color:#ddd;
}
</style>
Database Creation: Open the XAMPP control panel in your PC, Click start button for both Apache and MySQL. This step is very important to create a database and for running the application also. Open the browser (mostly Internet Explorer). On the search bar, type the line given below.
localhost/phpmyadmin
It will open up a tab where you can create a database. For this application, a database named chat_app is created. A table named chats with the fields "uname", "msg", "dt" is created. Here "uname" is of varchar type and denotes the user name, the "msg" is also of varchar type and denotes the message sent and the "dt" denotes datetime (set to varchar type for formatting purpose), object for storing the time at which the message was sent.
PHP code for storing in the MySQL database: To insert the chats every time a user presses the "send" button, write this code before the initial HTML tag. Attempt MySQL server connection. Assuming you are running MySQL server with default setting (user 'root' with no password).
PHP
<?php
    if (isset($_POST['submit'])){

    $link = mysqli_connect("localhost",
                "root", "", "chat_app");

    // Check connection
    if($link === false){
        die("ERROR: Could not connect. "
                . mysqli_connect_error());
    }

    // Escape user inputs for security
    $un= mysqli_real_escape_string(
            $link, $_REQUEST['uname']);
    $m = mysqli_real_escape_string(
            $link, $_REQUEST['msg']);

    date_default_timezone_set('Asia/Kolkata');
    $ts=date('y-m-d h:ia');

    // Attempt insert query execution
    $sql = "INSERT INTO chats (uname, msg, dt)
                VALUES ('$un', '$m', '$ts')";
    if(mysqli_query($link, $sql)){
        ;
    } else{
        echo "ERROR: Message not sent!!!";
    }

    // Close connection
    mysqli_close($link);
}
?>
PHP and HTML code for fetching and aligning messages in the chatroom: In this chat application, the very first user's chat is aligned to the right side. If the next message is also from the same user, it is also aligned to the right side of the chat room. If the message is from any other user, then that message will be aligned to the left side. The PHP function to achieve this is given below. Since the action to be carried out using PHP function is written on the same file, in the <form> tag, the action is set to the name of the same file. (Group_chat.php)
PHP
<body onload="show_func()">
<div id="container">
    <main>
        <header>
            <img src="https://s3-us-west-2.amazonaws.com/
             s.cdpn.io/1940306/ico_star.png" alt="">
            <div>
                <h2>GROUP CHAT</h2>
            </div>
            <img src="https://s3-us-west-2.amazonaws.com/
            s.cdpn.io/1940306/ico_star.png" alt="">
        </header>

<script>
function show_func(){

 var element = document.getElementById("chathist");
    element.scrollTop = element.scrollHeight;

 }
 </script>

<form id="myform" action="Group_chat.php" method="POST" >
<div class="inner_div" id="chathist">
<?php
$host = "localhost";
$user = "root";
$pass = "";
$db_name = "chat_app";
$con = new mysqli($host, $user, $pass, $db_name);

$query = "SELECT * FROM chats";
 $run = $con->query($query);
 $i=0;

 while($row = $run->fetch_array()) :
 if($i==0){
 $i=5;
 $first=$row;
 ?>
 <div id="triangle1" class="triangle1"></div>
 <div id="message1" class="message1">
 <span style="color:white;float:right;">
  <?php echo $row['msg']; ?>
 </span> <br/>
 <div>
  <span style="color:black;float:left;
   font-size:10px;clear:both;">
   <?php echo $row['uname']; ?>, <?php echo $row['dt']; ?>
 </span>
 </div>
</div>
<br/><br/>
 <?php
 }
else
{
if($row['uname']!=$first['uname'])
{
?>
 <div id="triangle" class="triangle"></div>
 <div id="message" class="message">
 <span style="color:white;float:left;">
 <?php echo $row['msg']; ?></span> <br/>
 <div>
  <span style="color:black;float:right;
          font-size:10px;clear:both;">
   <?php echo $row['uname']; ?>,
        <?php echo $row['dt']; ?>
 </span>
</div>
</div>
<br/><br/>
<?php
}
else
{
?>
 <div id="triangle1" class="triangle1"></div>
 <div id="message1" class="message1">
 <span style="color:white;float:right;">
 <?php echo $row['msg']; ?></span> <br/>
 <div>
  <span style="color:black;float:left;
          font-size:10px;clear:both;">
    <?php echo $row['uname']; ?>,
        <?php echo $row['dt']; ?>
  </span>
</div>
</div>
<br/><br/>
<?php
}
}
endwhile; ?>
</div>
    <footer>
        <table>
         <tr>
             <th>
              <input  class="input1" type="text" id="uname"
               name="uname" placeholder="From"></input>
              </th>
              <th>
              <textarea id="msg" name="msg" rows='3'
               cols='50' placeholder="Type your message">
             </textarea>
              </th>
              <th>
              <input class="input2" type="submit" id="submit"
              name="submit" value="send"></input>
              </th>
        </tr>
        </table>
    </footer>
</form>
</main>
</div>

</body>
Now the CSS, JavaScript, PHP and HTML part is put together and the whole code is given below. It is saved as Group_chat.php
PHP
<?php
if (isset($_POST['submit'])){
/* Attempt MySQL server connection. Assuming
you are running MySQL server with default
setting (user 'root' with no password) */
$link = mysqli_connect("localhost",
            "root", "", "chat_app");

// Check connection
if($link === false){
    die("ERROR: Could not connect. "
          . mysqli_connect_error());
}

// Escape user inputs for security
$un= mysqli_real_escape_string(
      $link, $_REQUEST['uname']);
$m = mysqli_real_escape_string(
      $link, $_REQUEST['msg']);
date_default_timezone_set('Asia/Kolkata');
$ts=date('y-m-d h:ia');

// Attempt insert query execution
$sql = "INSERT INTO chats (uname, msg, dt)
        VALUES ('$un', '$m', '$ts')";
if(mysqli_query($link, $sql)){
    ;
} else{
    echo "ERROR: Message not sent!!!";
}
 // Close connection
mysqli_close($link);
}
?>
<html>
<head>
<style>
*{
    box-sizing:border-box;
}
body{
    background-color:#abd9e9;
    font-family:Arial;
}
#container{
    width:500px;
    height:700px;
    background:white;
    margin:0 auto;
    font-size:0;
    border-radius:5px;
    overflow:hidden;
}
main{
    width:500px;
    height:700px;
    display:inline-block;
    font-size:15px;
    vertical-align:top;
}
main header{
    height:100px;
    padding:30px 20px 30px 40px;
    background-color:#622569;
}
main header > *{
    display:inline-block;
    vertical-align:top;
}
main header img:first-child{
    width:24px;
    margin-top:8px;
}
main header img:last-child{
    width:24px;
    margin-top:8px;
}
main header div{
    margin-left:90px;
    margin-right:90px;
}
main header h2{
    font-size:25px;
    margin-top:5px;
    text-align:center;
    color:#FFFFFF;
}
main .inner_div{
    padding-left:0;
    margin:0;
    list-style-type:none;
    position:relative;
    overflow:auto;
    height:500px;
    background-image:url(
https://media.geeksforgeeks.org/wp-content/cdn-uploads/20200911064223/bg.jpg);
    background-position:center;
    background-repeat:no-repeat;
    background-size:cover;
    position: relative;
    border-top:2px solid #fff;
    border-bottom:2px solid #fff;

}
main .triangle{
    width: 0;
    height: 0;
    border-style: solid;
    border-width: 0 8px 8px 8px;
    border-color: transparent transparent
      #58b666 transparent;
    margin-left:20px;
    clear:both;
}
main .message{
    padding:10px;
    color:#000;
    margin-left:15px;
    background-color:#58b666;
    line-height:20px;
    max-width:90%;
    display:inline-block;
    text-align:left;
    border-radius:5px;
    clear:both;
}
main .triangle1{
    width: 0;
    height: 0;
    border-style: solid;
    border-width: 0 8px 8px 8px;
    border-color: transparent
      transparent #6fbced transparent;
    margin-right:20px;
    float:right;
    clear:both;
}
main .message1{
    padding:10px;
    color:#000;
    margin-right:15px;
    background-color:#6fbced;
    line-height:20px;
    max-width:90%;
    display:inline-block;
    text-align:left;
    border-radius:5px;
    float:right;
    clear:both;
}

main footer{
    height:150px;
    padding:20px 30px 10px 20px;
    background-color:#622569;
}
main footer .input1{
    resize:none;
    border:100%;
    display:block;
    width:120%;
    height:55px;
    border-radius:3px;
    padding:20px;
    font-size:13px;
    margin-bottom:13px;
}
main footer textarea{
    resize:none;
    border:100%;
    display:block;
    width:140%;
    height:55px;
    border-radius:3px;
    padding:20px;
    font-size:13px;
    margin-bottom:13px;
    margin-left:20px;
}
main footer .input2{
    resize:none;
    border:100%;
    display:block;
    width:40%;
    height:55px;
    border-radius:3px;
    padding:20px;
    font-size:13px;
    margin-bottom:13px;
    margin-left:100px;
    color:white;
    text-align:center;
    background-color:black;
    border: 2px solid white;
}
}
main footer textarea::placeholder{
    color:#ddd;
}

</style>
<body onload="show_func()">
<div id="container">
    <main>
        <header>
            <img src="https://s3-us-west-2.amazonaws.com/
             s.cdpn.io/1940306/ico_star.png" alt="">
            <div>
                <h2>GROUP CHAT</h2>
            </div>
            <img src="https://s3-us-west-2.amazonaws.com/
            s.cdpn.io/1940306/ico_star.png" alt="">
        </header>

<script>
function show_func(){

 var element = document.getElementById("chathist");
    element.scrollTop = element.scrollHeight;

 }
 </script>

<form id="myform" action="Group_chat.php" method="POST" >
<div class="inner_div" id="chathist">
<?php
$host = "localhost";
$user = "root";
$pass = "";
$db_name = "chat_app";
$con = new mysqli($host, $user, $pass, $db_name);

$query = "SELECT * FROM chats";
 $run = $con->query($query);
 $i=0;

 while($row = $run->fetch_array()) :
 if($i==0){
 $i=5;
 $first=$row;
 ?>
 <div id="triangle1" class="triangle1"></div>
 <div id="message1" class="message1">
 <span style="color:white;float:right;">
 <?php echo $row['msg']; ?></span> <br/>
 <div>
   <span style="color:black;float:left;
   font-size:10px;clear:both;">
    <?php echo $row['uname']; ?>,
        <?php echo $row['dt']; ?>
   </span>
</div>
</div>
<br/><br/>
 <?php
 }
else
{
if($row['uname']!=$first['uname'])
{
?>
 <div id="triangle" class="triangle"></div>
 <div id="message" class="message">
 <span style="color:white;float:left;">
   <?php echo $row['msg']; ?>
 </span> <br/>
 <div>
  <span style="color:black;float:right;
          font-size:10px;clear:both;">
  <?php echo $row['uname']; ?>,
        <?php echo $row['dt']; ?>
 </span>
</div>
</div>
<br/><br/>
<?php
}
else
{
?>
 <div id="triangle1" class="triangle1"></div>
 <div id="message1" class="message1">
 <span style="color:white;float:right;">
  <?php echo $row['msg']; ?>
 </span> <br/>
 <div>
 <span style="color:black;float:left;
         font-size:10px;clear:both;">
 <?php echo $row['uname']; ?>,
      <?php echo $row['dt']; ?>
 </span>
</div>
</div>
<br/><br/>
<?php
}
}
endwhile;
?>
</div>
    <footer>
        <table>
        <tr>
           <th>
            <input  class="input1" type="text"
                    id="uname" name="uname"
                    placeholder="From">
           </th>
           <th>
            <textarea id="msg" name="msg"
                rows='3' cols='50'
                placeholder="Type your message">
            </textarea></th>
           <th>
            <input class="input2" type="submit"
            id="submit" name="submit" value="send">
           </th>
        </tr>
        </table>
    </footer>
</form>
</main>
</div>

</body>
</html>
Steps to run the code:
- Save the file above as Group_chat.php inside a new folder in C:\xampp\htdocs. For example, I have placed the file inside the folder named "myfiles" inside the htdocs folder.
- Before running the application create a database by following the steps given above. Name the database as chat_app. Name the table as chats.
- Check the XAMPP control panel to ensure whether the Apache and MySQL are in running state.
- Open the browser and type localhost/myfiles. The index of that directory will open. Click on the Group_chat.php.
- Start sending messages and see the result
Output:
 Empty chatroom
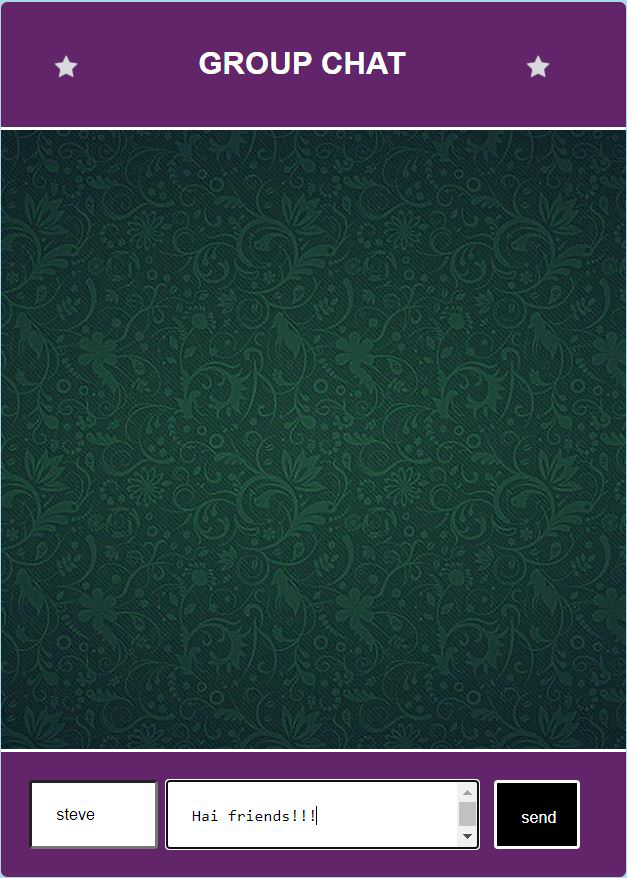 user-1: steve types the message and clicks send
 Message added to chat room
 another message from steve
 Ria types her second message
 message added to chatroom
Similar Reads
How to create admin login page using PHP?
In this article, we will see how we can create a login page for admin, connected with the database, or whose information to log in to the page is already stored in our database. Follow the steps to create an admin login page using PHP: Approach: Make sure you have XAMPP or WAMP installed on your w
4 min read
Signup form using PHP and MySQL Database
The task is to create and design a sign-up form in which if the user enters details, the HTML form data are inserted into our MySQL server database. Approach: First task is that we have to create our MySQL server Database and a Table according to our requirements. We connect our MySQL server Databas
4 min read
Online Group Chat application using PHP
Prerequisites:Â Technical knowledge: HTMLCSSJavascript (basics)PHP (Database connectivity)SQL queries Softwares to be installed: XAMPP server: This is a free software which contains web server Apache, Database management system for MySQL (or MariaDB). It can be downloaded for free from the official s
9 min read
How to Resize JPEG Image in PHP ?
Why do we need to resize images? In a website, often, we need to scale an image to fit a particular section. Sometimes, it becomes necessary to scale down any image of random size to fit a cover photo section or profile picture section. Also, we need to show a thumbnail of a bigger image. In those c
2 min read
How to make PDF file downloadable in HTML link using PHP ?
In web development, it is common to provide users with downloadable resources, such as PDF files. If you want to create a downloadable PDF link using HTML and PHP, this article will guide you through the process of making a PDF file downloadable when the user clicks on a link. ApproachCreate an HTML
3 min read
How to extract img src and alt from html using PHP?
Extraction of image attributes like 'src', 'alt', 'height', 'width' etc from a HTML page using PHP. This task can be done using the following steps. Loading HTML content in a variable(DOM variable). Selecting each image in that document. Selecting attribute and save it's content to a variable. Outpu
2 min read
Upload pdf file to MySQL database for multiple records using PHP
We will upload multiple records to the database and display all the records from the database on the same page. In this article, we will see how we can upload PDF files to a MySQL database using PHP. Approach: Make sure you have XAMPP or WAMP installed on your machine. In this tutorial, we will be
7 min read
Mailer multiple address in PHP
In this article, we will be demonstrating how we can send the mail to the multiple addresses from the database using the PHP. PHPMailer library is used to send any email safely from the unknown e-mail to any mail id using PHP code through XAMPP web-server for this project. Installation process for a
2 min read
Covid 19 Tracker Web App using PHP
In this article, we will see how to create a web application for tracking the Covid19 using PHP. Our Covid19 Tracker app will give the latest information for the States and Union Territories of India about the following things.Number of Active Cases of Covid19.Number of Confirmed Cases of Covid19.Nu
3 min read
How to automatically start a download in PHP ?
This post deals with creating a start downloading file using PHP. The idea is to make a download button which will redirect you to another page with the PHP script that will automatically start the download. Creating a download button: html <!DOCTYPE html> <html> <head> <meta na
2 min read