Learn how to set up a VPN on Linux, including the steps for installing a VPN client and establishing a VPN connection on Linux. Setting up and using a VPN on Linux provides enhanced online privacy, security, and access to geo-restricted content. A VPN configuration on Linux can help protect your data and ensure anonymous browsing.
Whether you're concerned about your data's privacy, need to bypass geo-restrictions, or want to securely access public Wi-Fi, this guide will walk you through how to set up and use a VPN on Linux with all four effective methods.
If you want to know more about the Virtual Private Network & its working process, check the article What is VPN & How It Works?
 How to Use VPN on Linux
Prerequisites
- Supported Linux distribution.
- Root access to your Linux machine command-line interface (CLI).
There are various ways to configure a VPN on Linux, ranging from using native network settings to utilizing command-line tools or third-party VPN apps. Below, we'll cover the most popular and reliable methods.
Method 1: Set Up VPN on Linux using OpenVPN (Command Line)
For advanced users, setting up a VPN using the OpenVPN command line is a powerful method. OpenVPN is one of the most secure and reliable VPN protocols.
Step 1: Install OpenVPN
Open the Linux terminal and type the following command to install OpenVPN. It will install the Service Provider on the device without configuration files.
sudo apt-get install openvpn

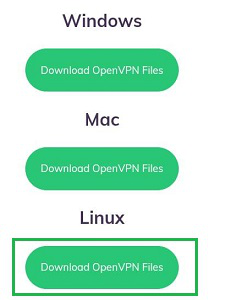
Step 2: Download VPN Configuration Files
Visit your VPN provider’s website and download the required configuration files. These are usually provided in a .ovpn format.
Step 3: Configure the VPN
Navigate to the directory where you downloaded the .ovpn file. Use the following command to connect to the VPN:
sudo openvpn --config [your-config-file.ovpn]
Enter your VPN credentials if prompted.
Note: Replace [your-config-file.ovpn] with the actual name of your configuration file.

Step 4: Connect to the VPN
Run the following command to enable the VPN service:
sudo openvpn

Your VPN should now be active. To verify the connection, check your IP address with:
curl ifconfig.me
Note: Once connected, you can verify your IP address by using a service like WhatIsMyIP to ensure your traffic is being routed through the VPN server.
Method 2: Set Up VPN on Linux using Network Manager (GUI)
The Network Manager is a common tool for managing network connections on Linux-based systems. It allows you to set up a VPN without using the terminal. This method is suitable for users who prefer a graphical user interface (GUI) for configuration.
Step 1: Add the Repository for Network Manager
On the Terminal, execute the following Linux Command to add the repository for the Network Manager.
sudo add-apt-repository universe

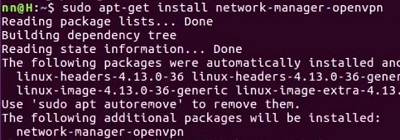
Step 2: Install Network Manager with OpenVPN Support
To use Network Manager for VPN setup, you may need to install additional plugins for your VPN protocol (e.g., OpenVPN, PPTP, or L2TP/IPsec).
For OpenVPN, Install the Network Manager plugin for OpenVPN using the command:
sudo add-get install network-manager-openvpn
For L2TP/IPsec, run:
sudo apt install network-manager-l2tp
Step 3: Restart the Network Manager
After installation, restart the Network Manager service to apply changes:
sudo service network-manager restart

Your Network Manager is now ready to configure and connect to a VPN.
Step 4: Add a VPN Connection
- In the Network Settings window, go to the VPN section and click Add.
- Select the type of VPN (e.g., OpenVPN, PPTP, etc.).
Step 5: Configure VPN
- Input the required information from your VPN provider (e.g., server address, username, password, security settings).
- Most VPN services provide these details in their setup guides.
Step 6: Connect to the VPN
- Once you’ve configured the VPN, click Save.
- To connect, simply click on the VPN connection in the Network Manager menu and click Connect.
Method 3: Set Up VPN on Linux using IKEv2/IPsec (Command Line)
If you're using the IKEv2/IPsec protocol, you can set it up using strongSwan, a powerful VPN solution for Linux.
Step 1: Install strongSwan
Install strongSwan, an open-source VPN solution that supports IKEv2/IPsec:
sudo apt update
sudo apt install strongswan
Step 2: Configure strongSwan
Edit the strongSwan configuration file to add your VPN credentials:
sudo nano /etc/ipsec.conf
Add the configuration details provided by your VPN provider (e.g., server address, authentication settings, etc.).
Step 3: Restart strongSwan
Restart the strongSwan service to apply the configuration:
sudo systemctl restart strongswan
Step 4: Verify Connection
To verify the VPN connection use the following command:
sudo ipsec status
Method 4: Set Up VPN on Linux using a Third-Party VPN Application (GUI)
For users who want the easiest method to use a VPN on Linux, many VPN providers offer dedicated VPN apps for Linux. These apps are easy to install and come with a user-friendly GUI for managing your connections.
Step 1: Download and Install the VPN App
Go to your VPN provider’s website and download their Linux client. Some popular options are ExpressVPN, NordVPN, and CyberGhost. Follow the installation instructions specific to your Linux distribution.
For example, to install ExpressVPN:
sudo apt install expressvpn
Step 2: Sign In and Configure
Open the VPN app and sign in with your account credentials. Choose your desired server location and connection settings.
Step 3: Connect to the VPN
Click Connect to initiate the VPN connection. Once connected, your traffic will be routed through the VPN server.
Troubleshooting VPN Connection Issues on Linux
Here are a few common VPN-related issues on Linux and how to resolve them:
1. VPN Connection Fails
- Ensure that your VPN configuration is correct, especially your credentials and server address.
- Check if your internet connection is working before connecting to the VPN.
2. Slow VPN Connection
- Try connecting to a server that’s geographically closer to you.
- Choose a different VPN protocol (e.g., switch from PPTP to OpenVPN for better speeds).
3. Cannot Access Websites after Connecting
- Check your DNS settings. Some VPNs require you to manually set DNS servers.
- Try changing your DNS to a public DNS service like Google DNS or Cloudflare DNS.
4. Unable to Connect to VPN via OpenVPN
- Ensure you’ve installed the correct OpenVPN configuration file.
- Verify that your firewall is not blocking the VPN connection.
Conclusion
Setting up a VPN on Linux is an excellent way to protect your privacy and securely access the internet. Whether you prefer the convenience of Network Manager, the flexibility of OpenVPN, or the simplicity of a third-party VPN app, Linux offers various methods for VPN configuration. By following this guide, you can ensure that your connection is secure, encrypted, and ready for browsing, streaming, and working remotely.
Remember, VPNs are an important tool for maintaining online security, privacy, and anonymity. Be sure to choose a reliable and secure VPN provider to maximize the benefits of using a VPN on Linux.
Explore
How To
MAC
AI Tools
Shortcut Key