How to Display the current Username in Linux | whoami Command
Last Updated :
26 Mar, 2025
Imagine you're working on your computer and forget who you're logged in as. In Linux, there's a special trick called "whoami" that's like asking "Hey computer, who am I right now?" This article explains how this simple command works and helps you remember who's in charge! Don't worry, it won't be full of confusing tech words. We'll keep it fun and easy to understand, just like talking to a friend.
Understanding the 'whoami' Command
The 'whoami' command is a simple yet powerful utility designed to reveal the current username associated with the active user session. When executed, it provides a swift response by outputting the username associated with the user who issued the command.
whoami command is used both in Unix Operating System and as well as in the Windows Operating System.
- It is basically the concatenation of the strings "who","am","i" as whoami.
- It displays the username of the current user when this command is invoked.
- It is similar as running the id command with the options -un.
The earliest versions were created in 2.9 BSD as a convenience form for who am i, the Berkeley Unix who command's way of printing just the logged in user's identity. Richard Mlynarik wrote the GNU version and is part of the GNU Core Utilities (coreutils).
Common Use Cases
- Checking if you're running as root or a normal user
- Verifying user identity after switching users (
su or sudo) - Debugging scripts or cron jobs running under different user accounts
Syntax of whoami Command in linux
The basic syntax of whoami command
whoami [OPTION]
How to Display the Current Username in Linux
Using the 'whoami' command is straightforward. Open a terminal and type the following:
whoami
Press 'Enter,' and the terminal will display the current username associated with the user account.

Options Available in Whoami Command
1. --help Option
It gives the help message and exit.
Syntax :
geekforgeeks@HP~: whoami --help
Example :

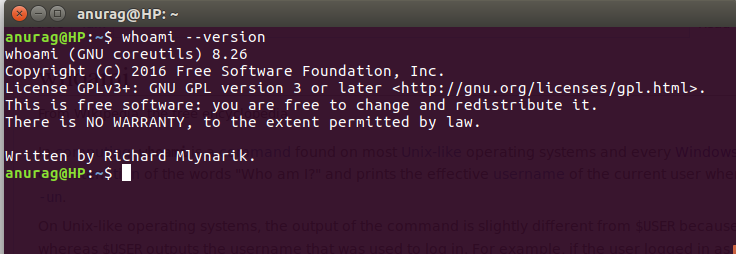
2. --version Option
It gives the version information and exit.
Syntax:
geekforgeeks@HP~: whoami --version
Example :
3. Display UID (User ID)
The whoami command does not show the numeric user ID (UID) so we use the id command which displays the UID (User ID) instead of the username.
id -u
id -u: Shows the current user's UID (e.g., 1000)
Real-World Application of whoami Command
The 'whoami' command finds its utility in various scenarios. It is particularly useful in scripting, where obtaining the current username dynamically can aid in automating tasks or customizing user-specific configurations.
For instance, consider a script that needs to perform different actions based on the user executing it. By incorporating the 'whoami' command, the script can adapt its behavior to the specific user, ensuring a personalized and secure execution.
Also Read:
Conclusion
In this article we discussed the 'whoami' command in Linux which acts like a digital name tag, telling you who you are on your computer. It's super easy to use—just type 'whoami' in the terminal, and voila, your username pops up. The article breaks down its simplicity, explores extra features like '-u' and '-e,' and shows how it's handy for scripting and personalized tasks. The FAQs at the end answer common questions, making 'whoami' your quick and friendly tool for figuring out your digital identity in the Linux world.
Similar Reads
wall command in Linux with Examples
wall command in Linux system is used to write a message to all users. This command displays a message, or the contents of a file, or otherwise its standard input, on the terminals of all currently logged in users. The lines which will be longer than 79 characters, wrapped by this command. Short line
3 min read
watch command in Linux with Examples
The 'watch' command in Linux is a powerful utility that allows you to execute a command periodically, displaying its output in fullscreen mode. It is particularly useful for monitoring the output of commands that change over time, such as system resource usage or server status. By default, 'watch' r
4 min read
wc command in Linux with examples
wc stands for word count. As the name implies, it is mainly used for counting purpose.It is used to find out number of lines, word count, byte and characters count in the files specified in the file arguments.By default it displays four-columnar output.First column shows number of lines present in a
6 min read
Wget Command in Linux/Unix
Wget is the non-interactive network downloader which is used to download files from the server even when the user has not logged on to the system and it can work in the background without hindering the current process. GNU wget is a free utility for non-interactive download of files from the Web. It
6 min read
whatis Command in Linux with Examples
whatis command in Linux is used to get a one-line manual page description. In Linux, each manual page has some sort of description within it. So, this command search for the manual pages names and show the manual page description of the specified filename or argument. Syntax of the `whatis` command
5 min read
How to Display Path of an Executable File in Linux | Which Command
In Linux finding the exact path of an excutable file can be crucial for the system adminstration, scripting and as well for troubleshooting. The `which` command helps with providing a simple and effective way to locate the executable files within the directories that are listed in your system. In th
6 min read
while Command in Linux with Example
The "while" command is a powerful tool in the Linux shell that allows you to execute a series of commands repeatedly based on a given condition. It is commonly used in shell scripts to create loops, where a block of code is executed as long as a particular condition remains true. Basic Syntax of Whi
6 min read
How to Display the current Username in Linux | whoami Command
Imagine you're working on your computer and forget who you're logged in as. In Linux, there's a special trick called "whoami" that's like asking "Hey computer, who am I right now?" This article explains how this simple command works and helps you remember who's in charge! Don't worry, it won't be fu
4 min read
write command in Linux with Examples
The `write` command in Linux facilitates the users in sending the messages directly to other logged-in users' terminals. For using this command, try on to type `write username` and then type your message. After typing your message, press `Ctrl+D` to end the session. This command is useful for quick
6 min read
xargs command in Linux with examples
xargs is a Unix command which can be used to build and execute commands from standard input. Importance:Some commands like grep can accept input as parameters, but some commands accept arguments, this is a place where xargs came into the picture. Syntax of `xargs` command in Linuxxargs [options] [co
5 min read